
Worx WG329E.9 Manual
PDF manual · 176 Pages
English



Quick check
Incorrect answer, please try again.
Chat with your Worx WG329E.9 manual using AI
Get instant AI answers from your Worx WG329E.9 manual
Ask anything about the Worx WG329E.9. Answers come from this manual, with the pages they are based on.
WG329E.9 Maintenance Schedule
Ensure chain can be pulled away from guide bar approx 3 mm and snaps back. Check around every 10 minutes during operation with new chain.
Check oil level window before starting and regularly during use. Ensure slight oil presence is visible on chain and bar.
Check for signs of damage, smooth handle action, adequate chain tension, and proper lubrication before and after every use.
Open chain access cover to remove trapped debris and clean ventilation slots with a dry brush.
Inject grease into lubrication hole until it appears at outside edge of chainwheel tip using a grease gun.
Replace chain when cutters are too worn to sharpen or if the chain breaks. Always include a new drive sprocket.
Ask a Question
Do you recommend WG329E.9?
Yes NoFrequently Asked Questions
It is intended for pruning branches and cutting small logs in wood only. The manual specifically warns not to use it for cutting metals or non-wood building materials. Stick to the wood use case and follow the size guidance for safer, better performance.
Is this answer helpful?
The saw uses a chain oil tank (30 ml) and an automatic oiler. The manual states it is shipped with an empty oil tank, so you must fill with chain bar oil before use. Check the oil level window regularly and refill if low. If the chain appears dry, ensure the oil hole in the bar is not blocked.
Is this answer helpful?
You should periodically check chain tension during use. The manual highlights re-checking around every 10 minutes when using a newly replaced chain. It also advises that you should be able to pull the chain about 3 mm away from the guide bar and have it snap back.
Is this answer helpful?
Yes. The tool includes two lock-out buttons to support upright cutting (down from the top) and inverted cutting (up from the bottom). Select the appropriate lock-out, then operate the trigger as described while maintaining secure footing.
Is this answer helpful?
Use both hands with correct grip, keep safety items in place, and never force the cut. Wear eye protection and hearing protection, and follow kickback guidance like avoiding contact with the guide bar nose and avoiding dull or loose chains. Always remove the battery before adjusting the chain or guide bar.
Is this answer helpful?
The manual points to common causes such as incorrect chain direction, incorrect chain tension, or a worn chain needing replacement. If the chain is installed backwards, it will not cut effectively. Confirm chain orientation, then verify tension and lubrication, and sharpen or replace the chain if needed.
Is this answer helpful?
Advantages and Disadvantages
Advantages

- Cordless pruning tool with 20V Max PowerShare platform for limb and small-log cutting.
- Automatic oiler with an oil level window helps keep the bar and chain lubricated during cutting.
- Supports both upright and inverted cutting orientations via lock-out buttons for more flexible pruning.
- Guided chain tensioning process; includes an easy-to-verify snap-back tension check.
- Jaw saw intended for wood (up to 100 mm), matching typical trimming and limbing needs.
Disadvantages

- Not intended for metals or non-wood materials; use is restricted to wood pruning tasks.
- Requires chain oil before use; shipped with empty oil tank and cannot be run dry.
- Safety requirements are strict: gloves, eye/hearing protection, and careful kickback handling are emphasized.
- If chain tension or lubrication is off, cutting performance may drop and the chain or motor may overheat.
- Tool-only configuration typically means you need a compatible battery and charger separately.
Product Specification
Type
Pruning Saw
Battery
20V, Li-Ion
Bar Length
5.91in
Chain Speed
8.20ft/s
Chain Oil Tank
1.01fl oz
Features
tool-free chain tensioning, automatic chain lubrication, claw stop
Vibration Level
5.60m/s²
Noise Level
82dB(A)
Weight
7.06lb
Scope of Delivery
without charger and battery
Product Description
Worx WG329E.9 20V PowerShare Cordless Limb Saw (tool only) Manual
A cordless jaw saw for cleaner pruning cuts
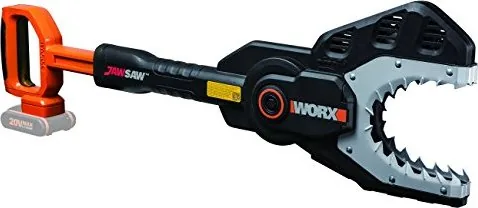
The Worx WG329E.9 20V PowerShare Cordless Limb Saw is designed for limb removal and trimming, helping you cut through branches and small logs with a controlled jaw-saw action. It is intended for wood only, including pruning work and cutting small logs up to 100 mm diameter, making it a practical choice for yard maintenance and storm cleanup.
With a 20V Max battery system, a 150 mm guide bar, 6.4 mm chain pitch, and a chain speed of 2.54 m/s, this cordless saw focuses on manageable power for typical pruning tasks. The tool uses an oil tank (30 ml) and an automatic oiler, so the cutting system stays lubricated during use.
Control and setup built into the tool
For safety and ease of operation, the saw includes a rear handle with a trigger switch plus lock-out buttons that support upright (cutting down from the top) and inverted (cutting up from the bottom) cutting positions. Before each job, you check the oil level window, verify chain tension, and ensure the chain stops when the trigger is released.
Chain tension is designed to be easy to adjust, and the instructions emphasize periodic re-checking, especially after fitting a new chain. Lubrication is critical: the manual notes the saw ships with an empty oil tank and should never be run without chain oil, as it can cause poor cutting performance, motor overload, and possible damage.
Key highlights (most important results)
- Designed for wood pruning and trimming, with intended capacity for branches and small logs up to 100 mm diameter.
- Includes automatic chain oiling with an oil level window, supporting consistent lubrication at low chain speeds.
- Tool-less in feel, but not tool-free: chain tensioning and guide bar or chain changes follow a guided, safety-first process.
- Supports two cutting orientations using lock-out buttons, improving flexibility for different limb positions.
Notes
- Wear eye protection and hearing protection, and follow chain lubrication, tensioning, and kickback safety guidance.
- Always remove the battery before adjustments or chain handling.
- Use the recommended bar and chain specifications and use fresh, approved chain oil to help protect the tool and warranty.
Search for 67,706 Manuals online


Type-in Brand or Model