
Oase BioMaster Thermo Manual
PDF manual · 188 Pages
English



Quick check
Incorrect answer, please try again.
Chat with your Oase BioMaster Thermo manual using AI
Get instant AI answers from your Oase BioMaster Thermo manual
Ask anything about the Oase BioMaster Thermo. Answers come from this manual, with the pages they are based on.
BioMaster Thermo Maintenance Schedule
Regularly check the water level and circulation in the filter and in the aquarium to ensure the pump does not run dry.
Rinse foam filters in warm water. Replace if worn. Frequency depends on tank size and fish load. Clean at different times to preserve bacteria.
Flush filter media with aquarium water. Replace if necessary. Rinse new media with warm tap water before first use.
Remove the impeller unit from the pump head, clean it, and reassemble. Replace if worn to maintain flow rate.
Clean the valve box only if venting does not work after cleaning the pre-filter foams. Remove seal and flaps to clean all parts.
Clean the suction chamber only if venting fails after cleaning foams and valve box. Caution: Strong spring can act as a projectile.
Ask a Question
Do you recommend BioMaster Thermo?
Yes NoFrequently Asked Questions
Press the suction button on the pre-filter repeatedly until water flows steadily out of the outlet pipe. Ensure all air bubbles have escaped before turning on the pump to prevent damage.
Is this answer helpful?
Yes, the BioMaster Thermo is suitable for both freshwater and saltwater aquariums, provided you rinse the components thoroughly after each use to prevent corrosion.
Is this answer helpful?
The largest model, the BioMaster Thermo 600, is recommended for aquariums up to 600 liters. Smaller models cover 250 and 350 liters respectively.
Is this answer helpful?
Clean the pre-filter foam every two to four weeks, or more frequently if your tank has a heavy bioload. Rinse in tank water to preserve beneficial bacteria.
Is this answer helpful?
No, the heater should only be operated when water is circulating. Always disconnect power immediately if the pump fails to prevent overheating and potential fire hazards.
Is this answer helpful?
Turn off the unit, let it cool, unscrew the holding ring counter-clockwise, and remove the old heater. Insert the new one moistened with water and screw the ring back clockwise.
Is this answer helpful?
Loud noises usually indicate trapped air. Move the filter side to side to release air pockets or check if the intake pipe is clogged with debris.
Is this answer helpful?
Advantages and Disadvantages
Advantages

- Integrated heater saves space and simplifies setup
- Multi-stage filtration with Hel-X bio-elements ensures excellent water quality
- Tool-free connection unit allows for quick hose installation and removal
- Adjustable flow rate lever provides precise control over water circulation
- Easy access to internal components facilitates efficient cleaning and maintenance
Disadvantages

- Heater must cool down before removal to prevent glass breakage
- Initial priming requires careful attention to avoid airlocks and noise
- Filter media replacement can be costly if using original OASE parts
- Unit height increases significantly when including the heater assembly
- Requires regular monitoring to ensure pump does not run dry
Product Specification
Type
Thermo-External Filter
Suitability
Freshwater, Seawater, Aquariums
Connections
Rotatable valves with quick-release coupling, 16mm hose connection (inner diameter)
Features
With suction aid, 4.92ft cable length, includes inlet/outlet set
Manufacturer Warranty
Three years (+1 year upon registration)
Product Description
Elevate Your Aquarium with the Oase BioMaster Thermo External Filter
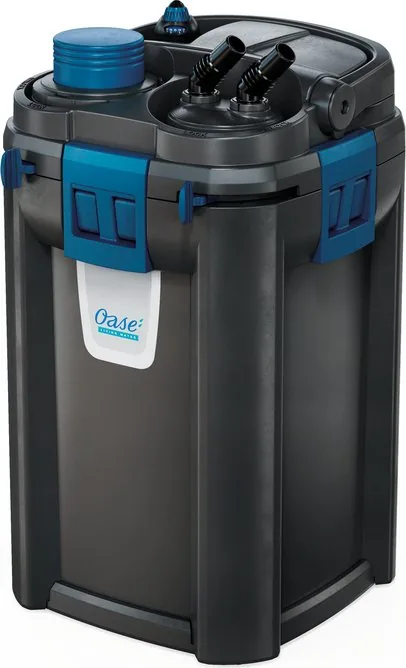
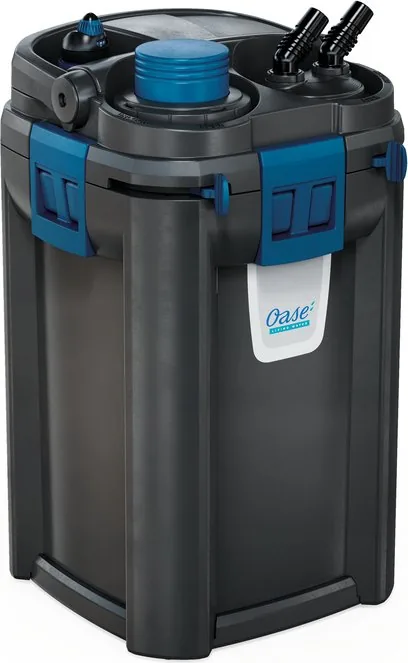
Maintaining a thriving aquatic environment requires reliable equipment that combines powerful filtration with precise temperature control. The Oase BioMaster Thermo Aquarium-Thermo-External Filter stands as a premier choice for aquarists seeking efficiency and stability in their tanks. This robust external filter is designed to handle aquariums ranging from 250 to 600 liters, offering versatile models tailored to specific volume needs.
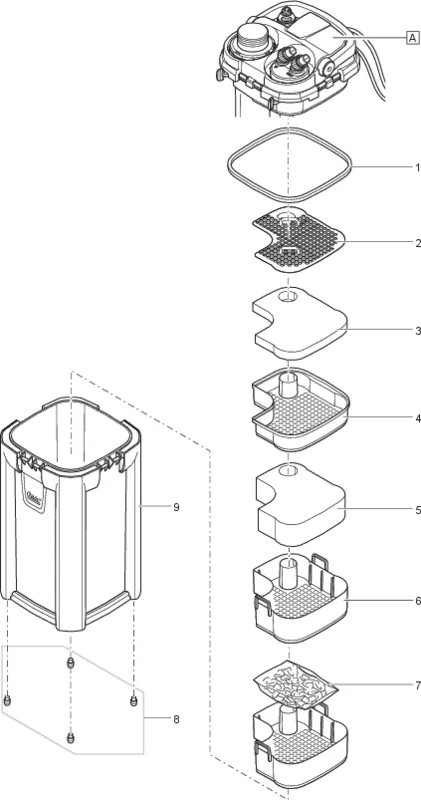
The BioMaster Thermo series goes beyond simple water circulation. It integrates a high-quality heating element directly into the filtration system, ensuring that your water remains at the ideal temperature while being thoroughly cleaned. Whether you are keeping freshwater or saltwater species, this unit adapts seamlessly. The filtration process begins as water is drawn into the unit head by a powerful pump. It first passes through a pre-filter equipped with foam sponges of varying densities to trap large debris. From there, the water flows upward through multiple baskets containing Hel-X bio-elements and additional filter media, promoting beneficial bacterial growth essential for biological filtration.
One of the standout features of the BioMaster Thermo is its user-friendly design. The connection unit allows for easy attachment of hoses without tools, and the lever system securely locks the components in place while preventing water leakage during maintenance. The unit head can be quickly removed for deep cleaning, allowing you to replace or rinse filter media efficiently. Safety is paramount; the device includes protections against dry running and overheating, ensuring long-term reliability.
Installation is straightforward. The filter sits outside the tank, either below or beside it, utilizing gravity and suction cups to position intake and output pipes correctly. Before starting, users must ensure the system is fully primed to remove air pockets, which could cause noise or damage. Once operational, the flow rate can be adjusted via a simple lever on the connection unit, giving you complete control over water movement.
Regular maintenance keeps the BioMaster performing at its peak. The pre-filter foam should be rinsed regularly, and the internal baskets should be cleaned based on tank bioload. Because the filter uses a multi-stage approach, you can stagger cleaning cycles to preserve the beneficial bacteria colony within the system. With its durable construction and intelligent engineering, the Oase BioMaster Thermo ensures your aquarium stays crystal clear and perfectly heated year-round.
Search for 67,706 Manuals online


Type-in Brand or Model