


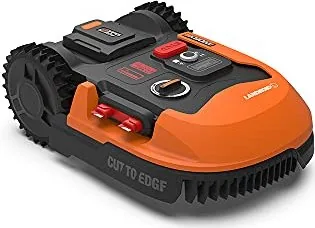
Worx Landroid Manual
PDF manual · 28 Pages
English



Quick check
Incorrect answer, please try again.
Chat with your Worx Landroid manual using AI
Get instant AI answers from your Worx Landroid manual
Ask anything about the Worx Landroid. Answers come from this manual, with the pages they are based on.
Landroid Maintenance Schedule
Check the Landroid once a week and replace any damaged or worn parts. Inspect blades and blade discs carefully.
Check if blades are chipped or damaged daily; they last up to 2 months with daily mowing. Replace if dull or worn.
Replace all blades at once, usually once per season, using new screws to ensure balance and safety.
Before winter storage, clean thoroughly, fully charge and remove the battery, then switch off the device.
Clean the plastic housing with a soft brush or cloth. Turn over to clean the underside with a soft brush or damp cloth, never using running water.
Clean contacts on the charging station and charging strips on the Landroid with a cloth to remove grass residue.
Free maintenance reminders
Timed to your purchase date. Always free, unsubscribe anytime.
Ask a Question
Do you recommend Landroid?
Yes NoFrequently Asked Questions
It follows a boundary wire laid around the mowing area. Sensors on the front help keep the robot inside the defined limits. If the signal direction or the wire connection is wrong, you may see reset or outside-area warnings.
Is this answer helpful?
The rain sensor detects wet conditions. The Landroid stops mowing, returns to the charging station, and waits for a programmable delay. After the delay (and once the sensors are dry), it resumes mowing automatically.
Is this answer helpful?
Yes. The Landroid can connect to your smartphone via the Landroid app. You can view status, check error messages, adjust schedules, and set weather-related start delay behavior. Setup guidance emphasizes using 2.4 GHz Wi-Fi and staying close during pairing.
Is this answer helpful?
When the battery is low, the robot stops cutting and returns to the dock. During the return trip, the blade system is disabled to conserve energy. Once charging is complete, it either resumes mowing by schedule or stays docked depending on your settings.
Is this answer helpful?
Keep blades sharp and replace all blades together when needed, using fresh screws. Clean the underside carefully (no high-pressure water), remove grass buildup, and wipe charging contacts and the charging strip so docking stays reliable.
Is this answer helpful?
These usually point to boundary wire signal issues. Check that the boundary wire is connected properly to the dock, verify there are no breaks near cable ends, and confirm polarity. For repeated errors at the same spot, re-check the installation route.
Is this answer helpful?
Advantages and Disadvantages
Advantages

- Automated mowing with scheduled operation and automatic return to the charging station when battery is low.
- Cut-to-edge style design helps trim close to borders, walls, and edges for a cleaner look.
- Rain sensor stops mowing and docks automatically, then resumes after a delay when conditions improve.
- Smartphone app support provides status, error messages, and flexible start/stop control.
Disadvantages

- Requires boundary wire installation and correct signal polarity; setup mistakes trigger “outside work area” or “cable missing” errors.
- Wet grass and uneven areas can reduce movement and cutting quality, increasing the chance of blockage messages.
- Obstacles or improper maintenance can lead to motor lock, blocked blades, or uneven mowing.
- App and updates depend on Wi-Fi and correct router settings (2.4 GHz) for stable connectivity.
Product Specification
Features
Alarm system, Timer, Theft protection optional
Smart Home
App control, Voice assistant optional
Charging system
automatic
Product Description
Worx 20V PowerShare Landroid: Easy, automated lawn mowing for modern gardens
The Worx 20V PowerShare Landroid is a boundary-wire robotic mower designed for private gardens that want consistent results with less effort. Built around a 20V lithium-ion power system and supported by app-based control, it mows regularly, returns to its charging station when the battery is low, and uses built-in logic to manage its route across your yard. If you are setting up or optimizing your routine, the Worx 20V PowerShare Landroid Manual guidance highlights the essentials for safe operation, boundary layout, and everyday maintenance.
A key feature is the mowing strategy: instead of creating obvious stripes, the robot chooses directions with a randomized approach to help keep the lawn evenly trimmed. It also includes a “Cut to Edge” style cutting concept, using a dedicated blade configuration to clean close to borders and reduce the need for manual trimming along walls and edges. With a cutting height range of 30-60 mm and a schedule you can adjust, the Landroid aims to match your lawn conditions and mowing preferences.
Control is flexible. You can start and stop from the unit, and you can also pair the mower with your smartphone over Wi-Fi for status checks, scheduling, and error visibility. The included app setup notes emphasize using a 2.4 GHz Wi-Fi connection, keeping the Landroid close during pairing, and ensuring firmware is current when updates are available. For weather resilience, a rain sensor detects wet conditions, pauses mowing, and sends the robot back to dock, then resumes after a programmable delay once things are dry.
Charging and operation are designed around efficiency. The Landroid stops the cutting deck when it is lifted for safety, and during the return trip to the dock it switches off the blades to conserve energy. When the season changes, the manual also covers winter storage steps such as cleaning, storing the battery properly, and protecting the underside from moisture.
Top takeaways
- Boundary-wire navigation keeps mowing inside your defined area and helps automate repeat work.
- App control and status/error visibility make schedules and troubleshooting easier.
- Rain sensor behavior reduces wet-grass issues and supports more consistent mowing.
- Maintenance guidance helps keep blades sharp, contacts clean, and performance steady.
Notes before setup
- Plan the boundary wire carefully, maintain safe spacing, and use a waterproof, reliable connection method.
- Avoid high-pressure washing and follow the manual's warnings when cleaning, repairing, or replacing blades.
Top pros results
- Automatic returns to charging and scheduled mowing for consistent weekly lawn care.
- Edge-focused cutting reduces manual trimming along borders and walls.
- Rain-sensor pause and delayed restart help prevent mowing in wet conditions.
- App support shows status, errors, and makes time scheduling straightforward.
Top cons results
- Boundary wire installation requires careful layout and correct polarity to avoid signal errors.
- Performance depends on cutting conditions like wet grass, obstacles, and blade sharpness.
- Wi-Fi pairing can be sensitive to router settings and distance.
- Large or complex lawns may need route tuning and potential expansion limits.
Search for 67,706 Manuals online


Type-in Brand or Model