
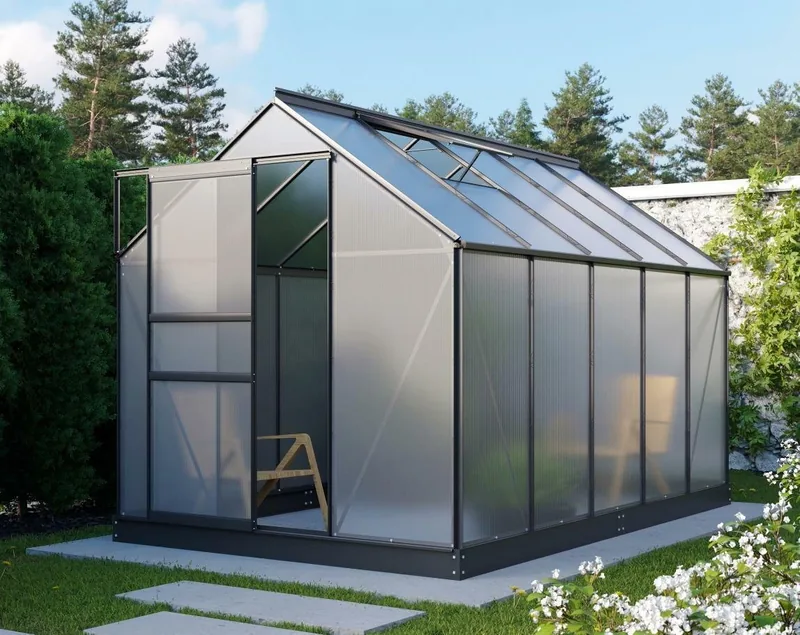


Vitavia Planet 6200 Manual
PDF manual · 52 Pages
English



Quick check
Incorrect answer, please try again.
Chat with your Vitavia Planet 6200 manual using AI
Get instant AI answers from your Vitavia Planet 6200 manual
Ask anything about the Vitavia Planet 6200. Answers come from this manual, with the pages they are based on.
Planet 6200 Maintenance Schedule
Thoroughly wash the greenhouse occasionally using a mild detergent that does not react aggressively with aluminium or glass fixing clips.
Ensure that the upper and lower door tracks are cleaned regularly to avoid a build up of debris.
Door tracks should be regularly cleaned and lubricated with paraffin wax or graphite.
Regularly remove leaves and dirt from the roof to prevent blockages and damage.
Continuously check that the anchoring into the ground is holding firmly.
In the event of high winds, close all doors and vents. Manually close automatic vent openers if strong wind is forecast.
In the event of heavy snowfall, clear the roof of the building or take suitable measures to support the roof.
Heat the building in winter to maintain structure integrity and plant conditions.
Ask a Question
Do you recommend Planet 6200?
Yes NoFrequently Asked Questions
Select a sunny location that is sheltered from the wind as much as possible. Place it on a flat surface below the frost level. Avoid exposed spots that receive strong gusts.
Is this answer helpful?
You will need normal and crosshead screwdrivers, a 10 mm socket spanner or wrench, a combination spanner, a knife, a measuring stick, a spirit level, and an accu-drill with adjustable torque settings.
Is this answer helpful?
Yes, polycarbonate sheets are compatible. However, you must follow the specific instructions included in the box with the polycarbonate sheets rather than the standard glass instructions.
Is this answer helpful?
Wash thoroughly with a gentle detergent occasionally. Ensure the detergent does not react aggressively with aluminium or fixing clips. Clean upper and lower door tracks regularly to avoid debris buildup.
Is this answer helpful?
Yes, the greenhouse must always be anchored. For very windy locations, drill through the base profile and steel base to connect them with nuts and bolts securely.
Is this answer helpful?
Close all doors and vents immediately. Do not leave automatic openers active. Clear snow loads quickly to prevent roof damage and consider supporting the roof in heavy snow conditions.
Is this answer helpful?
It is recommended to include the greenhouse in your house insurance policy for full protection against potential weather events like hailstorms or extreme wind damage.
Is this answer helpful?
Advantages and Disadvantages
Advantages

- Sturdy aluminium frame design allows for long term durability.
- Clear glass or polycarbonate options suit different plant needs.
- Roof vents provide necessary ventilation for healthy growth.
- Sliding doors save space and improve accessibility easily.
- Zinc coated steel base available for added wind resistance.
Disadvantages

- Assembly requires two people to ensure safety standards.
- Base foundation must be perfectly square and level.
- Maximum bolt torque is limited to 3Nm carefully.
- Sharp edges exist on aluminium profiles requiring caution.
- Harsh chemicals can damage aluminium or fixing clips.
Product Specification
Glazing
Polycarbonate 0.24 in (Multi-wall panel)
Frame
Aluminum
Color
Black
Area
53.82 sq ft
Features
2 Roof windows, gutter, lockable
Door
Sliding door
Dimensions (LxWxH)
76.77x127.17x81.50 in
Weight
114.20 lbs
Package Contents
Steel foundation
Product Description
Building Your Dream Garden Space
Welcome to the ultimate guide for expanding your gardening horizons with the stunning Vitavia Planet 6200 HKP 6mm Greenhouse Black. This structure is designed to provide an optimal environment for cultivating plants year-round while maintaining durability against the elements. Following the Vitavia Planet 6200 HKP 6mm Greenhouse Black Manual is crucial for a successful setup. The best location provides maximum sunlight yet remains sheltered from strong winds. Placing your greenhouse correctly is the first step toward longevity.
Assembly Essentials
Constructing this unit requires patience and precision. It is highly recommended that two people work together during the assembly phase to ensure safety and structural integrity. Before starting, verify that every single part listed in the packing slip is present. Lay out all components neatly to avoid mixing bundles. The frame relies on aluminium profiles which can have sharp edges, so wear protective gear like gloves and safety glasses. When tightening bolts, adhere strictly to the maximum torque of 3Nm to prevent damage to the threads or profile. Do not force components if fitting problems arise.
Structure and Glazing
The design allows for flexibility with glazing options. Polycarbonate sheets are also compatible if handled according to specific guidelines. Roof vents provide essential airflow, controlled manually using window openers installed in the ridge bar. Doors glide smoothly on runners, but care must be taken not to rest the door on the gliders when fully assembled. Foundation work is critical for stability. The base must be perfectly square and level. If using soil, ensure depth goes below the frost line to prevent shifting. A zinc-coated steel base accessory is available for added stability in windy areas.
Care and Safety
Regular maintenance keeps your greenhouse functioning perfectly throughout the changing seasons. Wash panels occasionally with gentle detergents avoiding aggressive chemicals that could harm aluminium or clips. Clean tracks regularly to prevent debris buildup which hinders sliding. During high winds, ensure all doors and vents are closed tightly. Remove heavy snow loads promptly to protect the roof structure from collapse. Always include the greenhouse in your home insurance policy for complete protection against weather events. Following these detailed Vitavia Planet 6200 HKP 6mm Greenhouse Black Manual steps ensures years of productive growing seasons for your beloved plants without compromising safety. Store the label on the door bar for future repair orders.
Notes: Ensure foundations are treated to resist rot. Apply silicone at joints if total sealing is desired. Keep identification stickers visible for future spare part orders. Do not heat if unnecessary.
Search for 67,706 Manuals online


Type-in Brand or Model