
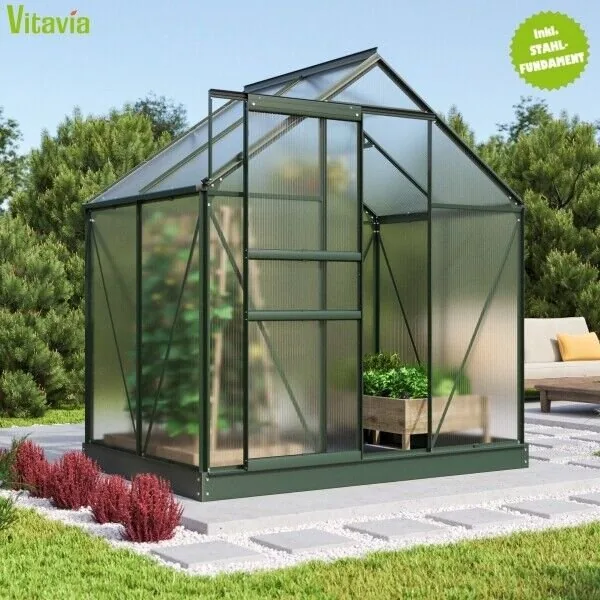
Vitavia Comet 2500 Manual
PDF manual · 44 Pages
English



Quick check
Incorrect answer, please try again.
Chat with your Vitavia Comet 2500 manual using AI
Get instant AI answers from your Vitavia Comet 2500 manual
Ask anything about the Vitavia Comet 2500. Answers come from this manual, with the pages they are based on.
Comet 2500 Maintenance Schedule
Thoroughly wash the greenhouse occasionally with a gentle detergent. Ensure the detergent does not react aggressively with aluminium or glass fixing clips.
Ensure that the upper and lower door tracks are cleaned regularly to avoid a build-up of debris.
Regularly remove leaves and dirt from the greenhouse roof to prevent accumulation.
Continuously check that the anchoring into the ground is firmly holding the structure.
In winter, regularly remove snow from the roof or provide sufficient support to hold the weight of heavy snowfall.
During winter, remove the automatic window opener and store it at temperatures above 0°C to prevent frost damage.
Ask a Question
Do you recommend Comet 2500?
Yes NoFrequently Asked Questions
You will need normal and crosshead screwdrivers, a 10 mm socket spanner or wrench, 10 mm combination spanner, a knife, measuring stick, spirit level, and an Accu-drill with adjustable torque.
Is this answer helpful?
It is strongly recommended that the greenhouse is assembled by two people to handle the aluminium profiles and glass safely and correctly.
Is this answer helpful?
If something is missing, please contact your retailer immediately. Do not proceed with assembly if components are incomplete, or the warranty may be void.
Is this answer helpful?
Wash thoroughly with gentle detergent occasionally. Check that the detergent does not react aggressively with aluminium or the glass fixing clips.
Is this answer helpful?
In the event of high wind conditions, close the door and all vents. The structure is tested up to 75 km/h but resistance drops significantly if open.
Is this answer helpful?
Yes, one side is UV-resistant, marked by a film and printing. This side must face outside and the film should be peeled off only after the pane is installed.
Is this answer helpful?
Yes, the base must be exactly square and level. A zinc-coated steel base is available as an accessory, or you can use treated wooden beams on stone/concrete.
Is this answer helpful?
Advantages and Disadvantages
Advantages

- Robust aluminium frame resists rust and corrosion effectively over time.
- Roof vent allows critical ventilation and temperature regulation for plants.
- 4mm polycarbonate offers better insulation than traditional glass materials.
- Sliding door mechanism provides easy access without taking up space.
- Comprehensive multi-language instructions available for assembly guidance.
Disadvantages

- Requires strict adherence to base leveling for proper structural fit.
- Maximum bolt torque of 3 Nm requires careful attention to avoid stripping.
- Protective film must be removed after installation to prevent sun damage.
- Anchoring to the ground is mandatory for safety in high winds.
- Drill bits not included despite needing holes for certain pane connections.
Product Specification
Glazing
Polycarbonate 0.16 in (Twin-wall sheets)
Frame
Aluminum
Color
green
Area
26.91 sq ft
Features
Roof window, Gutter, Lockable
Door
Sliding door
Dimensions (LxWxH)
76.77x51.57x77.56 in
Weight
50.04 lbs
Product Description
Welcome to Your New Growing Space
Starting a new greenhouse project is an exciting step for any gardener looking to extend their growing season. The primary resource for success with this unit is the Vitavia Comet 2500 HKP 4mm Greenhouse Emerald Manual. This comprehensive guide outlines every step required to transform a box of parts into a sturdy shelter for your plants. The frame is constructed from high-quality aluminium profiles that resist rust and corrosion over time.
Structural Integrity and Base Preparation
Before lifting a single profile, you must prepare the foundation. The text emphasizes that the base must be exactly square and level. Failure to do so can lead to alignment issues with the roof bars and door tracks later. A zinc-coated steel base is recommended for added stability, particularly if located in a very windy area. If constructing your own concrete or stone foundation, wood beams of at least 18 mm thickness should separate the metal frame from the ground to prevent moisture wicking. All foundations must extend below the frost line to remain solid throughout winter.
Assembly Process Overview
The construction begins with laying out all side elements loosely connected on the floor. The plain gable end and door gable end are assembled separately before connecting them together. Special attention is paid to the door runner bar, which determines the direction of the sliding door operation. Once the frame skeleton is bolted, position the structure on the foundation. Adjust until perfectly square before tightening all bolts securely but gently, adhering to the maximum torque of 3 Nm specified in the instructions.
Roof Vents and Glazing
Ventilation is critical for plant health. The roof vent assembly involves connecting side bars to the top bar and positioning the panel within the ridge bar. Ensure the window is square before final tightening. The glazing section uses 4mm polycarbonate panes which are cut slightly shorter to allow for thermal expansion. Remember that the UV-resistant side marked by the plastic film faces outward. Remove this film only once the pane is fixed in place to prevent degradation under direct sunlight.
Maintenance and Safety Tips
Regular cleaning with gentle detergent is sufficient; avoid aggressive solvents that react with aluminium or glazing clips. Keep upper and lower door tracks clear of debris. In high winds, always close the door and all vents to reduce strain. During heavy snowfall, clear the roof immediately or support it internally. Finally, stick the model label onto the door bar for future reference when ordering spare parts. With care, this greenhouse offers reliable protection.
Notes
Always wear protective glasses, gloves, and headgear when handling sharp edges. Do not use force if fitting is difficult; contact the retailer. The product is intended for growing plants only.
Search for 67,706 Manuals online


Type-in Brand or Model