
Manual.ly Logo

Vitavia Athena 7000 Manual

0.0 · 0 Ratings

PDF manual · 56 Pages

English

M: QW-35-FL
page

/ 56

Loading...
9de2b5480c9cdf600cc14f62897b00bb6a2c page 8
8 036.01.1409
7b. SIDE GLAZING
Press glazing seal (7382) into the top groove
in each (7381) and cut to t both ends.
If glazing with 4mm glass, press glazing seal
(6090) onto the aluminium proles (7b.2) and
cut to length. Note - On all horizontal glazing
guides it is recommended to use smaller
lengths of the seal (6090) in the middle of
each eld. This will allow condense water
which collects inside the house to escape.
Note - With Polycarbonate the glazing rubber
is not required.
Through the positioning of the (7050) bolt
head in the different guides in the glazing
capping‘s, it is possible to glaze the green-
house with 4mm,10mm or 16mm panes (7b.2).
Prepare bolts (7050) in each glazing capping
as shown (7b.3).
For 10mm glazing prepare 1 spacer (7407), in
the middle / top of each pane A (7b.4).
Position each glazing pane A into the frame
and connect the vertical capping‘s (7372),
(7373) or (7374) loosely with nuts (7053).
Lift pane A 15mm and connect capping‘s
(7381) loosely under the pane.
Note - The bolts (7050) used to hold the
diagonal braces in sections 1, 2 and 3 should
be replaced at this point (7b.8).
For 10mm glazing prepare 4 spacers (7409)
onto each (7321) and (7322) (2 spacers for
each pane E and F) (7b.5) (7b.6).
Position panes E and F.
Connect capping‘s (7377) or (7378) and then
(7375) / (7379) or (7376) / (7380) loosely.
Tighten all nuts. Please do not over tighten.
Note - The vertical capping‘s can be best as-
sembled when the bottom bolt is rst inserted
into the hole, then the middle and nally the
top bolt. Ensure that the capping remains in
contact with the sill bar.
8. FINAL STEPS
Insert eave plastic (7370) and (7371) into both
ends of the eave bar (7324 - 7327) (8.1).
Note - It can help to pull the eave bar at the
top edge, carefully away from the house so
that the opening for the plastic becomes lar-
ger.
Insert cropped head bolt (1412) into the bolt
channel at the bottom of corner bar (7310) and
connect parts (1405) and (1409) with alumini-
um nut (1002) on both sides (8.3). Fit elbow
(1402) onto the bottom of down pipe (1415)
(8.6) and then connect this to the eave plastic
(7370) or (7371) (8.11). Fit the down pipe
clamp (1403) around the down pipe and con-
nect to (1409) (8.4). Insert screw (1006) to x
the down pipe in place (8.5).
Slide the roof vent into the correct section from
one end of the house (8.7). Attach the roof
vent xer (7369) using the prepared holes and
self-drilling screw (7349) on both sides of the
roof vent (8.8) (8.9).
Assemble door track (7359) into the door ope-
ning. Connect to (7321), (7322) or (7324 -
7327) by inserting bolts (7052) into the bolt
channel on the outside of these bars and con-
nect with nuts (7053) (8.10).
Include at both ends of door track bar (7359)
bolt (7052) from outside and nut (3002) inside
the door guide to prevent the door from sliding
out of the track (8.10) (8.11).
Position the doors by inserting the plastic door
guides (2271) into the guide in door track bar
(7359) (8.12) (8.13a) and then lower the
wheels onto the door track on bar (7351)
(8.13b). Hook the door jump clips (7350) under
the lip on (7351) and tighten the lock nuts
(7360) (8.13b).
Connect plastic nut caps (6070) by pushing
them onto all visible nuts (7053) inside the
building (8.14).
Note - It is recommended to include a bead of
neutral silicone between the ridge bar and wall
from outside (8.9b). Neutral silicone is not
provided.
FINISHING
If desired, it is possible to further seal the
greenhouse at the edges using neutral silicone.
Silicone is not included for this purpose.
Place the warning label inside the house.
Please check the tightness of all nuts and
bolts 2 weeks after completing the assembly.
A full range of greenhouse accessories, to
help you make the most of this product, is
available from your stockist. Please inform
yourself as to the possibilities.
SAFETY NOTICE
In the event of high wind conditions, close the
doors and all vents.
In the event of heavy snowfall, clear the roof of
the building or take suitable measures to sup-
port the roof. Heat the building in winter.
COMMENTS
For the complete protection of your new
green house, we advise you to include it in
your house insurance. Please take note of
possible building rules relating to the positio-
ning of greenhouses.
Please stick the included greenhouse model
label onto door bar (7352) or (7353) after
success fully assembling this product. This
information is important in the event that re-
placement parts are later required.
Please keep these assembly instructions in a
safe place, for future reference!
Our policy is one of continuous improvement
and we reserve the right to change the speci-
cations without prior notice.

Chat with your Vitavia Athena 7000 manual using AI

Get instant AI answers from your Vitavia Athena 7000 manual

Ask anything about the Vitavia Athena 7000. Answers come from this manual, with the pages they are based on.

Athena 7000 Maintenance Schedule

Occasionally
Wash the greenhouse with gentle detergent

Thoroughly wash the greenhouse occasionally using a gentle detergent. Ensure the detergent does not react aggressively with aluminium or plastic.

Regularly
Clean the door tracks

Ensure that the door tracks are cleaned regularly to avoid a buildup of debris.

After assembly
Check tightness of nuts and bolts

Please check the tightness of all nuts and bolts 2 weeks after completing the assembly.

M: qwen/qwen3.8-flash

Ask a Question

0/1000

Do you recommend Athena 7000?

Yes No

Frequently Asked Questions

A

You will need screwdrivers, a rubber hammer, ladders, spanners, a craft knife, a measuring stick, a spirit level, and an accu-drill with adjustable torque.

Is this answer helpful?

A

Yes, the Vitavia Athena supports multiple glazing types including 4mm glass, 10mm polycarbonate, and 16mm polycarbonate depending on the model configuration.

Is this answer helpful?

A

No, the foundation is not included. You must construct a solid base using concrete, brickwork, or stonework yourself before assembly begins.

Is this answer helpful?

A

Condensation can be reduced by exchanging specific parts like (7424/7425) with (7423*) to increase internal ventilation, especially in polycarbonate models.

Is this answer helpful?

A

Yes, anchoring the greenhouse is mandatory for safety and stability, particularly against wind loads and to comply with insurance requirements.

Is this answer helpful?

M: QW-35-FL

Advantages and Disadvantages

Advantages

  • Durable aluminum frame construction ensures long-lasting performance
  • Versatile glazing options support both glass and polycarbonate panels
  • Sliding door design allows for convenient entry and exit
  • Roof vents provide excellent natural ventilation and temperature control
  • Detailed assembly instructions simplify the building process
VS

Disadvantages

  • Requires a perfectly level and square foundation for proper installation
  • Assembly typically requires two people for safety and efficiency
  • Neutral silicone for sealing is not included in the package
  • Condensation may occur with polycarbonate without specific venting adjustments
  • Foundation materials are not provided and must be sourced separately
M: QW-35-FL

Product Specification

Glazing

Polycarbonate 10mm (hollow chamber panels), safety glass 3mm (single layer)

Frame

Aluminum

Color

Silver

Area

74.2 sq ft

Features

1 roof window, rain gutter, lockable

Door

Double sliding door

Dimensions (LxWxH)

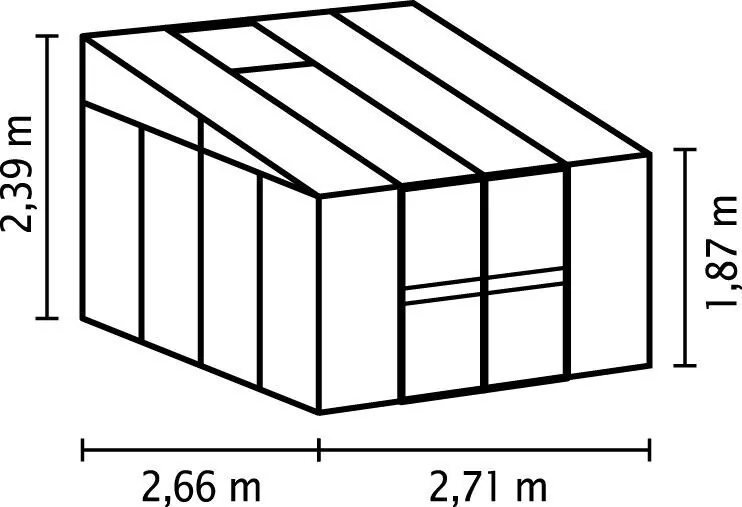
8.73x8.9x7.84 ft

M: QW-35-FL

Product Description

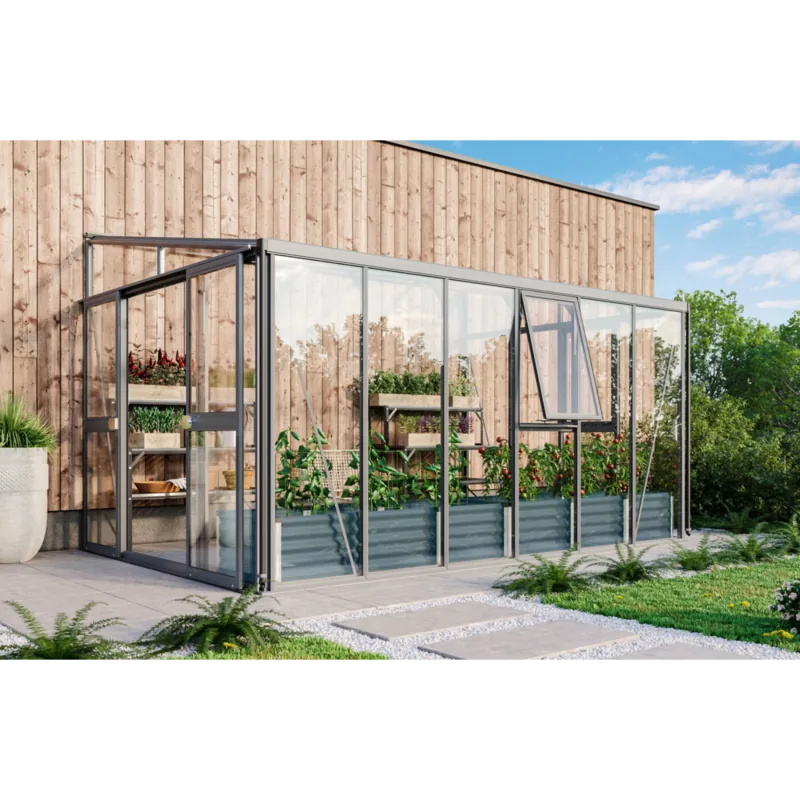
Vitavia Athena 7000 ESG/HKP Greenhouse alu Manual

The Vitavia Athena 7000 is a robust and elegant greenhouse designed for serious gardeners who demand durability and style. Constructed from high-quality aluminum, this structure offers exceptional strength while maintaining a sleek, modern aesthetic that complements any garden. The manual serves as your comprehensive guide to unlocking the full potential of this product, ensuring you can assemble it with confidence and precision.

Assembly begins with careful site selection. It is crucial to choose a location that receives ample sunlight while being sheltered from strong winds. A solid foundation made of concrete, brick, or stone is recommended to ensure stability and longevity. The foundation must be perfectly level and square before you begin placing the frame components. Safety is paramount during the build process; always wear protective gear such as gloves and glasses when handling aluminum profiles, glass, or polycarbonate sheets.

The Vitavia Athena features a sliding door system that provides easy access to your plants. The frame is assembled section by section, starting with the front elements and gable ends. The instructions detail how to connect side elements, install roof middle bars, and fit the roof vents for optimal climate control. Whether you choose to glaze the unit with 4mm glass or various thicknesses of polycarbonate, the flexible design accommodates both materials seamlessly. Proper sealing with neutral silicone is advised to ensure the greenhouse remains weather-tight.

Maintenance is straightforward but essential for keeping your greenhouse in top condition. Regular cleaning of the tracks and frames prevents debris buildup, which could hinder the smooth operation of doors and vents. Periodically check all nuts and bolts after two weeks of use to ensure they remain tight. By following these guidelines found in the Vitavia Athena 7000 ESG/HKP Greenhouse alu Manual, you will create a thriving environment for your plants for years to come.

M: QW-35-FL

© Copyright 2026 Manual.ly
