
Manual.ly Logo

Vitavia Athena 7000 Manual

0.0 · 0 Ratings

PDF manual · 56 Pages

English

M: QW-35-FL
page

/ 56

Loading...
9de2b5480c9cdf600cc14f62897b00bb6a2c page 6
6
1. PLEASE READ THESE INSTRUCTIONS CAREFULLY AND COMPLETELY BEFORE ASSEMBLING YOUR GREENHOUSE.
2. Sharp edges and corners can cause injury. Always wear protective glasses, gloves, shoes and headgear when handling the aluminium proles, glass
and polycarbonate sheets. Broken glass is a safety hazard – always clear up immediately and dispose of with care.
3. The product you have purchased is intended only for the growing of plants and should only be used for this purpose. When used for other purposes we
will take no responsibility.
4. It is recommended that this greenhouse is assembled by two people.
5. When using a step ladder one person should steady it at all times whilst the other works.
6. Should you encounter difculties constructing this house or in positioning the polycarbonate sheets, please contact your retailer
– do not use force!
7. The green house must always be anchored.
Assembly Instructions
Safety Warning
EN
036.01.1409
SITE SELECTION
Always try to select a sunny location, sheltered
from the wind as much as possible.
IMPORTANT
Before assembling your new greenhouse,
please check that all parts in the provided list
are included. Please take each bundle out of
the packaging in order to identify the parts
better.
It is important that the opened bundles do not
get mixed with one another.
If something is missing please contact your
retailer.
Note - The UV-resistant side of the polycar-
bonate panes is indicated by a plastic folio
or printing at the edge. This side must face
outside.
In order to seal the greenhouse effectively it is
suggested that you apply neutral silicone as
shown in diagrams (4b.3), (4b.4), (7a.7) and
(7a.9). Silicone is provided for this purpose.
NECESSARY TOOLS
Screw drivers (Normal and Crosshead PH2)
Rubber Hammer
2 x 1.8m ladder
10 mm socket spanner or wrench
10 mm combination spanner
Craft knife
Measuring stick
Spirit level
Accu-drill with adjustable torque
MAINTENANCE
The greenhouse should be thoroughly washed
with a gentle detergent occasionally. Please
check that the detergent used does not react
aggressively with aluminium or plastic.
Ensure that the door tracks are cleaned regu-
larly to avoid a buildup of debris.
0. FOUNDATION
Important! The foundation must be exactly
right angular and level. To achieve this you will
require a spirit level and a right angle.
Note - If the distance between the two opposi-
te corners is the same then the foundation is
right angular.
For the erection of this greenhouse we
suggest a solid foundation constructed from
concrete, brickwork or stonework.
If you have no experience with the construc-
tion of such a foundation please consult a
company specialising in this work.
Materials and tools for the preparation of the
suggested foundation are not provided.
The suggested foundation allows the door to
be assembled on any side of the greenhouse.
Foundations must extend down below the frost
level.
Diagrams in a single frame show the view
from inside the greenhouse. Those enclo-
sed in a double frame show the view from
outside the greenhouse.
1. FRONT ELEMENTS
Note - If the door will be assembled in the
front of the house remove one of the middle
bars (7311).
Push seal (7396) into the sill bar (7304 - 7307)
and cut to t both ends (1.1) (1.2).
Lay all of the parts, according to the model, on
the oor and loosely connect by inserting bolts
(7052) into the bolt channels.
Take care that the eave angles (7314 - 7317)
are pushed into the corner of both corner bars
(7310) (1.3) (1.4) and that corner bars (7310)
and middle bars (7311) sit correctly on the
assembly edge on the eave angle (1.9) (1.12).
Assemble diagonal bars (7312) on both sides
(1.3) (1.4) (1.10) (1.11). At the sill loosely at-
tach using bolt (7050). (7050) will be removed
during glazing (section 7b).
2. PLAIN GABLE END
Note - If the door will be assembled on this
side of the house remove middle bar (7311).
Push seal (7396) into sill bar (7301) and wall
bar (7344) and cut to t the ends (2.1) - (2.4).
Lay all of the parts on the oor and loosely
connect by inserting bolts (7052) into the bolt
channels.
Assemble end bar (7321) into the recess in
wall bar (7344) (2.5) (2.6) and then (7344)
onto sill bar (7301) (2.7) (2.8).
Assemble middle bars (7311) (2.9) (2.10),
noting the assembly edge on the eave angle
(1.9).
Assemble diagonal bar (7313) (2.5) (2.11)
(2.12). At the sill loosely attach using bolt
(7050). (7050) will be removed during glazing
(section 7b).
3. DOOR GABLE END
Note - If the door is to be assembled on ano-
ther side then assemble the (7311), which
was previously removed, in position b.
Assemble all parts as in Section 2.
4a. CONNECTING THE SIDE ELEMENTS
(4a.1) shows the 4a assembly if the door is to
be in the front of the house.
Push seal (7396) into the ridge bar (7334 -
7337) and cut to t the ends. Check that seal
(7414 - 7417) is correctly inserted into the
guide in the ridge bar. (4a.2) (4a.3).
Loosely prepare bolts (7052) and nuts (7053)

Chat with your Vitavia Athena 7000 manual using AI

Get instant AI answers from your Vitavia Athena 7000 manual

Ask anything about the Vitavia Athena 7000. Answers come from this manual, with the pages they are based on.

Athena 7000 Maintenance Schedule

Occasionally
Wash the greenhouse with gentle detergent

Thoroughly wash the greenhouse occasionally using a gentle detergent. Ensure the detergent does not react aggressively with aluminium or plastic.

Regularly
Clean the door tracks

Ensure that the door tracks are cleaned regularly to avoid a buildup of debris.

After assembly
Check tightness of nuts and bolts

Please check the tightness of all nuts and bolts 2 weeks after completing the assembly.

M: qwen/qwen3.8-flash

Ask a Question

0/1000

Do you recommend Athena 7000?

Yes No

Frequently Asked Questions

A

You will need screwdrivers, a rubber hammer, ladders, spanners, a craft knife, a measuring stick, a spirit level, and an accu-drill with adjustable torque.

Is this answer helpful?

A

Yes, the Vitavia Athena supports multiple glazing types including 4mm glass, 10mm polycarbonate, and 16mm polycarbonate depending on the model configuration.

Is this answer helpful?

A

No, the foundation is not included. You must construct a solid base using concrete, brickwork, or stonework yourself before assembly begins.

Is this answer helpful?

A

Condensation can be reduced by exchanging specific parts like (7424/7425) with (7423*) to increase internal ventilation, especially in polycarbonate models.

Is this answer helpful?

A

Yes, anchoring the greenhouse is mandatory for safety and stability, particularly against wind loads and to comply with insurance requirements.

Is this answer helpful?

M: QW-35-FL

Advantages and Disadvantages

Advantages

  • Durable aluminum frame construction ensures long-lasting performance
  • Versatile glazing options support both glass and polycarbonate panels
  • Sliding door design allows for convenient entry and exit
  • Roof vents provide excellent natural ventilation and temperature control
  • Detailed assembly instructions simplify the building process
VS

Disadvantages

  • Requires a perfectly level and square foundation for proper installation
  • Assembly typically requires two people for safety and efficiency
  • Neutral silicone for sealing is not included in the package
  • Condensation may occur with polycarbonate without specific venting adjustments
  • Foundation materials are not provided and must be sourced separately
M: QW-35-FL

Product Specification

Glazing

Polycarbonate 10mm (hollow chamber panels), safety glass 3mm (single layer)

Frame

Aluminum

Color

Silver

Area

74.2 sq ft

Features

1 roof window, rain gutter, lockable

Door

Double sliding door

Dimensions (LxWxH)

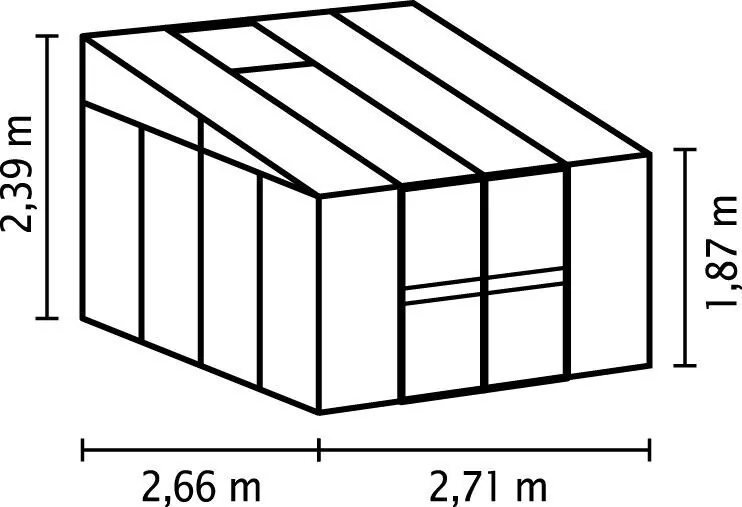
8.73x8.9x7.84 ft

M: QW-35-FL

Product Description

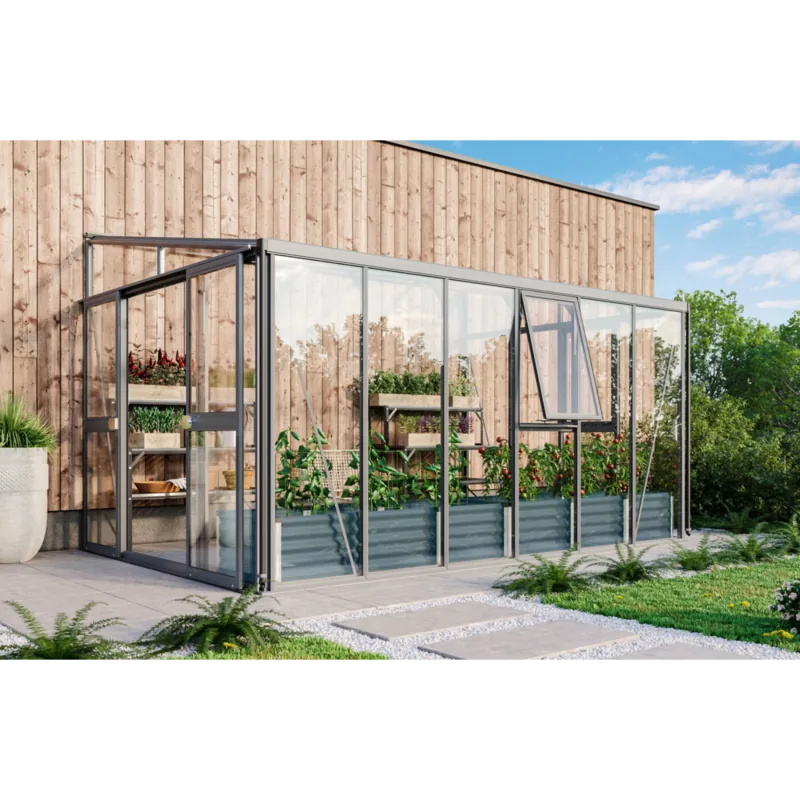
Vitavia Athena 7000 ESG/HKP Greenhouse alu Manual

The Vitavia Athena 7000 is a robust and elegant greenhouse designed for serious gardeners who demand durability and style. Constructed from high-quality aluminum, this structure offers exceptional strength while maintaining a sleek, modern aesthetic that complements any garden. The manual serves as your comprehensive guide to unlocking the full potential of this product, ensuring you can assemble it with confidence and precision.

Assembly begins with careful site selection. It is crucial to choose a location that receives ample sunlight while being sheltered from strong winds. A solid foundation made of concrete, brick, or stone is recommended to ensure stability and longevity. The foundation must be perfectly level and square before you begin placing the frame components. Safety is paramount during the build process; always wear protective gear such as gloves and glasses when handling aluminum profiles, glass, or polycarbonate sheets.

The Vitavia Athena features a sliding door system that provides easy access to your plants. The frame is assembled section by section, starting with the front elements and gable ends. The instructions detail how to connect side elements, install roof middle bars, and fit the roof vents for optimal climate control. Whether you choose to glaze the unit with 4mm glass or various thicknesses of polycarbonate, the flexible design accommodates both materials seamlessly. Proper sealing with neutral silicone is advised to ensure the greenhouse remains weather-tight.

Maintenance is straightforward but essential for keeping your greenhouse in top condition. Regular cleaning of the tracks and frames prevents debris buildup, which could hinder the smooth operation of doors and vents. Periodically check all nuts and bolts after two weeks of use to ensure they remain tight. By following these guidelines found in the Vitavia Athena 7000 ESG/HKP Greenhouse alu Manual, you will create a thriving environment for your plants for years to come.

M: QW-35-FL

© Copyright 2026 Manual.ly
