Y
™
700 Gen 2 MAX headset will enter Bluetooth
®
pairing mode once power
Bluetooth
®
connection is made in two minutes, Bluetooth
®
pairing mode will stop. T
headset into Bluetooth
®
pairing mode, follow these st
Une fois allumé, votr
™
700 Gen 2 MAX entrera en mode Appariage Bluet
®
.
Si aucune connexion Bluetooth
®
n'est effectuée dans les deux minutes, l
Bluetooth
®
sera désactivé. Pour activer l
®
sur votre c
suivez ces instructions:
FUNCTION
FONCTION
BLUETOOTH
®
BUTTON ACTION
ACTION DU BOUTON BL
®
Play/Pause
Lancer/Pause
Skip Forwar
Passer
Fast F
Accélér
Skip Back
Retour en arrièr
Press Onc
Appuyer une fois
Press T
Appuyer deux fois rapidement
Press T
Appuyer deux fois rapidement et maintenir
Press Thr
Appuyer trois f
Press Thr
Appuyer trois f
Press Onc
Appuyer une fois
Press Onc
Appuyer une fois
Press and Hol
Appuyer et maintenir
Rewind
Rembobiner
Answer Call
Répondr
End Call
Mettre fin à un appel
Press and Hol
Appuyer et maintenir
Reject Inc
Rejeter un appel
Activate V
Activer la rec
(si disponible)
BL
®
SETUP | CONFIGURAN BLUET
®
READ BEFORE USING
IMPORTANT
IMPORTANT
LIRE AVANT UTILISATION
tur tlebeac h.co m/ suppo r
Model: Stealt h
™
700P Gen 2 MAX
Any questions? Des questions ?
1
2
3
4
The MODE Button and Mappable Wheel can be assigned to
a new function based on your gaming style. To change the
button’s assignment, follow these steps:
Le bouton de MODE et la molette assignable peuvent être
assignés à une nouvelle fonction selon votre style de jeu.
Pour changer la fonction du bouton, suivez ces étapes:
Download the TiOS
or Android de
Téléchargez l'application mobile Turtle Beach Audio Hub sur
votre appareil iOS ou Android.
Enable Bluetooth
®
on your selected devic
Bluetooth
®
pairing method to acces
Activez le Bluetooth
®
sur l'appareil sél
de l'appariage Bluetooth
®
pour vous r
After pairing, open the app and swipe to the second settings
screen to as
Une fois l'appariage effectué, ouvr
glisser jusqu'au deuxième écran des options pour assigner de
nouvelles fonctions.
Once selected, y
Une fois la configuration sélectionnée, votre casque la
sauvegardera.
Headset Storage
Always charge your headset before storing it for any extended period of time
(longer than 3 months). Never store the unit in temperatures above 113°F/45°C.
Rangement du casque:
Chargez toujours votre casque avant de le ranger pour une durée prolongée
(plus de 3mois). Ne stockez jamais le casque à des températures supérieures à 45°C.
The Stealth
™
700 Gen 2 MAX gives you 40 hours of r
battery life. Mak
Le Stealth
™
40heur
d'autonomie de batterie r
rechar
A
A
Stealth
™
700 Gen 2 MAX Headset
Casque Stealth
™
700 Gen 2 MAX
Connect to the T for Windowor Mac
®
to update firmwar
T mobile app for Andr and iOS.
Connectez-vous au T pour
Windows ou Mac
®
afin de mettr
Personnalisez v
T pour Andr et iOS.
tur tlebeach.cm /audiohub
B
Microphone Mute
Flip up mic to mute. There
is an audible tone when the
mic is muted or unmuted.
Microphone muet
Rele
pour le désactiverVous
entendrez un son l
le microphone es
désactivé ou activé.
Le mode Superhuman Hearing
™
permet d'entendre l
comme les pas d'un adver
rechar
Pendant le jeu, vous pouvez activ
désactiver Superhuman Hearing
™
en
appuyant une fois sur le bouton
MODE rapidement.
Use Superhuman Hearing
™
Mode to
pinpoint quiet audio cues like enemy
footsteps and weapon r
During gameplay
deactivate Superhuman Hearing
™
by
pressing the MODE button oncy.
Mic Unmuted
Mic Muted Mic Muted
MODE Button
Superhuman Hearing
™
by default.
Refer to mappabl
Bouton de MODE
Superhuman Hearing
™
par dé
Indique les boutons assignables.
Bluetooth
®
Multi-Function Button
See Bluetooth
®
Pairing setup
Bouton multifonction Bluetooth
®
Voir la configuration Appariage
Bluetooth
®
USB Charge Update Port
Port USB pour le
chargement et la
mise à jour
LED Indication
Refer to LED Behavior
Indications du voyant
Se référer à la page
État des voyants
Power Button
Press (2s) = P
Bouton d'alimentation
Appuyer (2s) pour allumer/éteindr
Master Ve Dial
Molette de volume
principal
426-233-005-005 RC
Signature Sound | Son emblematique
Bass Boost | Amplific
Bass + Tt | Amplification des basses et des aigus
Voct | Amplification vocal
EQ PRESETS |
MAPPABLE BUTTONS
BOUTONS
ASSIGNABLES
HEADSET CONTROLS
COMMANDES
SUR
CASQUE
CHARGING
CHARGEMENT
CONTENTS
CONTENU DE
LA BOÎTE
BLUETOOTH
®
PAIRING
APPARIAGE
BLUETOOTH
®
IMPORT
VEUILLEZ VOUS ASSURER QUE V
DISPOSE DE LA DERNIÈRE VERSION DU MICROL
IMPORT
PLEASE MAKE SURE YOUR HEADSET
IS UPDA
Micro activé
Micro désactivé Micro désactivé
1. Hold down the Bluetooth
®
Button until the "Bluetooth
®
Pairing" pr
2. After placing your headset in pairing mode, select the headset fr
your device's Bluet
®
Settings menu to connect to your headset.
1. Maintenez le bouton Bluetooth
®
enfoncé jusqu'à obtenir c
jumelage Bluetooth
®
.
2. Après av
options Bluetooth
®
pour sélectionner votr
HEADSET LED
VOY
MEANING
SIGNIFICA
Solid Blue
Bleu et Fixe
Breathing Blue
Clignote en Bleu
Double-Blink Blue
Clignote Deux Fois en Bl
Solid Red
Rouge et Fix
Headset and T
Casque et Émetteur Appariés
Bluetooth
®
Pairing
Appariage Bluetooth
®
Solid White
Blanc et fixe
Stays white for 2 seconds, then goes back to blue.
Reste blanc pendant 2secondes, puis r
LED turns off when battery is fully charged (if headset is off).
Le voyant s'éteint lorsque la batterie est en
(si le casque est éteint).
Bluetooth
®
Paired
Bluetooth
®
apparié
(While Charging & On) Batt
(En charge et Allumé) Batterie Pl
Not Paired
Non Apparié
(While Charging) Batt
(En Charge) Batterie en Char
Battery Low
Batterie Faibl
Breathing R
Clignote en Rouge
Fast-Blinking Whit
Clignotement rapide blanc
LED BEHAVIORS
ÉTATS DES VOYANTS
Custom EQ Presets available thr
Turtl
Des préréglages EQ per
disponibles dans l'application mobile
Turtl
Scan this QR code to get the
Audio Hub App on your phone
so you can customize your
remappable buttons.
Scannez ce code QR pour
installer l'application Audio Hub
sur votre téléphone: vous
pourrez ensuite per
vos boutons reconfigurables.
turtlebeach.com/audiohub
EN
Depending on the size of your glasses frame, use the tab adjustment to create the appropriate sized channel in the ear
cushion. By default, the adjustment tab is set to the shallowest setting. To increase the size/depth of the channel in the
ear cushion, simply pull the tab and attach it to the post based on your preference.
FR
Utilisez la sangle de réglage pour créer et ajuster l'espace nécessaire correspondant à la taille de vos montures. Par
défaut, la sangle propose le plus petit réglage possible. Pour augmenter la taille ou la profondeur nécessaire, tirez tout
simplement la sangle et fixez-la en fonction de vos préférences.
EN
After you’ve adjusted the glasses friendly channel to your liking, place the ear cushion back onto the speaker.
The ear cushion should snap into place with minimal effort.
FR
Une fois que vous avez ajusté le système à votre convenance, replacez le coussinet sur l'écouteur. À nouveau,
le geste ne devrait pas vous poser de difficulté.
2
3
EN
The ProSpecs
™
Glasses Relief system creates a channel in the ear cushion to help reduce pressure on your glasses
frame. To adjust this, you must first remove the ear cushion. Hold the ear cushion firmly and pull it away from the
speaker. The ear cushion should come off with minimal effort.
FR
Le système spécial lunettes ProSpecs
™
réduit la pression exercée sur les montures. Pour l'utiliser, vous devrez
tout d'abord retirer les coussinets. Tenez fermement le coussinet et détachez-le de l'écouteur, ce qui ne devrait
pas nécessiter trop d'efforts.
For those who game with glasses, adjust the ProSpecs
™
Glasses Friendly System for added comfort
Le système ProSpecs
™
a été conçu spécialement pour garantir aux joueurs
qui portent des lunettes un confort absolu
ProSpecs
™
Glasses Relief System
Système spécial lunettes ProSpecs
™
1
Pull
Tirer
1. Mantén pulsado el botón de Bluetooth
®
hasta que el mensaje de
"emparejamiento de Bluet
®
" aparezca.
2. T
auriculares en el menú de c
®
de tu dispositivo para
conectar los auricular
1. Tieni premuto il pulsant
®
fino alla comparsa del messaggio
"abbinamento Bluetooth
®
".
2. Dopo aver messo in modalità associazione le tue cuffie, sel
dal menu delle impostazioni Bluetooth
®
del tuo dispositivo.
1. Halten Sie den Bluetooth
®
-Knopf gedrückt, bis die Meldung
„Bluetooth
®
Pairing“ er tönt.
2. Sobald sich das Headset im Kopplungsmodus befindet, wähl
Bluetooth
®
Einstellungen-Menü deines Gerätes aus, um das Headset zu v
1. Håll in Bluetooth
®
knappen tills ljudsignalerna för Bluetooth
®
k
2. Efter att du satt headsetet i park
enhetens Bluetooth
®
-inställningar för att uppr
1. Mantém premido o Bot
®
até aparec
"Emparelhamento Bluet
®
".
2. Quando puser os seus auscultadores em modo de empar
os auscultadores no menu de definiç
®
do seu dispositivo para os ligar
1. Houd de Bluetooth
®
-knop ingedrukt tot de vraag om
'Bluetooth
®
-k
2. Nadat je de headset in de k
in het Bluetooth
®
-instellingenmenu van je apparaat om je headset te k
1. Hold Bluetooth
®
-knappen nede indtil "Bluetooth
®
-parring" vises.
2. Når dit headset er i parringstilstand, skal du v
Bluetooth
®
-indstillinger for at opr
USB-C Charging Cable
Câble de chargement USB-C
C
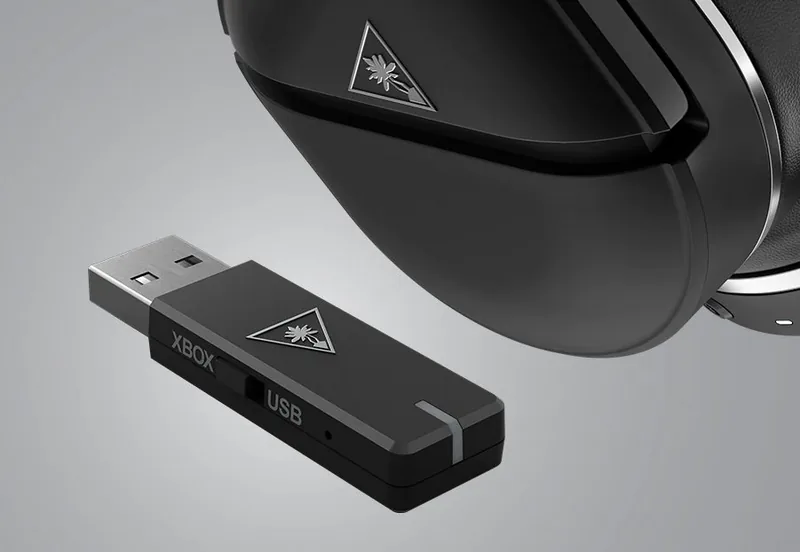
USB-A Wireless Transmitter
Émetteur sans fil USB-A
B
STEAL
Refer to mappable butt
Indique les boutons assignables.
Variabl
Réglage du r
TRANSMITTER LED INDICA
INDICA
Breathing R
Clignote en Rouge
Solid Blue
Bleu et Fixe
Double-Blink Blue
Clignote Deux Fois en Bl
Headset and T
Casque et Émetteur Appariés
Not Paired
Non Apparié
Mic Muted
Micro Désactivé
QUICK START GUIDE
GUIDE D
DÉMARRAGE RAPIDE
SETUP FOR PC MODE
CONFIGURATION
POUR LE MODE PC
3
Power on headset.
Allumez le casque.
4
Wait f
Attendez que le casque et l'émetteur
soient appariés.
2
Put the transmitter into your platf
Insérer l'émetteur dans l
votre plat
SETUP FOR PLAYSTATION
®
&
NINTENDO SWITCH
™
CONFIGURATION POUR
PLAYSTATION
®
ET
NINTENDO SWITCH
™
3
Power on headset.
Allumez le casque.
4
Wait f
Attendez que le casque et l'émetteur soient appariés.
1
Put the transmitter into “PS” mode.
Mettre l'émetteur en mode "PS".
FR
a. Sélectionnez Stealth 700 Gen 2 MAX comme périphérique de sortie
b. Réglez Sortie vers l
c. Mettez le réglage du volume (c
Ajustez les niveaux de votr
Microphone > Ajuster niveau micr
Sur PS5
™
, autorisez la fonction 3D Audio à améliorer l
casque, puis sélectionnez la meilleure option de pr
dans Ajuster le profil 3D Audio.
Allez dans Options > Son > Périphériques audio > Périphériques de sortie
5
a. Select Stealth 700 Gen 2 MAX for Output Device
b. Set Output to Headphones to All Audio
c. Set Volume Contr level to Maximum
Adjust your microphone lSettings >
Sound > Microphone > Adjusl > Microphone Level
On PS5
™
, enable 3D Audio to enhance thr
then go to Adjust 3D Audio Profile t
option for your game.
Go to Settings > Sound > Audio Outpu t > Output Device
ES
a. Selecciona los Stealth 700 Gen 2 MAX como dispositiv
b. Establece los auricular
c. Establece el nivel de c
Ajusta los niveles de tu micr
Micrófono > Ajust
Si lo deseas, puedes activar la función de sonido 3D en PS5
™
para
mejorar el audio de los auriculares y después ir a Ajus
sonido 3D para seleccionar la opción que mejor se adapte a lo
que estés jugando.
Ve a Configuración > Sonido > Salida de sonido > Dispositivo de salida
IT
a. Seleziona Stealth 700 Gen 2 MAX come dispositivo di uscita
b. Imposta le cuffie come dispositivo di uscita per tutt
c. Imposta Regolazione volume (cuffie) al liv
Regola i livelli del micr
Microfono > R
Abilita l'audio 3D su PS5
™
per potenziare l'audio delle tue cuffie,
dopodiché vai a Regola pr
più adatta al titolo a cui stai giocando.
Vai a Impostazioni > Suono > Uscita audio > Dispositivo di uscita
NL
a. Selecteer Stealth 700 Gen 2 MAX Gen als uitvoerapparaat
b. Stel Uitvoer naar hoofdtelef
c. Stel Volumebediening (hoof
Je kunt de microfoonniveaus aanpas
Geluid > Microfoon > Micr
Microfoonniveau t
Schakel op PS5
™
de optie '3D-audio' in voor je headset.
Selecteer daarna bij '3D-audioprofiel aanpassen' de bes
profieloptie voor je game.
Ga naar Instellingen > Geluid > Audio-uitvoer > Uitvoerapparaat
a. Välj Stealth 700 Gen 2 MAX som utdataenhet
b. Ställ in hörlurar som utdata för allt ljud
c. Ställ in volymk
Justera mikrof
bildskärm > Mikrof
Aktivera 3D-ljud för att få bättr
™
.
Gå sedan till Justera 3D-ljudsprofil f
som passar ditt spel bäst.
Gå till Inställningar > Ljud och bildskärm > Utdata > Utdataenhet
SE
PT
a.
Seleciona os auscultadores Stealth 700 Gen 2 MAX c
b. Em Saída para auscultadores, esc
c. Define o nível de control
Ajusta os níveis do microf
Ajustar nível do microf
Na PS5
™
, ative o Áudio 3D para melhorar os seus auscultador
em seguida, aceda a Ajustar Perfil de Áudio 3D para sel
melhor opção de perfil para o seu jogo.
Acede a Definições > Som > Saída de áudio > Dispositivo de saída
DE
a. Wähle das Stealth 700 Gen 2 MAX als Ausgabegerät
b. Stelle ein, dass alle Sounds über die Kopfhör
c. Stelle die Lautstärk
Passe deinen Mikrof
Mikrofonpegel anpassen > Mikr
Auf der PS5
™
, aktiviere 3D Audio, um den Sound über dein Headset zu
verstärk
der besten Profil-
Gehe auf Einstellungen > Sound > Audioausgabe > Ausgabegerät
DK
a. Vælg Stealth 700 Gen 2 MAX som Output
b. Angiv Output til hovedtelefoner til Al l
c. Indstil L
Du kan justere mikr
Mikrofon > Just
På PS5
™
kan du aktivere 3D-l
så gå til Juster 3D-lydpr
Gå til Indstillinger > Lyd > Lydoutput > Outputenhed
The USB-A wireles
switch that allows you to change c
L'émetteur USB-A sans fil est équipé d'un bouton qui
permet de changer les modes de compatibilité.
PS MODE PC MODE
PS5
™
Consoles
PS4
™
Consoles
Windows PC
Mac
®
Nintendo Switch
™
USB TRANSMITTER COMPATIBILITY
COMPATIBILITÉ DE
L'ÉMETTEUR USB
Console’
Port USB de console
Not seeing what you're looking for here?
Visit turtlebeach.com/support
for the latest Tech Support information.
Vous n'avez pas trouvé ce que vous cherchiez?
Rendez-vous sur turtlebeach.com/support
pour consulter les dernières informations
de l'assistance technique.
Regulat
Models: Stealth700P-MAX
Local Restrictions on R
Caution: Due to the fact that the fr
designed for use only in specific c
these products, you ar
verifying that they are c
permissible power and fr
T
that is printed on the identification label of your device is lis
http://www or contact T
Federal Communications Commission (F
This section includes the following FC
• FCC IDs: XGB-3790RX & X • Class B Interfer
• RF Radiation Exposure & Hazar • Non-Modification Statement
Class B Interferenc
This equipment has been tested and found to c
limits are designed to pr
uses, and can radiate radio fr
interferenc
equipment does cause harmful interfer
user is encouraged to try to corr
• Reorient or r
• Increase the separation between the equipment and r
• Connect the equipment into an outlet on a circuit diff
• Consult the dealer or an experienced r
FCC Caution:
This device complies with Part 15 of the F
interferenc
RF Radiation Exposure & Hazar
T
be greater than 2 cm (0.8 in.) fr
this product is not allowed. Ins
manual. This transmitter must not be co-loc
Non-Modification Statement
Use only the supplied internal antenna. Unauthorized antennas, modifications, or att
Stealth700P-MAX-
compliance coul
This product is compliant with the Consumer Pr
Canadian ICES Statement:
IC: 3879A-3790RX & 3879A-3790TX
This device complies with ICES-003 and RSS-247 of Indus
1. This device may not cause interf
2. This device must acc
Ce dispositif est conforme aux normes NMB003 et CNR-247 d’Industrie Canada.
1. L
2. il ne doit pas produir
brouillage est susc
T
indoors and away from windo
licensing and not supported by models: Stealth700P-MAX-RX and Stealth700P-MAX-
Pour éviter les interf
fonctionner à l'intérieur et à l'extérieur des f
à l'extérieur est soumis à l'octr
RF Radiation Exposure & Hazar
T
device will be gr
certification of this product is not all
provided in this manual. This transmitt
Exposition aux radiations RF & Mention de danger
Pour assurer la c
endroit ou l'antenne de l'appar
plus élevé et les types d'antennes qui ne sont pas c
installateurs de la radio et les utilisat
Cet émetteur ne doit pas être co-implant
European Union and Eur
This equipment may be operated in the countries that comprise the member c
T
AUSTRIA, BELGIUM, BUL
HUNGARY
SLOV
Declaration of Conformity
Marking by this symbol:
indicates compliance with the Essential R
This equipment meets the following conf
Safety:
IEC 62368-1: 2014 (CB Scheme Certificate),
EN 50332-1: 2013, EN 50332-2: 2013, EN 71-3: 2013
Additional licenses issued for specific countries av
EMC: EN 55032: 2015 + A11: 2020, CISPR 32: 2015,
EN 301 489-1 v2.2.3 (2019-11), EN 301 489-9 v2.1.1 (2019-04)
EN 61000-4-2: 2009, EN 61000-4-3: 2006 + A1: 2008 + A2: 2010,
EN 61000-4-8: 2010
The products ar
Additional issued licenses available upon r
Radio: EN 300 328 v2.2.2 (2019-07)
SAR: EN 62311: 2020
Environmental : R
Battery 2006/66/EC, T
Please visit the following URL f
http://www
Warning! This is a Class B product. In a domestic envir
requir
Achtung! Dieses ist ein Gerät der Funk
auftreten, in welchen F
Attention! Ceci est un pr
radioélectriques, il appartiendra alors à l
This symbol on the product or its pack
household waste. Instead, it is y
designated collection point for the r
and recycling of your w
it is recycled in a manner that pr
can drop off your was
T
Waste) R
and information on packaging waste management, r
https://wwwm/
Mexican IFT
“La operación de este equipo está sujeta a las siguientes dos c
interferencia perjudicial y (2) es
operación no deseada.”
T
取得審驗證明之低功率射頻器材,
用者均不得擅自
頻器材之使用不得影響飛航安全及干擾合法通信
立即停用,
法規定作業之無線電通信。
醫療用電波輻射性電機設備之干擾。
SUPERHUMAN HEARING
™
™
IT
1. Metti il trasmettitor
2. Collega il trasmettitor
3. Accendi le cuffie.
4. Attendi che le cuffie e il trasmettitor
SE
1. Ställ in sändaren på "PC"-läget.
2. Anslut sändaren i din plattf
3. Sätt på headsetet.
4. V
ES
1. Pon el transmisor en modo PC.
2. Pon el transmisor en el puerto USB-A
de tu plataforma.
3. Enciende los auriculares.
4. Espera a que se emparejen l
y el transmisor
DE
1. Ver
2. Verbinde den Sender mit dem USB-A
Anschluss deiner Plattform.
3. Schalte das Headset ein.
4. Wart
NL
1. Zet de zender in de PC-modus.
2. Sluit de zender aan op de USB-A-poort
van je platform.
3. Zet de headset aan.
4. W
PT
1. Coloque o transmissor em modo “PC”
2. Coloque o transmissor na porta USB-A
da sua plataforma.
3. Ligue os auscultadores.
4. Aguarde pelo empar
auscultadores e do tr
DK
1. Indstil senderen til “PC”-tils
2. Indsæt senderen i din platf
3. T
4. Vent, til der er opr
headset og sender
1
Put the transmitter into “PC” mode.
Mettre l'émetteur en mode "PC".
PS PC
PS PC
PS PC
Console’
Port USB de console
2
Connect transmitter to USB port.
Connecter l
It is recommended to insert the wir
into the USB port at the front of the PS5
™
console.
Nous recommandons d'insér
dans le port USB situé à l'avant de la console PS5
™
.
To access the rating label:
Pour accéder à l'étiquette:
2. Place ear cushion back onto the silver ring of your headset. The
ear cushion will snap into place.
Remettez les coussinets en place sur l'anneau en argent de votre
casque. Le coussinet se placera correctement de lui-même.
1. Remove the left ear pad.
Retirez le coussinet gauche .
The Stealth
™
700 Gen 2 MAX supports Nintendo Switch
™*
wireless compatibility through
the USB transmitter or Bluetooth
®
.
*Chat is available for games that support in-game chat capability while connected through the USB connection only
La compatibilité sans fil Nintendo Switch
™
de la Stealth
™*
700 Gen 2 MAX est assurée par
connexion USB ou en Bluetooth
®
.
*Le chat est disponible pour les jeux compatibles avec la fonction de chat dans le jeu, lor
USB uniquement.
The Stealth
™
700 Gen 2 MAX’
mode, your MODE button will sync with your multimedia to allo
music and skip tracks and adjust y
Any EQ modes you selected in PS mode will also be carried over in PC mode.
Le mode PC de Stealth
™
700 Gen 2 MAX permet d'optimiser le fonctionnement du casque
sur votre PC. Dans c
vous permettre de lir
le volume principal depuis votr
T
en mode PC.