Manual.ly Logo

Tokina SZX 400mm F8 Reflex MF Manual

0.0 · 0 Ratings

PDF manual · 1 Pages

English

M: qwen/qwen3.5-flash-20260224
page

/ 1

Loading...
28a879516b24e4b8c326c9c0b319ed09b871 page 1
2. Attaching the lens to the camera
Align the indicator marks on the mount adapter and the
camera body, and then turn the lens until you hear a “click.”
(For attachment and removal, refer to “Attaching the Lens”
and “Removing the Lens” in your camera's manual.)
Make sure the lens is firmly attached.
CameraMount adapter
10 12 15 20 30 50 100 ftMACRO
3 3.5 4 5 6 8 10 15 30 m1:3.5 1:4 1:4.5
1. Part names
Lenswithmountadapterremoved
Fig. 1
Fig. 2
10 12 15 20 30 50 100 ftMACRO
3 3.5 4 5 6 8 10 15 30 m1:3.5 1:4 1:4.5
⑤ ⑥ ⑧④
⑦
⑨
10 12 15 20 30 50 100 ftMACRO
3 3.5 4 5 6 8 10 15 30 m1:3.5 1:4 1:4.5
①
②
(Inside)
③
* Theshapeofthemountadaptermayvary
dependingoncameraspecifications.
① Mount adapter attachment thread
② Filter attachment thread (rear)
③ Filter attachment thread (front)
④ Focus ring
⑤ Distance scale (in feet)
⑥ Distance scale (in meters)
⑦ Macro magnification scale
⑧ Distance scale indicator mark
⑨ Mount adapter
3. Mount adapter
⑩ Outer screw (x3)
⑪ Outer ring
⑫ Inner ring
In order to adjust the position of the lens or attach rear filter
you have to adjust the mount adapter.
Follow the instructions below to adjust the position or
remove the mount adapter:
Slightly loosen the outer screws
(
⑩
)
as shown in Fig. 2.
* Do not loosen the screws too much. It may cause the inner ring
of the mount adapter to come off.
* Use a regular precision screwdriver to loosen the screws.
Turn the lens until the distance scale indicator comes to the top
center, and then securely tighten the outer screws
(
⑩
)
as
shown in Fig. 2.
Take the lens off the camera.
2
1
2
1
Remove the mount adapter from the lens by turning the mount
adapter counterclockwise while holding the lens with the other
hand.
Note : If the outer
screws
(
⑩
)
are
loosened too
much, the inner ring
(
⑫
)
may come off.
If the distance scale indicator mark
(
⑧ in Fig. 1
)
does not
align with the top center of the lens when it is attached to
the camera, adjust according to the instructions below:
Note : For easier operations, the 3 exterior screws are slightly
loosened at the time of shipment. Make sure
beforehand that you use screwdriver to tighten he
screws before attaching the mount to the lens.
Follow the instructions below to remove the mount adapter
from the lens:
⑩
⑩⑩
⑪
⑫
* The shape of the mount adapter may vary
depending on camera specifications.
4. Setting up the camera
Some cameras must be set up before attaching the lens.
Set up your camera by referring to the information provided
below. For details, refer to your camera's manual.
For correct using and setting of the camera’ s in-built image
stabilization, refer to your camera's manual.
The lens can be used in the “Av (aperture priority)” mode and “M
(manual)” mode.
■
How to use the “Av (aperture priority)” mode
1. Set the exposure mode to “Av.”
2. Correct the exposure compensation if necessary.
If this lens is used with a Canon EOS series camera, the following
operations may be required on some models due to the specifica-
tions of the camera:
Canon EOS series
• When the lens is attached, the aperture is displayed as “00.”:
You can shoot as it is.
• An aperture value (e.g., F5.6) is displayed when the lens is
attached:
Open up the aperture (adjust it to the smallest value).
*This lens cannot be used with those cameras that have no aperture
priority mode (Av) or manual mode (M).
*If a conversion lens or an extension tube (ring) is attached, the
camera will not operate correctly. Do not combine this lens with the
above items.
*The Focus Aid function cannot be used.
*The aperture cannot be adjusted in the aperture priority mode.
*The aperture value will not be recorded in Exif data.
SONY E
The supported exposure modes might be limited depending on the
camera model.
Refer to “List of Supported Non-CPU Lenses” or other similar sec-
tions in your camera's manual.
Nikon F
To use this lens with any cameras listed above, set the shooting
mode to “M (manual).”
The shutter cannot be released in any other mode.
*The shutter speed must be adjusted depending on the condition in
which photographs are taken.
*Set the focus mode to “MF.”
*The aperture cannot be adjusted in the aperture priority mode.
*The aperture value will not be recorded in Exif data.
D5XXX series, D3XXX series, D90, D80, D60, D40X, D40,
D70S, D70, D50, D100
The non-lens release lock function must be canceled.
Menu 󲰛 Setup Menu 󲰛 Change the setting for [Release without
Lens] to [Permit].
Any shooting mode can be used, except for those in which priority is
given to the shutter speed. It is not recommended to give priority to
the shutter speed (shutter priority mode).
* In the program mode, aperture priority mode or manual mode, set
the ISO sensitivity to AUTO.
Menu 󲰛 Setup Menu 󲰛 Brightness/Color 󲰛 ISO Sensitivity 󲰛
Set to [AUTO].
* The aperture cannot be adjusted in the aperture priority mode.
* The aperture value will not be recorded in Exif data.
Olympus Micro Four-Thirds
Any shooting mode can be used, except for those in which the
shutter speed is given priority (shutter priority mode). It is not
recommended to give priority to the shutter speed (shutter priority
mode).
*
When using the program mode, aperture priority mode or manual
mode, set the ISO sensitivity to AUTO.
Setup Menu 󲰛 ISO Sensitivity 󲰛 Set to [AUTO].
* The aperture cannot be adjusted in the aperture priority mode.
* The aperture value will not be recorded in Exif data.
Panasonic Micro Four-Thirds
The non-lens release function must be set to [ON].
Setup Menu 󲰛 Release without Lens 󲰛 Set to [ON].
Any shooting mode can be used, except for those giving priority to
the shutter speed (shutter priority mode). It is not recommended to
give priority to the shutter speed (shutter priority mode).
* When using the program mode, aperture priority mode or manual
mode, set the ISO sensitivity to AUTO.
Setup Menu 󲰛 ISO Sensitivity 󲰛 Set to [AUTO].
* The aperture cannot be adjusted in the aperture priority mode.
* The aperture value will not be recorded in Exif data.
FUJIFILM X
It is necessary to set menu allowing [Release without lens] option to
be activated.
Setup Menu 󲰛 Release without lens 󲰛 [Approval]
Shooting can be possible in aperture priority AE mode or manual (M)
mode.
* Set ISO to [AUTO] MENU 󲰛 ISO 󲰛 [AUTO]
* Aperture value will not be registered in Exif data.
*
In “Movie” mode there is no [Release without lens] option in menu
list, but if in other mode [Release without lens] is approved, movie
function will be activated.
400mm
F8 (fixed)
Full Frame (24mm x 36mm)
Multi-coated
6 elements in 5 groups
6° 8’
1.15 m
0.4x
Manual with front barrel extension
No
67 mm
30.5 mm
76.8mm (at infinity position)
φ74 mm
355 g
BH-673
Focal distance
Maximum aperture
Format
Coating
Lens configuration
Angle of view
Minimum focus distance
Maximum macro magnification
Focus
Diaphragm blades
Front filter size
Rear filter size
Overall length
(excluding mount adapter)
Maximum diameter
Weight
(excluding mount adapter)
Hood
6. Specifications
* Before attaching a filter to the front of the lens, be sure the filter will not get in contact
with the reflective part (black circle) at the center of the front surface of the lens.
Specifications and exterior appearance are subject to change without previous notice
for the purpose of product improvement.
* A display mark indicating inclusion in the China RoHS directive (Administrative
Measure on the Control of Pollution Caused by Electronic Information Products).
A lens hood is designed to prevent the flares
and ghost in the images that may be caused
by strong diagonal or side rays hitting the lens.
We recommend using a lens hood to ensure
high quality images and protect the lens.
Lens hood is a screw type hood. To securely
install the hood turn it according to the arrow
as shown in the picture below. To remove
the hood, turn it in the opposite way.
5. Lens Hood
How to attach the lens hood
10 12 15 20 30 50 100 ftMACRO
3 3.5 4 5 6 8 10 15 30 m1:3.5 1:4 1:4.5
BH-673
T4008-2006
SZX SUPER TELE 400mm F8
Reflex MF
Instruction Manual
This is a telephoto lens for a single-lens
reflex cameras or interchangeable lens
mirrorless digital cameras adopting
reflective optics to achieve a long focal
length within a compact body.

Chat with your Tokina SZX 400mm F8 Reflex MF manual using AI

Get instant AI answers from your Tokina SZX 400mm F8 Reflex MF manual

Ask anything about the Tokina SZX 400mm F8 Reflex MF. Answers come from this manual, with the pages they are based on.

Ask a Question

0/1000

Do you recommend SZX 400mm F8 Reflex MF?

Yes No

Frequently Asked Questions

A

Align indicator marks on the mount adapter and camera body. Turn the lens until you hear a click. Ensure the lens is firmly attached before shooting.

Is this answer helpful?

A

Yes, but you must use Manual or Aperture Priority modes. Some models may display the aperture as 00. Ensure the camera is configured for non-CPU lenses.

Is this answer helpful?

A

The minimum focus distance is 1.15 meters. This allows for a maximum macro magnification of 0.4x with the manual barrel extension.

Is this answer helpful?

A

The BH-673 hood is screw type. Turn it clockwise according to the arrow to install securely. To remove, turn it in the opposite direction.

Is this answer helpful?

A

No, this lens has a fixed aperture of F8. It cannot be adjusted in either manual or aperture priority modes.

Is this answer helpful?

A

No, this is a manual focus lens with fixed F8. You must rely on camera settings or external stabilization. Ensure your camera manual is consulted for stabilization.

Is this answer helpful?

M: qwen/qwen3.5-flash-20260224

Advantages and Disadvantages

Advantages

  • Compact body size with reflective optics design
  • Low weight of 355 grams excluding mount adapter
  • Fixed aperture ensures exposure consistency
  • Includes multi-coated surfaces to reduce flares
VS

Disadvantages

  • Manual focus only with no AF motor
  • Fixed F8 aperture limits low light performance
  • Requires specific camera menu settings per brand
  • Aperture value not recorded in Exif data
M: qwen/qwen3.5-flash-20260224

Product Specification

Type

Telephoto Lens

Aperture

F8.0

Optical Construction (Lenses/Groups)

6/5

Focus Motor

No

Image Stabilizer

No

Minimum Focus Distance

3.77 ft

Smallest Aperture

F8

Max Field of View

6.13 deg

Max Magnification

1:2.50

Sensor Compatibility

APS-C/Full Frame

Filter Mount

2.64 in Screw Filter

Features

Mirror Lens

Color

Black

Dimensions

2.91x3.02 in (DxL)

Weight

0.78 lbs

M: qwen/qwen3.5-flash-20260224

Product Description

Discovering the Tokina SZX 400mm 8.0 Reflex MF Manual

Photography enthusiasts looking for compact telephoto solutions often find the Tokina SZX 400mm 8.0 Manual lens to be a fascinating tool. This catadioptric lens utilizes reflective optics to achieve a long focal length within a surprisingly smaller body. When reviewing the Tokina SZX 400mm 8.0 Reflex MF Manual, users appreciate the unique design that brings distant subjects closer without the bulk of traditional optics. It represents a specific niche for photographers who value portability over speed.

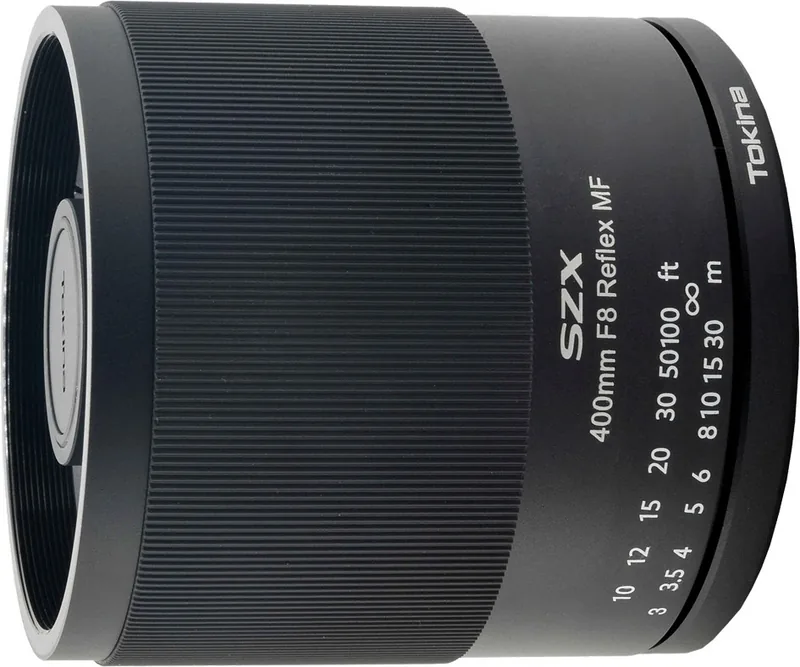
The lens features a fixed aperture of F8. While this limits light intake, it ensures consistency in exposure across different focal distances. Manual focus is the primary method for achieving sharp images, requiring patience and skill. The lens includes distance scales in both feet and meters to aid photographers in estimating focus. Additionally, users can attach rear or front filters, though care must be taken regarding the reflective center element. The multi-coated surfaces help reduce ghosting and flares during shooting sessions. The angle of view is approximately 6 degrees.

Setting up the camera is crucial for optimal performance across different brands. Various manufacturers like Canon, Nikon, Sony, and Olympus require specific menu configurations. For example, Canon users often need to shoot in Manual or Aperture Priority modes. Some Nikon DSLRs require the release without lens option to be enabled in the menu to prevent errors. Fujifilm users must also adjust specific release settings to ensure the shutter fires correctly. Without these adjustments, the camera will not take a photo.

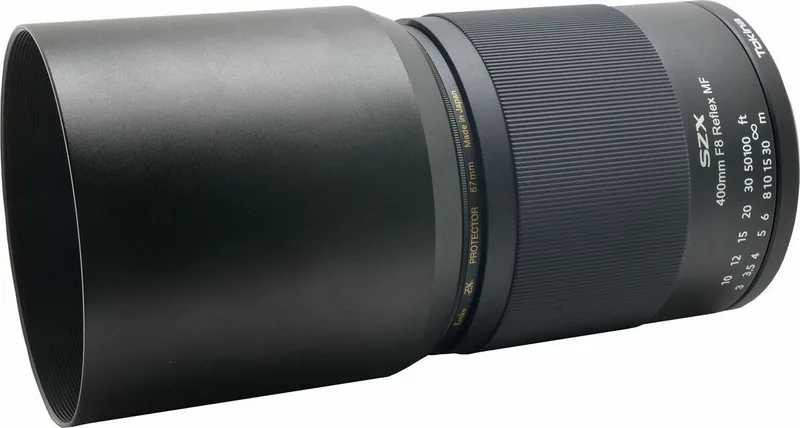
To protect the front element, the included lens hood is highly recommended. Attaching it involves screwing it on clockwise until secure. The overall weight remains low at around 355 grams excluding accessories, making it portable for travel yet stable for handheld shooting in good light. The maximum macro magnification reaches 0.4x. The minimum focus distance is 1.15 meters from the sensor plane.

When attaching the lens, align indicator marks on the mount adapter and camera body. Removing the mount adapter requires loosening outer screws slightly. Caution is advised to prevent the inner ring from dislodging. Understanding these mechanical details ensures longevity for your equipment.

This optic is ideal for those willing to embrace manual operation styles. The unique bokeh pattern creates a dreamy background effect. Whether photographing wildlife or landscapes, understanding the limitations and capabilities allows creators to produce exceptional results. Mastering the controls and understanding the compatibility ensures a smooth shooting experience. It remains a favorite for creative projects where budget and weight are key factors.

M: qwen/qwen3.5-flash-20260224

© Copyright 2026 Manual.ly
