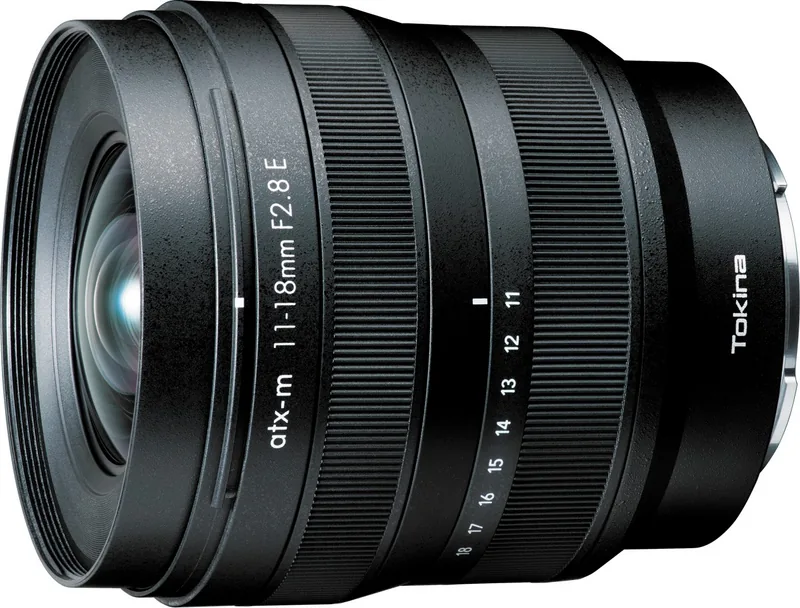
Ajuste de la apertura
El ajuste de la apertura se realiza en la cámara de acuerdo al modo de
disparo.
F
Por fav
*
lado de la montura de la lente, al momento de acoplar o retirar el
objetivo. La corrosión puede causar fallos en el contacto
tenga cuidado para no golpearlo.
El parasol incluido con el objetivo, pr
proveniente de los lados
lente, lo que puede ocasionar halo o imágenes fantasma, afectando la
calidad de las fotografías
Por fav
tomas, para obtener los mejores r
* Recomendamos que siempre tenga el parasol acoplado al objetivo
para evitar la luz directa que puede causar halo o imágenes fantasma.
Para instalar el parasol con seguridad, alinee la mar
(
▼
)
del parasol con
el indicador correspondiente del objetivo y gir
de las agujas de reloj, hasta que suene un
posición de la marca
(
▲
)
del parasol coincide con la marca
(
■
)
en la parte
inferior del objetivo.
Par
Enfoque
■Enfoque automático
Utilice la cámara en enfoque automático (AF).
Presionando el disparador hasta la mitad
el enfoque automático
■Enfoque manual
Utilice la cámara en enfoque manual (MF).
Ajuste el enfoque moviendo el anillo del mismo
imagen en el visor o del monitor de la cámara
Se puede lograr un enfoque más preciso utilizando la función de
ampliación de pantalla.
[Función de enf
Con este objetivo
puede ajustar manualmente sin cambiar el modo de enfoque.
Cologue el modo de enfoque de la cámara en DMF ”
automático luego puede realizar ajuste al enf
disparador hasta la mitad, haciendo girar el anillo de enfoque
usar para tomas que necesitan un enfoque preciso
tomas macro.
■Como acoplar el par
Cuidados básicos y almac
Evite cualquier golpe o impacto en la lente o la exposición a tempera-
turas extremadamente altas o bajas, así como también evitar la
humedad excesiva.
Para pr
después de utilizarla. No utilice disolvente para pintura, benceno u
otros agentes orgánicos para limpiar la suciedad o las huellas digitales
impregnadas en el lente
un paño de papel.
Cuando al sacar el objetivo a exteriores, limpie constantemente la
suciedad, polvo o residuos
Asegurarse que las paredes del objetivo estén limpias
de la parte frontal o posterior.
Selectione un lugar frío y fresco cuando lo que se quiere es almacenar
por un largo periodo de tiempo, además debe tener de pr
una buena ventilación. P
lente, mantener la lente alejada de la naftalina o de gas naftaleno.
Este objetivo no es resistent
objetivo durante la lluvia o clima parecido
Normalmente no se recomienda la reparación del objetivo o sus
componentes cuando han sido dañados por agua.
Cambios repentinos de temperatura, pueden causar condensación en
las lentes componentes. Cuando ing
un ambiente frío, es recomendable dejar el objetivo en un estuche
hasta que la temperatura del objetivo alcance la temperatura del
ambiente.
•
•
•
•
•
•
Filtr
Utilice filtros con rosca circular
filtro, puede causar r
Asegúrese de limpiar bien el filtro ant
* Por fav
puede causar viñeteado.
Cuidados al utilizar el flash incorpor
Cuando se realiza una toma con el flash incorporado en la cámara o con
un flash pequeño, la luz del flash puede ser parcialmente bloqueada y la
sombra del objetivo aparece en la pantalla. En este caso
externo.
Dirección de rotación del anillo de enf
La dirección de rotación del anillo de f
objetivo genuino.
T
11-18 mm
F2.8
F22
APS-C
Multi-coating
13 – 11
104.3° ~ 76.7°
0.19 m / 0.3 m
1 : 9.2 / 1 : 12.4
Enfoque interno (IF)
9
67 mm
74.1 mm
74.4 mm
335 g
BH-674
Distancia focal
Apertura máxima
Apertura mínima
Formato
Coating
Conguración del objetivo
(elementos/grupos)
Ángulo de visión
Distancia mínima de enfoque
Máxima macro-magnicación
Tipo de enfoque
Hojas del diafragma
T
Longitud total
Diámetro máximo
Peso
Parasol
11
12
1
3
1
4
1
5
1
6
1
7
1
8
❶
❷
❺
❻
❸
❹
T
pueden ser cambiadas sin previo aviso, para mejorar el pr
* La marca es una marca de cumplimiento de los estándar
se debe mostrar en productos indicados que se comercialice en la UE.
Esta es también una marca que declara el cumplimiento de los
estándares de las Directivas RoHS y EMC.
*La marca es una marca de cumplimiento de los estándar
se debe mostrar en productos indicados que se comercialice en el
Reino Unido (Inglaterra, Gales y Escocia). Esta es también una marca
que declara el cumplimiento de los estándares de las Directivas RoHS
y EMC.
* Marca indicando la inserción en la directiva RoHS de China (Medición
Administrativa para el Control de P
Información Electrónica)
Nombre de las partes
ESPAÑOL
❶Indicador de parasol
❷ Anillo de enfoque manual
❸ Indicador de centro
❹ Escala de longitud focal
❺ Anillo de zoom
❻Indicador de la montura del objetivo
※Al instalar el parasol, gir
de que está bien colocado
Si el parasol no está correctamente colocado
viñeteado
Indicador de parasol
How to attach and r
Please follow the camera instruction manual for attaching
the lens.
※When attaching or removing the lens, do not touch the sig
point on the lens attachment surface.
problems due to corrosion. Also
Aperture settings
Please set the aperture settings on the camera side in accordance with
the shooting mode.
F
■Auto F
Set your camera
The camera will automatically focus when the shutter butt
half-pushed.
■Manual Focus
Set your camera
Adjust focus by turning the f
monitor and finder image.
It is also possible to conduct precision focusing using the display
enlarging function.
[Direct manual focus function]
With this lens, it is possible to make slight focal adjustments manually
while the camera is in use with autofocus mode without switching the
focus mode.
Set the focus mode of the camera to Direct Manual FDMF ). Then,
focus using the autof
the half-pushed position, make slight focal adjustments by turning the
focus ring.
conducting macro photography
The included lens hood prevents strong angular light fr
striking the front lens element and causing lens flare or ghosting that
would impact image quality.
Please be sure to always use the lens hood when phot
achieve the best results possible.
■ Attaching the lens hood
Align the hood
(
▼
)
mark with the lens hood attachment mark
looking from the front, turn the hood clockwise to the right until you
hear a click. Check to make sure the
(
■
)
mark below the lens and the
(
▲
)
mark on the hood are aligned.
Lens hood
Hood attachment mark
Basic care and storage
Avoid any shock or impact to the lens or exposur
low temperature or high humidity
T
Do not use paint thinner
dirt or finger prints from the lens elements. Clean with a soft
moistened lens cloth or lens tissue.
In caring for the exterior of the lens, always wipe any dirt, dust or debris
with a chamois or silicone cloth. Make sure the barrels of the lens are
clean, not only the front and rear elements.
Select a cool and dr
ventilation.
from mothballs or naphthalene gas.
This lens is not waterproof
keep it from getting wet. It is often impractical to repair a lens or its
components when damaged by water
Sudden changes in temperature may cause condensation or f
the lens elements.
advisable to keep the lens in a case until the temperature of the lens
reaches the temperature of the r
•
•
•
•
•
•
Notes on use of built-in flash
Photography using the camera built
cause a portion of the flash light being block
shadow appearing on both sides of the photo. If this occurs, use an
external flash.
Rotation direction of the focus ring
The manual focus ring rotation direction is the same direction as the
original manufacturer
Please use round screw-in filters
filter
thoroughly befor
※Please use only one filter at a time. If more than one is used at the same
time, it may cause vignetting
Filt
Performance table
11-18 mm
F2.8
F22
APS-C
Multi-coating
13 - 11 (elements/groups)
104.3° ~ 76.7°
0.19 m / 0.3 m
1 : 9.2 / 1 : 12.4
Inner focus
9
67 mm
74.1 mm
74.4 mm
335 g
BH-674
Focal distance
Maximum aperture
Minimum aper
Format
Coating
Lens conguration
Angle of view
Minimum focus distance
Maximum macro magnication
Focus method
Diaphragm blades
Filt
Overall length
Maximum diameter
Weight
Hood
※When attaching the hood, turn it until y
a secure fit.
If the hood is not attached properly
11
12
1
3
1
4
1
5
1
6
1
7
1
8
❶
❷
❺
❻
❸
❹
※The Mark is a symbol indicating conformance with relevant standards that is
required labeling for specic pr
the product is compliant with the RoHS Directive and the EMC Directive.
※The Mark is a symbol indicating conformance with relevant standards that is
required labeling for specic pr
This mark is also indication that the product is compliant with the RoHS Directive and
the EMC Directive.
※ A display mark indicating inclusion in the China RoHS directive (Administra-
tive Measure on the Control of P
Products).
Please note that specications and appearance may be changed without notice to
improve the product.
Part names
ENGLISH
❶Hood Attachment Index
❷ F
❸ Center Index
❹ F
❺ Zoom Ring
❻ Mount Attachment Mark
1
F2.8 E
Einstellung der Blende
Stellen Sie die Blende bitte je nach Aufnahmeart an der Kamera ein.
Objektiv ansetzen und abnehmen
Bitte befolgen Sie die Bedienungsanleitung für das Anbringen und
Entfernen des Objektivs an der Kamera.
※Berühren Sie beim Anbringen und Abnehmen nicht die Signalkontak-
te auf der Montagefläche des Objektivs. Korrosion kann zum V
der Kontakte führen. Achten Sie außerdem darauf
Objektiv nicht anstoßen.
Grundlegende Pflege und Lagerung
Jegliche Erschütterungen oder Stöße gegen das Objektiv sowie
extrem hohe oder tiefe
vermeiden.
Reinigen Sie das Objektiv nach Gebrauch, um Schimmelbildung zu
vermeiden. Keinen
verwenden, um Schmutz oder Fingerabdrücke auf dem Objektiv zu
beseitigen. -
gungstuch oder Optik-Reinigungspapier
Bei der Pflege der Fr
einem Chamois- oder Silikontuch abwischen. Achten Sie darauf
auch der Objektivtubus sauber ist und nicht nur die vorderen und
hinteren Elemente
Wählen Sie einen kühlen und trocken, vorzugsweise gut gelüfteten
Ort, um das Objektiv langfr
von Mottenkugeln oder Naphthalengas, um Beschädigungen der
Linsenbeschichtung zu vermeiden.
Das Objektiv ist nicht wasserfest. Achten Sie darauf, dass das Objektiv
nicht nass wird, wenn Sie es im Regen oder in der Nähe von
verwenden. Es ist oft unmöglich ein Objektiv oder deren
reparieren, wenn diese durch
Plötzliche -
tionswasser auf den Objektivelementen führen.
Es ist ratsam, das Objektiv in einem Etui zu belassen, bis es Raumtem-
peratur erreicht hat, wenn Sie aus der Kälte in einen warmen Raum
kommen.
•
•
•
•
•
•
F
■Fokussieren mit A
Stellen Sie den F
automatisch scharf, wenn Sie den Auslöser halb herunter
■Fokussieren mit manuellem F
Stellen Sie den F
Fokusring zum Scharfstellen, während Sie das Bild auf dem Kameramoni-
tor und im Sucher überprüfen. Eine exakte F
Display-V
[Direkte manuelle Fokusfunktion]
Mit diesem Objektiv können Sie den Fokus auch in der Autofokuseinstel-
lung manuell einstellen, ohne den F
müssen.
Stellen Sie den FDMF "
Motiv mit dem Autofokus während Sie den A
heruntergedrückt halten und drehen Sie den F
fein abzustimmen.
Verwenden Sie diese F
Die mitgelieferte Streulichtblende verhindert, dass starkes Licht direkt
von vorne oder von der Seite schräg in das Objektiv einfällt und zu
Streulicht und Geisterbildern auf Fot
Streulichtblende, um klare, scharfe F
schützen.
■ Befestigung der Streulichtblende
Richten Sie die Mark▼ ) auf der Streulichtblende mit dem Index
für die Befestigung der Streulichtblende (
■
) am Objektiv aus und drehen
Sie die Streulichtblende von vorne gesehen im Uhrzeigersinn, bis sie
sicher einrastet.
Vergewissern Sie sich, dass die Markierung (▲ ) auf der Streulichtblende
mit dem Mittelindex des Objektivs übereinstimmt.
Streulichtblende
Filt
Hinweise zur
Bitte verwenden Sie runde Einschraubfilter
oder mit
Geisterbildern kommen. Achten Sie bitte darauf, vor dem F
den Filt
※Es wird empfohlen, nur einen F
Wenn gleichzeitig mehr als ein F
Vignettierung kommen.
Drehrichtung des F
Die Drehrichtung des F
Kameraherstellers.
Bei Aufnahmen mit dem eingebauten Blitz der Kamera oder einem
kleinen Blitzgerät k
Objektiv blockier
Bild erscheint. V
T
11-18 mm
F2.8
F22
APS-C
Multibeschichtung
13 Linsen in 11 Gruppen
104.3° ~ 76.7°
0.19 m / 0.3 m
1 : 9.2 / 1 : 12.4
IF Fokusierung
9
67 mm
74.1 mm
74.4 mm
335 g
BH-674
Brennweite
Max. Blendenönung
Min. Blendenönung
Max. Aufnahmeformat
Beschichtung
Optischer Aufbau
Bildwinkel
Min. Aufnahmeabstand
Max. Mak
Fokusf
Irisblende
Filt
Länge
Durchmesser
Gewicht
Streulichtblende
Index zum Aufsetzen
der Streulichtblende
11
12
1
3
1
4
1
5
1
6
1
7
1
8
❶
❷
❺
❻
❸
❹
Bitte beachten Sie, dass die technischen Daten und das A
Verbesserung des P
werden können.
※Bei der Kennzeichnung handelt es sich um ein Standard-Konfor -
mitätszeichen, das auf bestimmten in der EU verkauften Produkten
angebracht werden muss. Es ist auch eine Konformitätserklärung mit der
RoHS- und der EMV-Richtlinie.
※
Bei der Kennzeichnung handelt es sich um ein Konformitätszeichen,
das auf bestimmten Pr
Ver
werden. Es ist auch ein Zeichen, das die Einhaltung der RoHS- und
EMV-Richtlinien erklär
※ Inhaltskennzeichnung gemäß der chinesischen
RoHS-Richtlinie (Chinas Gesetz zur Kontrolle der Umweltverschmutzung
durch elektronische P
❶Index zum Aufsetzen der Streulichtblende
❷ F
❸ Brennweit
❹ Brennweit
❺ Zoomring (zur Brennw
❻ F
Bezeichnung
DEUTSCH
※Bei Anbringung der Blende diese soweit drehen, bis Sie ein
"Klicken" hören, um einen sicheren Sitz zu gew
W
Vignettierung kommen.
Réglage de l’
Veuillez r
de prise de vue.
Montage / démontage de l’
Veuillez suivr
concernant le montage de l'objectif sur l'appareil et son démontage.
* Lorsque vous montez ou démont
surface de montage de l'objec
défaillance du contact. V
Mise au point
■Mise au point automatique
Réglez le mode de mise au point de votre appareil photo sur « AF ».
L
mi-course sur le déclencheur.
■Mise au point manuelle
Réglez le mode de mise au point de votre appareil photo sur « MF ».
T
vérifiant l'image sur le moniteur de l'appareil photo et le viseur
Il est également possible de faire une mise au point rigoureuse en
utilisant la fonction d’agrandissement de l’affichage.
Fonction de mise au point manuelle directe (DMF)
Cet objectif vous permet de régler manuellement la mise au point sans
changer de mode de mise au point lors de la prise de vue avec mise au
point automatique.
Réglez le mode de mise au point de l'appareil photo sur « DMF »,
effectuez une mise au point avec mise au point automatique, t
bague de mise au point tout en appuyant à mi-course sur le déclencheur
et effectuez un réglage précis
pour la mise au point sur une prise de vue macro.
Le pare-soleil est conçu pour éviter la formation de flare ou d'images
fantôme, qui apparaissent quand les rayons lumineux obliques
atteignent la lentille frontale et qui auraient un impact sur la qualité de
l'image.
Utilisez toujours un pare-soleil lorsque vous photographiez afin d'obtenir
les meilleurs résultats possibles.
* Nous recommandons de laisser le pare-soleil fixé en permanence sur
l'objectif afin de bloquer les rayons parasites, qui dans le cas contraire
causeraient du flare ou des images fantôme.
■ Comment fix
Aligner la marque
(
▼
)
du pare-soleil avec le repère de montage du
pare-soleil présent sur l'objectif, puis le tourner dans le sens des aiguilles
d'une montre, vu par l'avant, jusqu'à entendr
Vérifier ensuite que la mar
(
■
)
du pare-soleil est alignée avec
l'indicateur
(
▲
)
présent sur la partie inférieure de l'objectif.
Par
Conseils d’
Évitez tout choc, impact sur l'objectif ou exposition à des températures
extrêmement élevées ou extrêmement basses, ainsi qu'à une
humidité élevée.
Pour éviter la moisissur
utilisation. Ne pas utiliser de diluant à peinture, benzène
agents biologiques pour éliminer les traces de saleté ou de doigts des
éléments de l’
mouchoir
Pour netto
poussière ou les débris avec une peau de chamois ou un chiffon à base
de silicone. Assurez-
seulement les éléments avant et arrière.
Choisissez un endroit frais et sec pour le stockage prolongé, de
préfér
revêtement de l’
naphtalène.
Cet objectif n'est pas étanche. Si vous utilisez cet objectif en cas de
pluie ou à proximité de l’-
ble de réparer un objectif ou ses composants lorsqu'ils sont
endommagés par l'eau.
Les changements brusques de température peuv
condensation sur les éléments de l’
Lorsque vous entrez dans une pièce chaude quand il fait fr
il est conseillé de garder l’
température de l’
•
•
•
•
•
•
Filtr
Veuillez utiliser des filtr
photographies parfaites si le filtre est sale ou présente des gouttes d’
ou d’autres particules étrangères. Nettoyez soigneusement le filtr
de prendre des photos
* Si deux filtres ou davantage sont utilisés en même temps, un eff
vignettage (assombrissement aux coins de l'image) peut se produire.
Av
Si vous prenez des photos à l'aide du flash intég
l’appareil photo, il se peut que l'
et que l'ombre de l'objectif apparaisse à l'écran. Dans ce cas, utilisez un
flash externe.
Sens de rotation de la bague de mise au point
Le sens de rotation de la bague de mise au point est identique à l'objectif
d’
Spécifications techniques
11-18 mm
F2.8
F22
APS-C
Multicouches
13-11 (éléments/groupes)
104.3° ~ 76.7°
0.19 m / 0.3 m
1 : 9.2 / 1 : 12.4
Mise au point interne
9
67 mm
74.1 mm
74.4 mm
335 g
BH-674
Distance focale
Ouverture maximum
Ouverture minimum
Format
Revêtement
Construction optique
Angle de champ
Distance minimale de MAP
Ratio de grossissement macro
Méthode de mise au point
Nombre de lamelles de diaphragme
Diamètre du ltre
Longueur totale
Diamètre maximum
Poids
pare-soleil
11
12
1
3
1
4
1
5
1
6
1
7
1
8
❶
❷
❺
❻
❸
❹
*Le marquage est une mar
apposée sur les produits désignés vendus dans l’UE. Il s’ag
d’une marque prouvant la conformité standar
CEM.
*Le marquage est une mar
apposée sur les produits désignés vendus au Royaume-Uni (Angleterre,
Pa
conformité standard des dir
* L
RoHS de la Chine (mesure administrative sur le contrôle de la pollution
causée par les produits électroniques).
Veuillez noter que les spécications et l'aspect peuvent êtr
sans préavis pour améliorer le pr
Nomenclature
❶Repère de montage du pare-soleil
❷ Bague de mise au point manuelle
❸ Repère de focale
❹ Echelle de focale
❺ Bague de zoom
❻ Repère de montage de l’
※
Quand vous fixez le par
« clic » pour vous assurer qu'il soit bien fix
Si le pare-soleil n'est pas conv
vignettage peut se produire
Repère de montage
du pare-soleil
Sulla base del modo di scatto desiderato regolar
dalla fotocamera.
Regolazione dell’apertura
Applicazione e rimozione dell’
Per l’applicazione e la rimozione dell’
manuale di istruzioni della macchina fotografica.
Nota: Durante l’installazione e la rimozione dell’
contatti elettrici ubicati sul lato di montaggio. In caso contrario si
potrebbero arrugginire
contatto. Si raccomanda inoltre di non sott
Messa a fuoco
■Messa a fuoco in modalità Autofocus
Impostate il fuoco della macchina fotografica in vostr
modalità Autofocus (
La messa a fuoco avverrà automaticamente premendo il pulsante
dell’
■Messa a fuoco in modalità Manuale
Impostate il fuoco della macchina fotografica in vostr
modalità Focus (MF) prima di utilizzarla.
Regolate la messa a fuoco ruotando l’anello di messa a fuoco e
controllando l’immag
È anche possibile effettuare una messa a fuoco di pr
la funzione di ingrandimento della visualizzazione.
[Messa a fuoco manuale diretta]
Questo obiettivo permette la regolazione manuale di precisione della
messa a fuoco anche durante le inquadrature in modalità Autof
senza dover cambiare modalità.
Impostate la modalità del fuoco della macchina fotografica su (DMF),
effettuate la messa a fuoco automatica tramite A
premuto il pulsante dell’
la regolazione manuale di precisione della messa a fuoco ruotando
l’anello di messa a fuoco.
Utilizzate questa funzione per gli scatti in modalità Portrait o Macro.
Il paraluce incluso con questo obiettivo permette di proteggere la lente
dalla luce diretta che, penetrando sia frontalment
potrebbe causare bagliori (flare) o immag
influendo negativamente sulla qualità dell’immag
il paraluce in ogni circostanza, sia a prot
mantere alta la qualità delle fot
Nota: a differenza dei rullini analogici, con macchine dig
immagine fisso il rischio di riverbero è maggiore. Si raccomanda
pertanto di montare il paraluce anche in caso di riprese interne.
Allineare il simbolo
(
▼
)
del paraluce con l’indicator
dell’
paraluce stesso in senso orario sino ad avvertirne lo scatto in posizione.
Verificare infine che l’
(
■
)
situato sulla parte inferiore dell’-
vo sia correttamente allineato con l’
(
▲
)
del paraluce.
Par
■ Montaggio del paraluce
Manutenzione e corretta c
Evitare l’
o basse, o ad ambienti con alto tasso di umidità. P
da forti impatti o ur
prolungati, conservare l’-
temente capiente, possibilmente allegando un sacchett
Per pr
superficie della lente dopo ogni utilizzo. Evitare l’utilizzo di solventi,
prodotti contenenti benzene, o sostanz
eventuale sporco o impronte dig
Utilizzare esclusivamente un panno morbido leggermente umidificato
con apposito liquido per la pulizia delle lenti, o un panno apposito per
la pulizia delle lenti.
Per una buona cura e manutenzione delle componenti est
rimuovere abitualmente eventuali macchie, polv
panno di camoscio o in silicone. Assicurarsi di non limitare la pulizia
solo alla parte anteriore e posteriore dell’
accuratamente anche il barilotto.
In caso di non utilizzo per periodi prolungati, riporre l’
luogo fresco, asciutto e pr
deterioramento del rivestimento della lente, si raccomanda di porre
l’
Questo obiettivo non è dotato di elementi impermeabili o resistenti
all’acqua. In caso di pioggia o di utilizzo in luoghi in prossimità di fonti
d’acqua, fare attenzione affinché la lente non si bagni. Infiltrazioni
d’acqua all’interno dell’-
menti o danni irreparabili.
Violenti o improvvisi sbalzi di temperatura possono causare l’
di condensa all’interno dell’
l’
inserire preventivamente l’
busta di plastica, nonché di procedere all’utilizzo solo una volta la
temperatura dell’ambiente si sia stabilizzata.
•
•
•
•
•
•
Note sull’uso del flash incorporat
Quando si scattano foto con il flash incorporato , o con un piccolo flash
dedicato innestato sul corpo della macchina, parte della luce emessa
potrebbe risultare bloccata dall’
sua ombra sulle immagini. P
utilizzare un flash esterno.
Modalità di rotazione dell'anello di messa a fuoco
Il senso di rotazione dell'anello messa a fuoco manuale è lo stesso degli
obiettivi originali.
Filtri
Con questo obiettivo è possibile utilizzare solo filtri circolari
presenza di sporco o di condensa sulla superficie del filtro può causare
bagliori (flare) o immagini fantasma (ghosting) nella foto
pertanto di detergere e asciugare accuratamente la superficie del filtro
prima di qualsiasi ripresa.
Nota: utilizzare un solo filtro alla volta. L-
neamente può causare la presenza di vig
T
11-18 mm
F 2.8
F 22
APS-C
Rivestimento multistrato
11 gruppi / 13 elementi
104.3° ~ 76.7°
0.19 m / 0.3 m
1 : 9.2 / 1 : 12.4
Interno
9
Lunghezza focale
Luminosità (apertura massima)
Apertura minima
Formato
Rivestimento
Struttura dell’
Angolo di campo
Distanza minima del soggetto
Ingrandimento massimo
nelle foto macro
Metodo di messa a fuoco
Numero delle lamelle
del diaframma
Diametro del ltro
Lunghezza totale
Diametro massimo
Peso
Paraluce
67mm
74.1mm
74.4mm
335g
BH-674
11
12
1
3
1
4
1
5
1
6
1
7
1
8
❶
❷
❺
❻
❸
❹
※Il marchio è un simbolo graco che deve essere obbligatoriamente
apposto ai prodotti designati commer
Economico Europeo (SEE) in conformità alle disposizioni comunitarie
pertinenti. È anche il marchio che dichiara la conformità alle direttive
RoHS ed EMC.
※Il marchio è un simbolo graco che deve essere obbligatoriamente
apposto ai prodotti designati commer
(Inghilterra, Galles e Scozia) in conformità alle disposizioni per
anche il marchio che dichiara la conformità alle direttiv
※Il simbolo indica inoltre il rispetto delle norme previste dalla
direttiva China RoHS (misure amministrative di controllo del liv
inquinamento causato dall’
Note: si prega di prender
prodotto potrebber
apportate al prodotto.
❶Indicatore di montaggio paraluce
❷ Ghiera di messa a fuoco
❸ Indice centrale
❹ Scala della lunghezza focale
❺ Ghiera dello zoom
❻ Indicatore di montaggio sul corpo macchina
ITALIANO
Nomenclatura
Nota: assicurarsi di ruotare il paraluc
dello scatto in posizione. In caso contr
risulterà correttamen
sull'immagine finale.
Indicatore di
montaggio paraluce