
Synology DVA3219 Manual
PDF manual · 67 Pages
English



Quick check
Incorrect answer, please try again.
Chat with your Synology DVA3219 manual using AI
Get instant AI answers from your Synology DVA3219 manual
Ask anything about the Synology DVA3219. Answers come from this manual, with the pages they are based on.
Ask a Question
Do you recommend DVA3219?
Yes NoFrequently Asked Questions
Open Surveillance Station main menu, go to IP Camera, then choose Add > Add Camera. Use Quick Setup to search for cameras on your local network, select the device, test the connection, and finish. You can also manually enter name, IP, port, brand/model, username, and password when needed.
Is this answer helpful?
You can add cameras via User-Defined compatibility to match different streaming devices. You can also use ONVIF to discover cameras and load their capabilities automatically. During setup, select ONVIF (or the ONVIF interface/brand option), provide credentials, load capability, then test connection and complete installation.
Is this answer helpful?
Event Detection supports modes like Motion, ACAP VMD (AXIS VMD), Audio, Tampering, PIR, and ACAP Apps when the camera supports them. Notifications can be sent through email, SMS, and push/mobile services. You can also attach event snapshots and limit how frequently messages are sent using an interval schedule.
Is this answer helpful?
Live View Analytics provides intelligent target tracking during live viewing and recording. It lets you pick an analytics type, then use Simulation mode to fine-tune sensitivity, detection zone, and object size for each camera. Once configured, you can enable alerts so suspicious events trigger smart recording, and you can review archived sessions later.
Is this answer helpful?
Yes. Create PTZ preset positions, then build a patrol path by selecting presets in order, setting interval and movement speed (if supported), and saving. To automate repeats, create an Action Rule with Rule Type scheduled and set the action device as the PTZ camera using your patrol configuration.
Is this answer helpful?
CMS lets a host server manage multiple Synology recording servers in one central interface. You can add recording servers, migrate cameras between servers, and optionally set failover roles to increase uptime. CMS Failover supports automatic failover when conditions are met and can restore recordings and snapshots afterward based on your settings.
Is this answer helpful?
Advantages and Disadvantages
Advantages

- Supports over 6000 IP cameras and includes ONVIF compatibility for broader device choice.
- Comprehensive recording configuration: schedules, pre/post-recording, retention days, and archive size limits.
- Live View Analytics with simulation mode helps tune detection sensitivity, zone, and object size.
- Flexible monitoring and evidence workflows: layouts, snapshots, timeline playback, smart search, and locked recordings.
- Scalable management with CMS hosting, camera migration, and failover servers for higher uptime.
Disadvantages

- Feature depth means more configuration steps, which can be challenging for new users.
- Advanced capabilities depend on camera support, such as PTZ, specific event types, and analytics inputs.
- Push/mobile notifications require correct Internet access and service setup.
- Storage, archive rotation, and bandwidth controls need planning to avoid unexpected overwrites or gaps.
- Using CMS/failover, encryption, and I/O modules adds integration complexity.
Product Specification
Channels
32
Compression
MJPEG, MPEG-4, H.264, H.265, MxPEG, PCM, G711, G726, AMR, AAC
Hard drive
4x 3.5" SATA 6Gb/s
Drive
N/A
Interfaces
4x RJ-45, 3x USB 3.0 (Host), 2x eSATA (Host), 1x COM-Port
Features
controllable via app (Android, iOS), NFS, FTP, WebDAV, SSH, VPN
Manufacturer's warranty
three years
Product Description
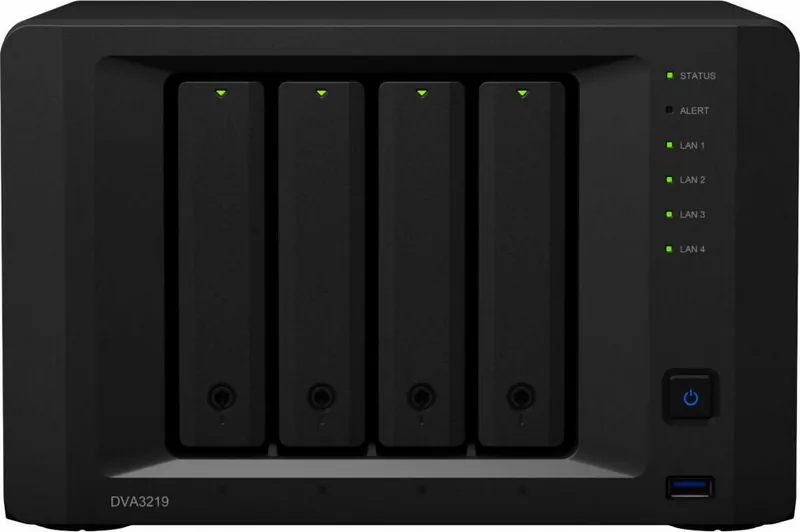
Synology Deep Learning NVR DVA3219: Centralized Surveillance with Surveillance Station
The Synology Deep Learning NVR DVA3219 (32-channel) is built for teams and households that need a reliable, centralized way to manage many IP cameras. With Surveillance Station 8.2 or above, the system turns your existing surveillance equipment into a more actionable monitoring experience, helping you respond faster to what matters most. After hardware and DSM/NVR setup, you can launch Surveillance Station from the main menu and organize everything from the desktop taskbar, including quick access to applications, notifications, search, and security lock features.
Getting started is designed for both speed and flexibility. You can add Synology supported cameras using the Add Camera Wizard with Quick Setup, searching your local network and testing connections before you finalize. If a device is not on the support list, Surveillance Station can still work through user-defined compatibility or ONVIF discovery, loading camera capabilities automatically when supported credentials are provided. From there, you refine device and recording settings: recording schedules, file length, retention windows, archive size limits, and storage estimates for continuous recording.
Live monitoring becomes more powerful with layouts, alerts, and PTZ control. Live View layouts let you drag and drop camera feeds, take snapshots, and adjust viewing options for PTZ cameras. Live View Analytics adds intelligent tracking with simulation mode, so you can tune sensitivity, detection zones, and object size, then archive results for analysis. When events occur, configured notifications can alert you via email, SMS, or mobile push, including optional event snapshots and message interval limits.
For playback and evidence handling, Timeline supports multi-channel reconstruction with time filtering, smart search for specific behaviors, and filters by recording mode or events only. Recording management includes play, download, lock for important clips, truncation of a recording in progress, and export and mounting of archived footage. You can also add encrypted recording storages to better control data security.
As your setup grows, Action Rules automate workflows, combining schedules, patrol routes, and I/O module triggers. Central Management System (CMS) ties multiple Synology devices together with recording server roles, camera migration, and failover options to maximize uptime. Extra tools like Home Mode, E-Map, Snapshot management, Smart Time Lapse, and Log controls help you adapt the system to real-world situations.
Key takeaways
- Add cameras quickly with supported discovery, then fine-tune recording schedules, retention, and archive limits per device.
- Use ONVIF and user-defined options to expand compatibility beyond listed models.
- Activate analytics simulation to tune detection performance, then trigger smart recording and review archived sessions.
- Automate patrol and responses using PTZ presets, patrol paths, and action rules tied to schedules or events.
- Scale reliability with CMS hosting, camera migration, and failover servers.
Pros and cons
Pros
- Broad compatibility, including over 6000 supported cameras and ONVIF support.
- Detailed recording controls, including schedules, retention, and storage optimization features.
- Smart monitoring tools like Live View Analytics, smart search, and timeline filtering.
- Strong automation with Action Rules, PTZ patrols, and I/O module integration.
- Scalable management using CMS with failover and camera migration.
Cons
- Many settings can create a steeper learning curve for first-time deployments.
- Some features depend on camera support (PTZ, specific motion, PIR, audio, or ACAP functions).
- Push notifications require Internet access and correct service configuration.
- Large multi-camera setups require careful storage and archive planning.
- Advanced integrations (CMS, failover, encryption, I/O) need deliberate configuration.
Notes
- Deleted camera settings are erased, so confirm what you remove.
- Encrypted storage and archive controls are powerful, but should be aligned with your retention goals.
- Use simulation and test triggers to validate analytics before relying on automated recording.
Search for 67,706 Manuals online


Type-in Brand or Model