
StarTech M2E1BRU31C Manual
PDF manual · 2 Pages
English



Quick check
Incorrect answer, please try again.
Chat with your StarTech M2E1BRU31C manual using AI
Get instant AI answers from your StarTech M2E1BRU31C manual
Ask anything about the StarTech M2E1BRU31C. Answers come from this manual, with the pages they are based on.
Ask a Question
Do you recommend M2E1BRU31C?
Yes NoFrequently Asked Questions
The enclosure supports 42 mm, 60 mm, and 80 mm M.2 NVMe SSDs. Use the adjustable drive-length holes and included standoffs to position and secure drives of the correct length.
Is this answer helpful?
No external power adapter is required in most cases; the enclosure draws power from the host USB-C port. However, some USB ports may not supply sufficient current to power an NVMe drive, so using a high-power or USB-C port is recommended.
Is this answer helpful?
Ensure the cover plate is properly aligned with the top housing, that nothing obstructs the sealing surfaces, tighten screws carefully (do not over-torque), and apply the adhesive strips over the drive-cover screws to protect against water and dust ingress.
Is this answer helpful?
On Windows, use the Safely Remove Hardware icon and eject the device before unplugging. On macOS, close windows accessing the drive, drag the drive icon to the Trash (Eject), wait a few seconds, then disconnect. This prevents data loss or corruption.
Is this answer helpful?
Avoid touching exposed circuit boards or internal components while the enclosure is powered. Handling internal electronics when powered can risk damage, shock, or data loss.
Is this answer helpful?
Yes. The package includes a Torx screwdriver, drive-mount screws, cover screws, standoffs for different drive lengths, and adhesive strips to seal the cover screws.
Is this answer helpful?
The product is backed by a two-year warranty. It complies with FCC Part 15 and Canadian ICES/RSS regulations. For full warranty terms and regulatory details, consult StarTech support resources online.
Is this answer helpful?
Advantages and Disadvantages
Advantages

- IP67 rating provides dust and water resistance for reliable field use.
- USB-C 3.1 (USB 3.2 Gen 2) enables high-speed NVMe data transfers without external power.
- Supports multiple M.2 lengths (42 mm, 60 mm, 80 mm) with adjustable mounting.
- Includes Torx screwdriver and mounting hardware for straightforward assembly.
- Two-year warranty and StarTech support with compliance documentation.
Disadvantages

- Not all USB ports may supply enough power; some hosts might require a powered port.
- Manual assembly exposes internal circuit board—requires cautious handling.
- Over-tightening screws can damage the seal or enclosure if not careful.
- IP67 seal depends on correct alignment and screw sealing; user error can reduce protection.
- No mention of active thermal management; sustained high-speed use could raise drive temps.
Product Specification
Form Factor
M.2 2280, M.2 2260, M.2 2242, M.2 2230
Internal Connector
1x M.2 (PCIe 3.0 x2, NVMe)
External Connector
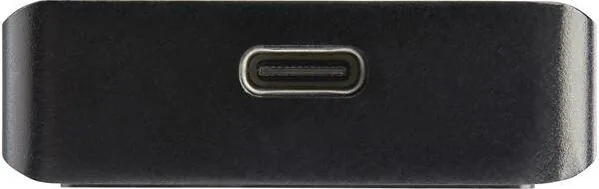
1x USB-C 3.1 (10Gb/s)
RAID Level
N/A
Fan
N/A
Chipset
JMicron JMS583
Dimensions
4.13x1.77x0.55in
Weight
0.22 lb
Color
black
Special Features
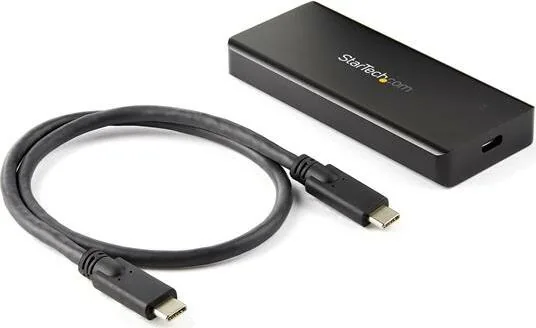
Aluminum housing, waterproof, IP67 certified, incl. USB cable (USB-C)
Manufacturer Warranty
two years
USB Notation
Link
Product Description
StarTech external enclosure M.2 NVMe SSD, IP67, USB-C 3.1 Manual
The StarTech external enclosure M.2 NVMe SSD, IP67, USB-C 3.1 Manual highlights a rugged, high-performance solution for turning M.2 NVMe SSDs into portable, weather-resistant storage. Designed for users who need fast transfer speeds and reliable protection, this enclosure pairs USB-C 3.1 (USB 3.2 Gen 2) connectivity with an IP67-rated shell to guard against dust and temporary immersion in water. It supports multiple M.2 lengths (42 mm, 60 mm, and 80 mm) and provides simple assembly and installation using the included Torx screwdriver and mounting hardware.
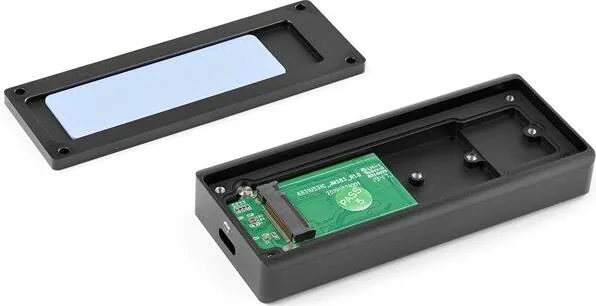
Inside the enclosure, a secure drive connector and adjustable drive-length holes ensure correct alignment and a firm mount. The manual walks through step-by-step installation: removing the cover plate, aligning the drive, seating the keyed connector at a 30° angle, fastening the drive-mount screw, and resealing the cover to maintain the IP67 ingress protection. Adhesive strips are used to seal cover screws for added water and dust resistance. LED feedback indicates power and drive activity, while the USB-C port supplies power and data without an external adapter on most host ports.
For operation, the enclosure is plug-and-play: most modern OSes auto-install required drivers when connected. The guide describes safe disconnect procedures for Windows and macOS to prevent data loss. Safety notes emphasize careful handling of exposed circuit boards and avoiding touching internal components while powered. The product carries FCC and Industry Canada compliance statements and is backed by a two-year warranty, with warranty and support details available on StarTech’s support site.
Practical for fieldwork, media professionals, and anyone needing rugged portable NVMe storage, the enclosure balances speed, protection, and portability. Clear diagrams and torque guidance for screws reduce the risk of improper sealing, and included mounting hardware supports different M.2 drive lengths without extra purchases. The manual also covers regulatory statements, trademark notices, and liability limitations to set expectations about use and support.
Notes:
- Ensure the drive connector is aligned and keyed before seating to avoid damage.
- Confirm your host USB port can supply enough power; some ports may not provide sufficient current.
- Tighten screws carefully to avoid over-torquing which could compromise the seal or damage the drive.
- Follow OS-specific eject procedures to prevent data corruption.
Search for 67,706 Manuals online


Type-in Brand or Model