Manual.ly Logo

SpeaKa Professional SP-TVM-103 Manual

0.0 · 0 Ratings

PDF manual · 4 Pages

English

M: OA-GPT-5-NAN
page

/ 4

Loading...
a25d0e6e5b5ad249e22b48a871a1d220d0e1 page 2
IMPORTANT INFORMATION
Item no. 2564730
Item no. 2564731
Item no. 2564732
General safety instructions for Monitor holders
Dear customer!
As well as providing ergonomic improvement while you are working or playing, monitor holders
also create space.
Depending on which monitor holder you have, your monitor can be adjusted in height, tilted
or even rotated. In this way, the optimal adjustment of your monitor can be made to suit your
needs.
When xing it to a table top or a wall (depending on the design of the monitor holder), however,
there are a few important safety instructions which must be observed. Therefore, please read
the following sections carefully.
General
• A monitor holder is not a toy. Therefore, keep the product out of the reach of children.
• Do not leave packaging material carelessly lying around, since it could become a dangerous
plaything for children.
• The product is intended for use in dry indoor spaces only.
• Verify that the delivery content is complete before assembling the product. Do not assemble
the product if the delivery content is not complete.
• Selecting an unsuitable installation location can lead to personal or material damage!
• Proceed with care when assembling and installating the product! The product has some
sharp edges. There is a risk of injury!
• Carry out only the work on the monitor holder that is necessary in order to install it (or to
change its location). Never dismantle the monitor holder and never attempt to convert it
or to repair it in any way. Some monitor holders contain highly pre-stressed metal springs.
Dismantling such a monitor holder in the wrong way could cause you severe injury!
• Before beginning the installation process, check whether there are appropriate mounting
options for a monitor holder on the back of your monitor.
• It is usually necessary to remove the monitor’s base before mounting the monitor on a
monitor holder. Please consult the operating instructions for your monitor.
Lay the monitor at with its screen side down onto a soft, clean pad or cloth, so that there is
no pressure on the screen and the screen does not get scratched. Protect valuable furniture
surfaces during installation by using a suitable pad or cloth.
Remove the monitor’s base; depending on the monitor’s design, this will either be screwed
or clipped in.
• When xing the monitor holder to the back of the monitor, make absolutely certain that you
use the correct screws. Not only must these be of the correct thread type for the monitor, but
they must also not be too long; otherwise they will damage the monitor.
The screws must not be too short, however, since otherwise the connection will not be secure.
The screws must be screwed into the threaded xture holes on the monitor with at least 5
full 360° turns. The correct screws are usually supplied together with the monitor holder or
with the monitor. Occasionally, however (depending on the monitor type), other screws are
required; these can be purchased from specialist retailers.
Do not use any force when tightening the screws; otherwise the monitor may be destroyed,
leading to loss of warranty/guarantee!
If you have any doubt about the correct length of the screws required, we recommend that
you contact the monitor manufacturer or an appropriate specialist.
• Depending on the size and design of the monitor and monitor holder concerned, it is sensible
for a second person to help with the installation. This person can hold the monitor still, for
example, while you are attaching the monitor to the monitor holder.
• Apply your full concentration when carrying out the installation, because if the monitor and/or
monitor holder were to fall, this could cause expensive damage to the equipment and there
is the potential danger of personal injury!
• Lay all the monitor’s cables in such a way that they do not get jammed or kinked in the
monitor holder.
• Check all the screw ttings from time to time. Adjusting the position of the monitor and/or
the monitor holder and moving them can sometimes cause the screws to become loose
over time.
• Do not exert any force when moving/adjusting the monitor and/or monitor holder, as this
could damage the monitor.
• When moving/adjusting, do not press on the monitor’s screen!
• Do not overload the monitor holder. Pay attention to the details provided by the manufacturer
for the maximum monitor weight and/or its size.
• Do not use the monitor holder to support yourself or to hold onto.
• Do not x any objects to the monitor holder other than the monitor for which it was intended.
• If you are in any doubt, do not carry out the installation yourself; ask a qualied person to
do it for you.
Table Mounting
The following information is relevant for monitor holders that must be
mounted on a table top.
• Attach the monitor holder only to a sufciently stable, horizontal table top. Tables made of
glass, ceramic or stone slabs or thin plastic-coated wooden-bre slabs, are categorically
unsuitable for attachments.
Furthermore, you must not attach the monitor holder to shelves or similar unstable or
unsteady surfaces.
• Attach the monitor holder only at a position on the table top that is suitable for this purpose.
Consider the signicant lever action involved!
• The weight of the monitor and monitor holder as well as its xed position and signicant lever
action can all cause pressure marks on the table top. For this reason, we do not recommend
that you mount it on valuable furniture items!
• For safety reasons, the monitor holder and the monitor that is attached to it should be situated
only above the table surface. The design of many monitor holders means that it is not suitable
for the monitor arm to be situated anywhere other than above the table surface. There is also
a danger of it toppling over in certain circumstances!
• Ensure that the monitor holder is xed to the table top securely. Otherwise it could slip off
the table top when you are moving the monitor and the monitor holder. As well as causing
material damage, this poses a danger of personal injury!
Wall Mounting
The following information is relevant for monitor holders that must be
mounted on a vertical wall.
• Wall-mounting is permissible only where the wall concerned is of the correct type and
condition. Lightweight partition walls or those made from gypsum boards are normally
unsuitable. However, specialist retailers do sometimes stock special dowel ttings for such
installation locations. If you are in doubt, ask a specialist before installation.
Depending on the base wall material (e.g. concrete), suitable mounting materials must be
used (screws, dowels, etc.); these are not normally supplied with the monitor holder!
Due to the weight of the monitor and monitor holder and the lever action involved, ensure that
screws are xed securely.
• Plan the installation location carefully, so that the monitor holder with the monitor xed to it
will be situated at the correct height when you have nished.
• Use a spirit level to assist you with mounting the monitor holder on the wall correctly.
• Make certain when drilling and tightening the screws that no cables or pipes are damaged.
Inadvertently drilling through electric cables causes the life-threatening danger of an electric
shock!
Pay special attention to your safety when using electric tools (e.g. a drill).
• Make certain when mounting the product on a wall that nobody is situated in the area
underneath the monitor holder and/or monitor.
This is a publication by Conrad Electronic SE, Klaus-Conrad-Str. 1, D-92240 Hirschau (www.conrad.com).
All rights including translation reserved. Reproduction by any method, e.g. photocopy, microlming, or the capture in
electronic data processing systems require the prior written approval by the editor. Reprinting, also in part, is prohibited.
This publication represent the technical status at the time of printing.
Copyright 2022 by Conrad Electronic SE. *2564730-32_v1_0422_02_dh_ss_4L

Chat with your SpeaKa Professional SP-TVM-103 manual using AI

Get instant AI answers from your SpeaKa Professional SP-TVM-103 manual

Ask anything about the SpeaKa Professional SP-TVM-103. Answers come from this manual, with the pages they are based on.

Ask a Question

0/1000

Do you recommend SP-TVM-103?

Yes No

Frequently Asked Questions

A

Avoid glass, ceramic, stone tabletops and thin plastic-coated fiberboard; do not mount on unstable shelves. For wall mounts, lightweight partition walls and standard plasterboard are often unsuitable unless you use special anchors or consult a professional.

Is this answer helpful?

A

Use screws matching your monitor’s threaded VESA holes; they must not be too long (to prevent internal damage) nor too short. Screws should engage at least five full turns. If unsure, refer to the monitor manual or contact the monitor manufacturer or a specialist.

Is this answer helpful?

A

Smaller monitors may be manageable solo, but larger or heavier displays often require a second person to hold the monitor while attaching it. If in doubt about weight, wall type, or mounting safety, hire a qualified installer.

Is this answer helpful?

A

Choose a sufficiently stable, horizontal desk and position the mount where lever forces are minimized. Protect surfaces with a pad during installation and avoid mounting on valuable furniture to reduce risk of pressure marks or damage.

Is this answer helpful?

A

Ensure all screws and fastenings are secure, cables are routed to avoid pinching, and the mount is fixed firmly to the substrate. Periodically recheck screw fittings after use and avoid exerting force or pressing the monitor screen during adjustments.

Is this answer helpful?

A

No. The product is intended for indoor use only in dry conditions. Exposure to moisture may damage the mount and void safety or warranty considerations.

Is this answer helpful?

A

Do not proceed with installation. Verify VESA compatibility, screw types and maximum supported weight and size. Contact the monitor or mount manufacturer, or consult a professional installer for guidance.

Is this answer helpful?

M: OA-GPT-5-NAN

Advantages and Disadvantages

Advantages

  • Adjustable height, tilt and swivel to optimize ergonomic viewing positions.
  • Compatible with table or wall mounting for flexible workspace arrangements.
  • Sturdy design reduces desk clutter and improves usable surface area.
  • Clear safety guidance reduces risk of improper installation or damage.
  • Periodic maintenance reminders (check screws, manage cables) prolong lifespan.
VS

Disadvantages

  • Not suitable for fragile surfaces like glass, ceramic, thin fiberboard or weak shelves.
  • Requires correct screw selection and possible purchase of special anchors for some monitors or walls.
  • Improper installation or under-spec anchors can cause tipping, damage or injury.
  • May leave pressure marks on valuable furniture due to weight and lever forces.
  • Some steps may need two people or a professional installer for larger monitors.
M: OA-GPT-5-NAN

Product Specification

Type

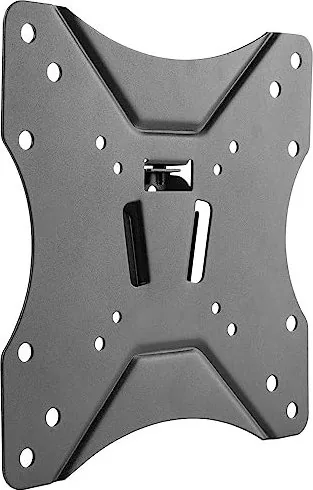
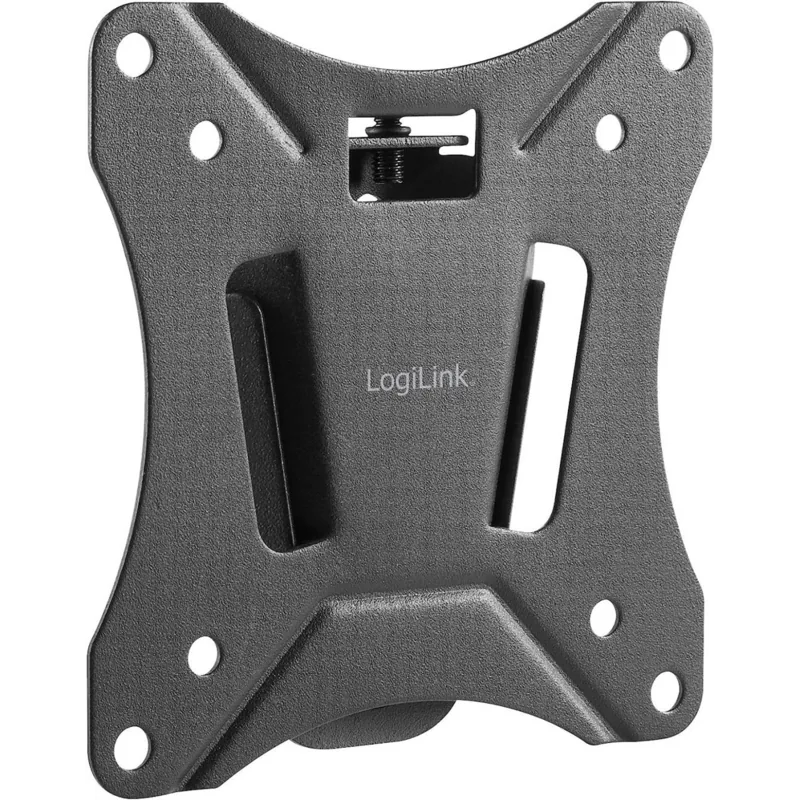
Wall mount

Number of monitors

1

Screen size

23-42"

Mobility

rigid

Max. load capacity

77.16 lb

VESA

min. 75x75, max. 200x200

Color

black

Weight

1.57 lb

M: OA-GPT-54-NAN

Product Description

SpeaKa professional SP-TVM-103 Manual: Safe, Stable Monitor Mounting

The SpeaKa professional SP-TVM-103 is a robust monitor mounting solution designed to improve ergonomics and free up desk space. Adjustable for height, tilt and swivel, it adapts to varied working and gaming setups. Built for both table and wall installation variants, the SP-TVM-103 supports secure placement of flat-panel displays while offering flexible positioning to reduce neck and eye strain.

Installation requires careful planning: select a stable, horizontal table or a suitably strong wall, and use appropriate mounting hardware for the substrate (concrete, wood, or special anchors for hollow walls). The mount’s lever effect makes positioning critical — place the mount where the arm and monitor remain over the desk surface to avoid tipping and undue stress on furniture.

Before attaching the monitor, verify the screw types and lengths required by your display. Use screws that match the monitor’s VESA or threaded holes and ensure they engage at least five full turns for a secure connection. Do not over-tighten screws to avoid damaging the monitor. If unsure about screw length or compatibility, consult the monitor manufacturer or a professional.

For table-mounted setups, fix the clamp or base only to sufficiently stable tops — avoid glass, ceramic, stone, thin coated fiberboard or fragile surfaces. The weight and lever forces can leave pressure marks; avoid mounting on valuable furniture. For wall-mounted setups, confirm the wall material is appropriate; lightweight partition walls often require special anchors or a professional installer.

Safety and maintenance are emphasized: keep children away from the mount and packaging, protect surfaces during assembly, and avoid using the mount as a support to lean on. Periodically check all fastenings, route cables to prevent pinching, and never press the monitor screen when adjusting the arm. Some assembly tasks may require a second person for safe handling of larger screens.

The SP-TVM-103 is intended for indoor, dry use and can significantly improve workspace ergonomics when installed correctly. Follow all manufacturer weight and size limits and heed safety recommendations to prevent damage or injury.

Notes

  • Always check delivery contents before beginning installation.
  • Use a spirit level for wall mounting and suitable drill anchors for the substrate.
  • If in doubt, hire a qualified installer.
M: OA-GPT-5-NAN

© Copyright 2026 Manual.ly
