
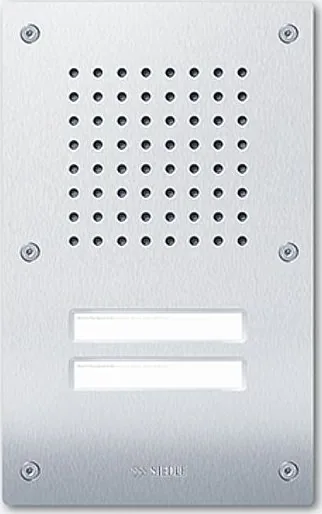
Siedle Classic CL 111 Manual
PDF manual · 20 Pages
English



Quick check
Incorrect answer, please try again.
Chat with your Siedle Classic CL 111 manual using AI
Get instant AI answers from your Siedle Classic CL 111 manual
Ask anything about the Siedle Classic CL 111. Answers come from this manual, with the pages they are based on.
Classic CL 111 Maintenance Schedule
Apply a commercially available non-abrasive metal care product with a cloth or chamois leather. Wipe off completely to avoid stains.
Unscrew the call button screws, remove the name plate, inscribe the name as required, and reinstall.
Ask a Question
Do you recommend Classic CL 111?
Yes NoFrequently Asked Questions
No, electrical installation and service must only be performed by a qualified electrician to comply with safety standards like DIN VDE 0100.
Is this answer helpful?
Yes, the CL 111 is designed to use the fixtures of the existing flush-mount housing from Portavox units made between 1968 and 1988.
Is this answer helpful?
The R models are reverse compatible for standard 6+n systems, while the F models support hands-free duplex intercom systems with THT stations.
Is this answer helpful?
Use a non-abrasive metal cleaner on the aluminum parts with a cloth. Do not use this on plastic nameplates as it can cause milky discoloration.
Is this answer helpful?
In some cases, yes. If there are no reserve wires, the existing rectifier LN 8001a may need to be exchanged for NG 402-03.
Is this answer helpful?
Yes, the call button can be unscrewed to remove the nameplate for custom inscription or professional re-lettering via Siedle service.
Is this answer helpful?
Advantages and Disadvantages
Advantages

- Directly replaces Portavox units from 1968-1988 without changing the flush mount housing
- Compatible with a wide variety of existing apartment call stations and power supplies
- Includes integrated button lighting for enhanced nighttime visibility
- Easy volume adjustment controls located on the back of the unit
- Modular design allows for easy replacement of internal function modules
Disadvantages

- Requires a qualified electrician for safe installation and servicing
- Wire-saving systems like TL 005 cannot be replaced and need full reinstallation
- Plastic nameplates are sensitive to metal cleaning agents and may discolor
- Specific power supply upgrades may be needed depending on the existing setup
- Terminal 11 from old units remains unused and must be left free
Product Specification
Display
N/A
Image Sensor
N/A
Detection Range
N/A
Protection Class
IP54
Package Contents
1x Outdoor Unit
Product Description
Upgrade Your Entryway with the Siedle Door Communication System Classic CL 111
The Siedle Door Communication System Classic CL 111 represents a seamless evolution in residential security and communication. Designed specifically to replace legacy Portavox units manufactured between 1968 and 1988, this system allows homeowners to modernize their entry experience without the need for extensive rewiring or structural changes. The CL 111 series is engineered to fit into existing flush-mounted housings, preserving the original aesthetic of your building while introducing superior functionality.
This product line includes versatile models such as the CL 111-1R through CL 111-5R for standard reverse-compatible systems and the CL 111-1F through CL 111-5F for hands-free duplex intercom setups. Whether you are upgrading a simple 6+n technology network or a complex PVZ amplifier system, the Siedle Classic CL 111 ensures compatibility with a wide range of apartment call stations and power supplies. The front panel features integrated lighting for the call buttons, ensuring visibility during night hours, and maintains the classic aluminum finish that has defined Siedle quality for decades.
Installation is straightforward for qualified electricians, utilizing the same mounting fixtures as the older units. The system supports various configurations, from single-button setups to multi-button arrangements with pre-wired terminals for added convenience. Users can easily adjust volume levels for both the loudspeaker and microphone to prevent feedback and ensure clear conversations. The scope of delivery includes all necessary tools, such as Allen keys and screwdrivers, along with an RC element for specific installation scenarios where reserve wires are unavailable.
Maintaining your Siedle system is simple with regular cleaning using non-abrasive metal care products. It is important to avoid applying these cleaners to plastic parts like nameplates to prevent milky discoloration. For those needing personalized touches, nameplate lettering can be customized via the Siedle service. This robust door station combines timeless design with reliable performance, making it an ideal choice for updating older installations efficiently.
Important Notes
- Always disconnect power before beginning any installation or maintenance work.
- Ensure no external voltages greater than 50 V are present inside the housing.
- Plastic components must not be cleaned with metal polishing agents.
- Verify the correct mounting position when inserting new modules.
Search for 67,706 Manuals online


Type-in Brand or Model