Manual.ly Logo

Shelly Dimmer 2 Manual

0.0 · 0 Ratings

PDF manual · 2 Pages

English

M: gpt-5.6-terra
page

/ 2

Loading...
89a85131b2d858c89590dec1affeebe9677f page 1
USER GUIDE
Smart WiFi Dimmer Switch
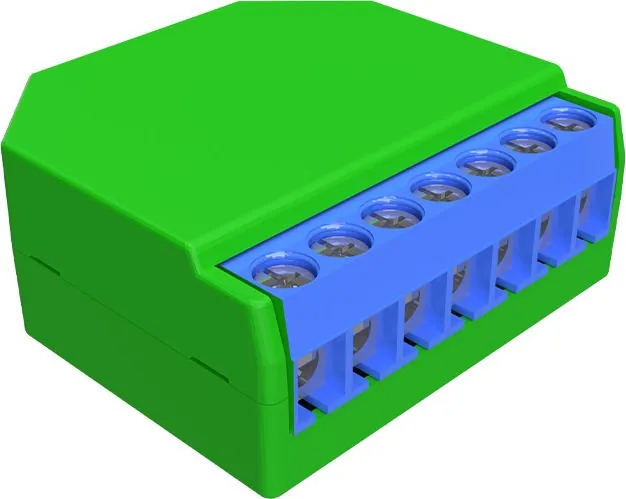
The Shelly® smart WiFi dimmer by Allterco Robotics is intended
to be installed directly to your lights in order to control and dim
the light. It is intended to be mounted into a standard in-wall con-
sole, behind the light switches or other places with limited space.
Shelly may work as a standalone device or as an accessory to a
home automation controller.
SHELLY DIMMER CANNOT BE CONNECTED AND OPERATE A
FAN. DOING SO MAY CAUSE DAMAGE TO THE UNIT OR FAN,
INCLUDING CAUSING A FIRE!!!
Power supply:
110-240V ±10%
50/60Hz AC
Operational current:
0.1 - 1.1A
Device temperature
protection:
105°C
Complies with EU
standards:
• RE Directive
2014/53/EU
• LVD 2014/35/EU
• EMC 2004/108/WE
• RoHS2 2011/65/UE
Working temperature:
from 0°C to 35°C
Radio signal power:
1mW
Radio protocol:
WiFi 802.11 b/g/n
Frequency:
2400 – 2500 MHz;
Operational range
(depending on local
construction):
• up to 50 m outdoors
• up to 30 m indoors
Dimensions (HxWxL):
42 x 36 x 14 mm
Electrical consump-
tion:
< 1,5 W
Supported light types:
• Incandescent and
halogen light sources:
1-220W
• Dimmable LED : 50-
200VA / 1W – 200W
• Resistive-inductive
loads ferromagnetic
transformers: 50-
150VA
Specication
Introduction to Shelly
®
Shelly
®
is a family of innovative Devices, which allow remote
control of electric appli-ances through mobile phone, PC or
home automation system. Shelly
®
uses WiFi to connect to
the devices controlling it. They can be in the same WiFi net-
work or they can use remote access (through the Internet).
Shelly
®
may work standalone, without being managed by a
home automation controller, in the local WiFi network, as well
as through a cloud service, from everywhere the User has
Internet access.
Shelly
®
has an integrated web server, through which the User
may adjust, control and monitor the Device. Shelly
®
has two
WiFi modes - access Point (AP) and Client mode (CM). To op-
erate in Client Mode, a WiFi router must be located within the
range of the Device. Shelly
®
devices can communicate directly
with other WiFi devices through HTTP protocol.
An API can be provided by the Manufacturer. Shelly
®
devices
may be available for monitor and control even if the User is
outside the range of the local WiFi network, as long as the
WiFi router is connected to the Internet. The cloud function
could be used, which is activated through the web server of
the Device or through the settings in the Shelly Cloud mobile
application.
The User can register and access Shelly Cloud, using either
Android or iOS mobile applications, or any internet browser
and the web site: https://my.Shelly.cloud/.
Technical Information
• Control through WiFi from a mobile phone, PC, automa-
tion system or any other Device supporting HTTP and/or
UDP protocol.
• Microprocessor management.
• Shelly may be controlled by an external button/switch.
CAUTION! Danger of electrocution. Mounting the Device
to the power grid has to be performed with caution.
CAUTION! Do not allow children to play with the button/
switch connected the Device. Keep the Devices for remote
control of Shelly (mobile phones, tablets, PCs) away from
children.
Installation Instructions
CAUTION! Danger of electrocution. The mounting/instal-
lation of the Device should be done by a qualied person
(electrician).
CAUTION! Do not connect the Device to appliances ex-
ceeding the given max load!
CAUTION! Connect the Device only in the way shown in
these instructions. Any other method could cause damage
and/or injury.
CAUTION! Before beginning the installation please read
the accompanying documentation carefully and completely.
Failure to follow recommended procedures could lead to mal-
function, danger to your life or violation of the law. Allterco
Robotics is not responsible for any loss or damage in case of
incorrect installation or operation of this Device.
CAUTION! Use the Device only with power grid and appli-
ances which comply with all applicable regulations. short
circuit in the power grid or any appliance connected to the
Device may damage the Device.
RECOMMENDATION: Тhe Device may be connected to
and may control electric circuits and appliances only if they
comply with the respective standards and safety norms.
RECOMMENDATION: The Device may be connected to
and may control electric circuits and light sockets only if they
comply with the respective standards and safety norms.
AWARENESS: If the Device is not connected to the sup-
ported light types, the dimming functionality may not be pres-
ent. However, you will still be able to turn on and off your
lights.
Initial Inclusion
Before installing/mounting the Device ensure that the grid is
powered off (turned down breakers).
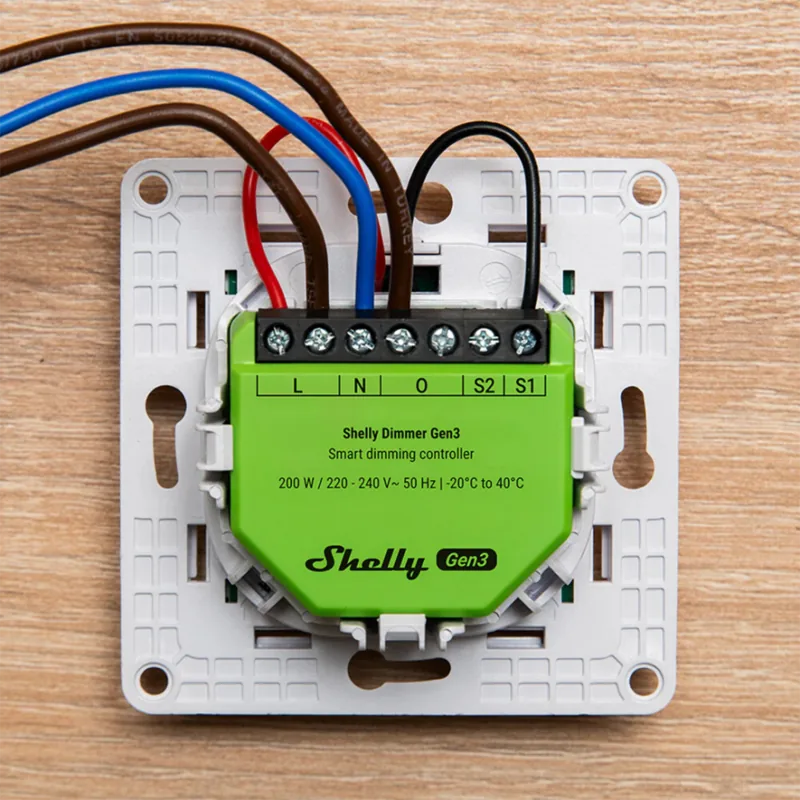
Connect the Device to the power grid and install it in the con-
sole behind the switch/power socket following the scheme
that suites the desired purpose.
1. 1. Connecting to a standard power grid with neutral – g. 1
1. 2. Connecting to a power grid without neutral, with a min-
imal consumption of 10W – g. 2
1. 3. Connecting to a standard power grid with neutral, and
switches also connected to neutral – g. 3
1. 4. Connecting to a power grid without neutral, with no
minimal consumption and using Shelly Bypass – g. 4
You may choose if you want to use Shelly with the Shelly
Cloud mobile application and Shelly Cloud service. You can
also familiarize yourself with the instructions for Manage-
ment and Control through the embedded Web interface.
Control your home with your voice
All Shelly devices are compatible with Amazon Echo and
Google Home. Please see our step-by-step guide on:
https://shelly.cloud/compatibility/Alexa
https://shelly.cloud/compatibility/Assistant
SHELLY
®
MOBILE APPLICATION
Shelly Cloud gives you opportunity to control and adjust all
Shelly
®
Devices from anywhere in the world.
You only need an internet connection and our mobile applica-
tion, installed on your smartphone or tablet.
To install the application please visit Google Play (Android - g.
2) or App Store (iOS - g. 3) and install the Shelly Cloud app.
g. 2
g. 3
Registration
The rst time you load the Shelly Cloud mobile app, you have to
create an account which can manage all your Shelly
®
devices.
Forgotten Password
In case you forget or lose your password, just enter the e-mail
address you have used in your registration. You will then re-
ceive instructions to change your password.
WARNING! Be careful when you type your e-mail address
during the registration, as it will be used in case you forget
your password.
After registering, create your rst room (or rooms), where you
are going to add and use your Shelly devices.
Shelly Cloud gives you opportunity to create scenes for auto-
matic turning on or off of the Devices at predened hours or
based on other parameters like temperature, humidity, light
etc. (with available sensor in Shelly Cloud).
Shelly Cloud allows easy control and monitoring using a mo-
bile phone, tablet or PC.
Device Inclusion
To add a new Shelly device, install it to the power grid fol-
lowing the Installation Instructions included with the Device.
LEGEND:
SW1 - Switch input 1 for on/off/dimming
SW2 - Switch input 2 for on/off/dimming
O
-
Output
L - Line input (110-240V)
N - Neutral input (Zero)
Step 1
After the installation of Shelly and the power is turned on,
Shelly will create its own WiFi Access Point (AP).
WARNING: In case the Device has not created its own
WiFi network with SSID like shellydimmer2-35FA58 check if
you have connected Shelly correctly by the wiring schemes. If
you do not see an active WiFi network with SSID like shelly-
dimmer2-35FA58, reset the Device. If the Device has been
powered on, you have to power it off and on again. After turn-
ing the power on, you have 60 seconds to press 5 consecu-
tive times either switch connected I1/I2. Or if you have phys-
ical access to the Device, press and hold the reset button for
10 seconds. Shelly should return to AP Mode. If not, please
repeat or contact our customer support at:
Step 2
Choose “Add Device”.
In order to add more Devices later, use the app menu at the
top right corner of the main screen and click “Add Device”.
Type the name (SSID) and password for the WiFi network, to
which you want to add the Device.
Step 3
If using iOS: you will see the following screen:
Press the home button of your iPhone/iPad/iPod. Open
Settings > WiFi and connect to the WiFi network created by
Shelly, e.g. shellydimmer2-35FA58.
If using Android: your phone/tablet will automatically scan
and include all new Shelly Devices in the WiFi network that
you are connected to.
Upon successful Device Inclusion to the WiFi network you will
see the following pop-up:
Step 4:
Approximately 30 seconds after discovery of any new Devic-
es оn the local WiFi network, а list will be displayed by default
in the “Discovered Devices” room.
Step 5:
Enter Discovered Devices and choose the Device you want to
include in your account.
Step 6:
Enter a name for the Device (in the Device Name eld). Choose a
Room, in which the Device has to be positioned. You can choose
an icon or add a picture to make it easier to recognize. Press
“Save Device”.
Step 7:
To enable connection to the Shelly Cloud service for remote
control and monitoring of the Device, press “YES” on the fol-
lowing pop-up.
L
N
ONLLLSW2SW1
L
N
ONLLLSW2SW1
L
N
ONLLLSW2SW1
L
N
Bypass
ONLLLSW2SW1
Standard wiring with neutral
g. 1
g. 3
g. 2
g. 4
Standard wiring with neutral and SW
connected to neutral
No neutral wiring*
No neutral wiring with no minimum
load requirements
*When using the device without neutral, Shelly Dimmer 2
requires at least 10W of power consumption, in order to oper-
ate. If the connected light has a smaller power consumption,
then Shelly Bypass is required for the operation of the Device.

Chat with your Shelly Dimmer 2 manual using AI

Get instant AI answers from your Shelly Dimmer 2 manual

Ask anything about the Shelly Dimmer 2. Answers come from this manual, with the pages they are based on.

Ask a Question

0/1000

Do you recommend Dimmer 2?

Yes No

Frequently Asked Questions

A

Shelly Dimmer 2 is an in-wall WiFi actuator for switching and dimming compatible lighting circuits. It can be installed behind a wall switch and controlled locally, through an app, a browser, voice assistants, or supported automation systems.

Is this answer helpful?

A

No. It must not be connected to or used with a fan. The unit is designed for supported lighting loads, and operating a fan with it may damage the actuator or fan and can create a fire hazard.

Is this answer helpful?

A

It supports incandescent and halogen lamps from 1 to 220 W, dimmable LEDs from 1 to 200 W or 50 to 200 VA, and certain resistive-inductive loads using ferromagnetic transformers from 50 to 150 VA. Calibration is recommended after installation.

Is this answer helpful?

A

It supports both neutral and selected no-neutral wiring arrangements. Without a neutral wire, the connected lighting load must consume at least 10 W. For lower loads, such as some LED circuits, a Shelly Bypass may be needed.

Is this answer helpful?

A

Yes. Shelly Dimmer 2 has an embedded web interface that can be opened from a browser on a phone, tablet, or computer connected to its network. It also supports local control through a physical switch and supported HTTP-based automation.

Is this answer helpful?

A

Available settings include calibration, transition time, dimming fade rate, minimum brightness, and warm-up behavior. These controls help match the dimmer to the characteristics of connected bulbs and can improve startup and low-brightness operation.

Is this answer helpful?

M: gpt-5.6-terra

Advantages and Disadvantages

Advantages

  • Compact in-wall design fits behind many standard light switches.
  • WiFi control works through the Shelly app, browser interface, and compatible automation systems.
  • Supports dimmable LEDs, incandescent lamps, halogen lamps, and selected transformer loads.
  • Detailed settings include calibration, minimum brightness, warm-up, fade rate, timers, and schedules.
  • Compatible with Amazon Echo and Google Home for voice-based lighting control.
VS

Disadvantages

  • Not suitable for fans or other unsupported loads.
  • Mains wiring should be completed by a qualified electrician.
  • No-neutral installations need at least 10 W load or may require a Shelly Bypass.
  • Dimming performance depends on using compatible, dimmable light sources.
  • Sunrise, sunset, and weekly schedule functions require an internet connection.
M: gpt-5.6-terra

Product Specification

Type

Actuator

Standard

Wi-Fi (802.11b/g/n)

Function

Switch actuator (on/off), dimming function

Topology

Bus/star

Dimensions

1.65 x 1.42 x 0.55 in

Special features

App-controlled (iOS, Android), voice assistant (Amazon Alexa, Google Assistant)

M: gpt-5.6-terra

Product Description

Shelly Dimmer 2 Switch Actuator with Dimmer - Read, Download & Print Free

The Shelly Dimmer 2 Switch Actuator with Dimmer is a compact smart lighting controller designed to bring flexible brightness control to existing wall switches and lighting circuits. Installed behind a compatible switch in a standard wall box, it helps turn conventional dimmable lights into connected home lighting without requiring a separate hub.

With WiFi connectivity, the unit can be controlled from a phone, tablet, PC, compatible home automation platform, or local web interface. It can also operate independently on a local network, giving homeowners options for managing their lighting setup. Support for HTTP, UDP, MQTT, and CoAP-based integrations makes it a practical choice for users building customized smart-home routines.

Designed for Adjustable Lighting

Shelly Dimmer 2 supports incandescent and halogen lamps, dimmable LED lighting, and selected resistive-inductive loads with ferromagnetic transformers. Its dimming settings can be tailored to the connected bulbs through calibration, minimum brightness adjustments, warm-up behavior, transition timing, and fade-rate controls. These options can help reduce flicker, improve low-level performance, and create a more comfortable lighting experience.

The device supports installations with a neutral wire and selected no-neutral configurations. In no-neutral installations, a connected load of at least 10 W is required. Lower-load lighting may require a Shelly Bypass accessory for reliable operation. Professional installation is recommended because the actuator connects directly to mains voltage.

Automation and Everyday Control

The Shelly Cloud app provides remote control when an internet connection is available, while the embedded web interface offers local configuration through a browser. Users can create rooms, name devices, set timers, configure automatic on or off actions, and build schedules based on set times or sunrise and sunset. Night Mode can apply a chosen lower brightness level during defined hours.

Physical wall control remains part of the setup. The actuator supports several button and switch modes, including one-button, dual-button, toggle, and edge-switch operation. This allows the lighting control to match many existing switch styles while adding smart functions in the background.

Voice-control compatibility with Amazon Echo and Google Home adds another convenient way to adjust connected lights. The device also includes WiFi client backup settings, access point mode, firmware updates, login restriction for the web interface, and over-temperature protection.

Note: Shelly Dimmer 2 is intended for supported lighting loads only. It must never be connected to or used to operate a fan, as this may damage equipment and create a fire risk.

Installation note: Disconnect power at the breaker before wiring. Follow applicable electrical codes and use a qualified electrician for mains installation.

M: gpt-5.6-terra

© Copyright 2026 Manual.ly