
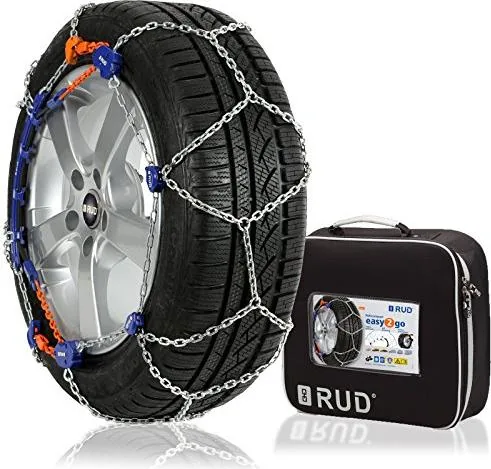
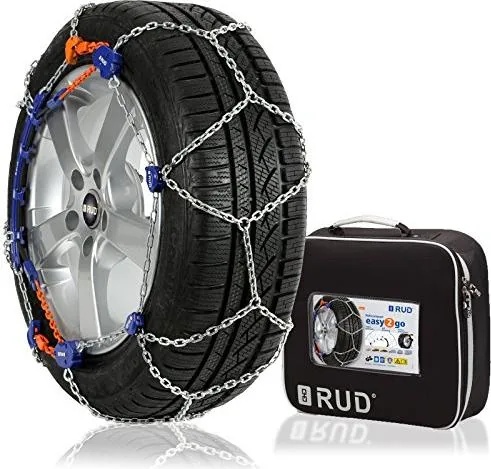
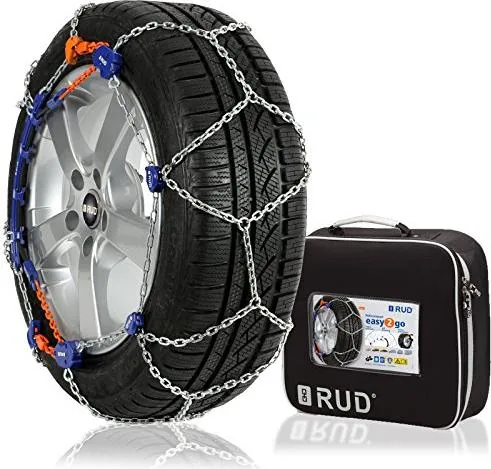
RUD RUDcompact easy2go Manual
PDF manual · 16 Pages
English



Quick check
Incorrect answer, please try again.
Chat with your RUD RUDcompact easy2go manual using AI
Get instant AI answers from your RUD RUDcompact easy2go manual
Ask anything about the RUD RUDcompact easy2go. Answers come from this manual, with the pages they are based on.
RUDcompact easy2go Maintenance Schedule
Rinse the chain with warm water after use and allow it to dry completely before storage.
Do not use the chain if the links show more than 50% wear as breaks may occur.
Ask a Question
Do you recommend RUDcompact easy2go?
Yes NoFrequently Asked Questions
You must not exceed fifty kilometers per hour while driving with the snow chains installed. Adhering to this speed limit is critical for safety and equipment longevity. Exceeding this speed may damage the chains or reduce braking efficiency.
Is this answer helpful?
Start by pulling the chain behind the tire with the orange ring end leading. Connect the closure pieces to form a loop. Hook the orange and grey hooks into the designated eyelets on the wheel. Finally, attach the chain mesh eyelets to the rubber tensioner to secure the fit.
Is this answer helpful?
Remove the chains when winter conditions improve or you are driving on dry roads. Proper removal requires parking the vehicle so hooks face specific positions. Unhook the tensioner, release the ratchet, and pull the mesh toward the wheel center to open the connector.
Is this answer helpful?
After each use, rinse the chains with warm water and allow them to dry thoroughly. Store them in a dry place away from the elements. Always store accessories like gloves and spare parts with the chains to keep everything together.
Is this answer helpful?
If the links show more than fifty percent wear, cease usage immediately. Worn chains can break and cause damage to your vehicle or injury. Do not attempt to repair chains with significant wear or degradation of the metal links.
Is this answer helpful?
Yes, the easy2go system features automatic tensioning. As you drive, the rubber tensioner adjusts the chain to maintain the correct fit. This ensures the chain stays secure without frequent manual stops to re-tighten the assembly.
Is this answer helpful?
Advantages and Disadvantages
Advantages

- Simple installation process with color coded components
- Automatic tensioning during driving for stability
- Durable chain mesh with rubber tensioner
- Quick removal procedure for storage
- High-visibility orange marking aids placement
Disadvantages

- Maximum driving speed limited to 50 kilometers per hour
- Braking distance increases on dry pavement
- Usage must stop if links exceed 50 percent wear
- High-visibility safety vest required for installation
- Not suitable for use on completely dry roads
Product Specification
Vehicle Type
Passenger Car
Type
Snow Chain
Tensioning
Automatic
Rim Protection
Yes
Product Description
Introduction
Winter driving requires reliable safety equipment. The RUD RUDcompact easy2go Manual serves as a guide for snow chains. This product represents a high-quality solution for icy roads. The design prioritizes ease of installation and removal. Drivers can achieve confidence through proper understanding of the system components.
Component Overview
The system features distinctive color coding for clarity. An orange marked ring end indicates the leading point behind the wheel. The main ring encircles the tire efficiently. Connecting pieces join the ends securely to form a closed loop. Hooks in orange and grey correspond to eyelets. A ratchet mechanism controls tensioning precisely. A rubber tensioner attaches to the chain mesh. This configuration ensures the chain stays in place.
Installation Steps
Start by pulling the chain around the rear of the tire. Ensure the ring lies near the back of the tire for correct placement. Take both ends of the ring and pull them up the tread. Connect the closure pieces to complete the main loop. On the upper wheel section, hook the orange hook into the designated eyelet. Pull a short length of chain from the ratchet to allow access. Slide the wire hoop over the tread area until it rests on the back. Finally, secure the grey hook into the lower eyelet. Attach the chain mesh eyelets to the rubber tensioner plastic hooks. The system will tighten automatically while you drive.
Safety and Maintenance
Adhering to safety guidelines is critical. Do not exceed fifty kilometers per hour. Braking distances extend on dry pavement. Avoid spinning wheels to prevent damage. Rinse chains with warm water and let dry. Check links periodically for wear. If wear exceeds fifty percent, cease usage. Consult vehicle manufacturer regarding compatibility. High-visibility vest during installation is recommended. Store accessories like gloves and parts with chains.
Removal Procedures
Remove chains for storage to ensure seamless preparation. Park car so orange hook faces positions. For front-wheel drive, align hook with axle height. Rear-wheel drive requires hook at top. Unhook two eyelets from rubber tensioner first. Press release button on ratchet to loosen chain. Pull chain back and repeat for second ratchet. Unhook both hooks from eyelets. Grasp chain mesh near device. Pull mesh toward center. Move closure mechanism to front. Open closure connector. Shake loose if resists movement. Lay chain on ground. Remove second chain from opposite side. Drive away to clear chains completely. This prevents damage during storage.
Final Thoughts
Detail of kit improves safety outcomes. Regular inspections prevent failure. Durable materials withstand harsh winter conditions effectively. Compliance with speed limits protects the car and passengers. Clean and dry storage prevents corrosion. Trust instructions to guide your actions. Winter weather becomes less intimidating when equipped correctly. Maintain systems for smooth journeys. This product stands as a reliable ally in all snowy conditions you might encounter.
Search for 67,706 Manuals online


Type-in Brand or Model