

RockShox Reverb AXS Manual
PDF manual · 43 Pages
English



Quick check
Incorrect answer, please try again.
Chat with your RockShox Reverb AXS manual using AI
Get instant AI answers from your RockShox Reverb AXS manual
Ask anything about the RockShox Reverb AXS. Answers come from this manual, with the pages they are based on.
Reverb AXS Maintenance Schedule
Check battery levels before and after each use. Charge or replace batteries as needed.
Wipe off dirt with a damp cloth. Clean components with soap and water only. Rinse thoroughly and allow to dry.
Ask a Question
Do you recommend Reverb AXS?
Yes NoFrequently Asked Questions
Yes. The guidance stresses that you must read and understand the included safety instructions before proceeding. Incorrect installation can be extremely dangerous and may lead to severe or fatal injuries. If you have questions, consult a qualified bicycle mechanic. The manual also indicates safety instructions are available online via SRAM.
Is this answer helpful?
Clean the inside of the seat tube and remove burrs from the frame edges. Apply friction paste to the inside seat tube and the seatpost contact surface, and do not apply grease. Insert the seatpost at least 80 mm or to your frame manufacturers minimum insertion, whichever is greater. Tighten the seat collar to the lower of 6.7 N.m or your frame specification.
Is this answer helpful?
Pairing must happen before use. Start the pairing session at the seatpost by pressing and holding the seatpost AXS button until the green LED blinks slowly, then release. After timing out after 30 seconds of inactivity, continue on the controller by pressing and holding the controller AXS button until the green LED blinks quickly, then release. Confirm pairing by pressing the controller paddle. Repeat if the seatpost does not respond.
Is this answer helpful?
You should check charge levels before and after each use. If a battery depletes during use, the seatpost stays in its current position until the battery is replaced. If the controller battery depletes before the seatpost battery, the seatpost AXS button can raise or lower the seatpost. The LED can show near depletion (blinking red) and indicates the battery safety shutoff has activated.
Is this answer helpful?
When you press the controller paddle, controller AXS button, or the seatpost AXS button, the LED illuminates. The LED color indicates battery charge level. During use, if the seatpost does not respond to controller input, it can indicate the SRAM battery is near depletion (blinking red) and the safety shutoff has been activated.
Is this answer helpful?
No. The guidance explicitly says you must not attempt to adjust air pressure using the air valve on the seatpost. Any change to the factory air pressure setting can render the seatpost inoperable, requiring full service.
Is this answer helpful?
Advantages and Disadvantages
Advantages

- Wireless AXS actuation makes it easy to raise or lower the seatpost with controller paddle and seatpost AXS button.
- LED indicator communicates battery charge level and low-power behavior during rides.
- Safety shutoff helps maintain predictable operation when power is near depletion.
- AXS app supports account setup, customization, notifications, and access to service intervals.
- Designed compatibility across seat tube internal diameters and common saddle rail types.
Disadvantages

- Strict installation requirements (friction paste, minimum insertion depth, torque limits) must be followed to avoid issues.
- Battery handling and charging require care, including keeping hands and gloves clean.
- Pairing can be time-sensitive and must be repeated when components are replaced, added, or removed.
- Air pressure should not be adjusted using the seatpost air valve, or the post may become inoperable.
- SRAM components typically need specialized tools and are best installed by a qualified mechanic.
Product Specification
Type
Dropper seatpost
Colors
black
Operation
Remote control
Transmission
Wireless
Cable routing
wireless
Setback
0 in
Product Description
RockShox Reverb AXS - Smooth, Wireless Seatpost Control
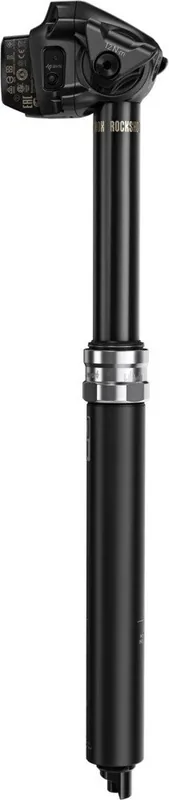
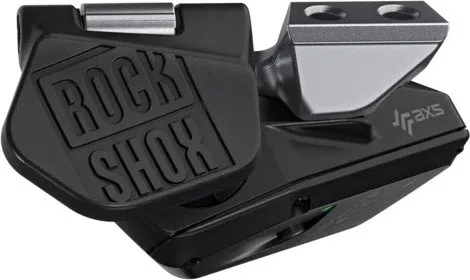
The RockShox Reverb AXS brings electronic, on-the-move suspension tuning to your ride by combining a dropper seatpost with AXS wireless control. Instead of relying on cables or manual levers, you command the seat height at the push of the controller paddle or the AXS button on the seatpost, letting you fine-tune your position for climbs, descents, and technical sections.
This guide-style overview draws on the RockShox Reverb AXS Manual to highlight what matters most for everyday use and installation. After pairing, the system lets the controller send actuation commands to the seatpost. During operation, a built-in LED indicator helps you understand battery status, and if battery power approaches depletion, the system activates a safety shutoff so the seatpost behavior remains predictable.
Setup also includes the SRAM AXS app, which you can download after your components are installed and paired. The app supports account creation, component management, and customization, plus notifications for product features and firmware updates. It also gives access to product data and recommended service intervals, which is especially helpful if you ride frequently or in harsh conditions.
Proper installation is critical. The seat tube must be cleaned before fitment, friction paste should be applied to the inside of the seat tube and the contact surface of the seatpost (do not use grease), and the seatpost must be inserted at least 80 mm or to your frame manufacturers minimum insertion requirement, whichever is greater. Torque matters too: the seat collar should be tightened to the lower of 6.7 N.m or your frame specification.
Notes on safe operation and battery handling are emphasized as well. Do not attempt to adjust factory air pressure using the seatpost air valve, and keep battery handling clean to avoid damage. If your controller battery depletes before the seatpost battery, the seatpost AXS button can still raise or lower the post, with instructions that guide how to lock the desired position.
Key takeaways
- Electronic control lets you raise or lower the seatpost instantly with controller paddle or seatpost AXS button.
- LED charging feedback and safety shutoff help manage low-power situations.
- Friction paste, correct insertion depth, and torque specs are essential for safe, reliable operation.
- Pairing establishes controller-to-seatpost communication and must be redone when components change.
Pros and cons notes
- Expect a more hands-off ride feel, but plan for careful installation and battery upkeep.
Search for 67,706 Manuals online


Type-in Brand or Model