Manual.ly Logo

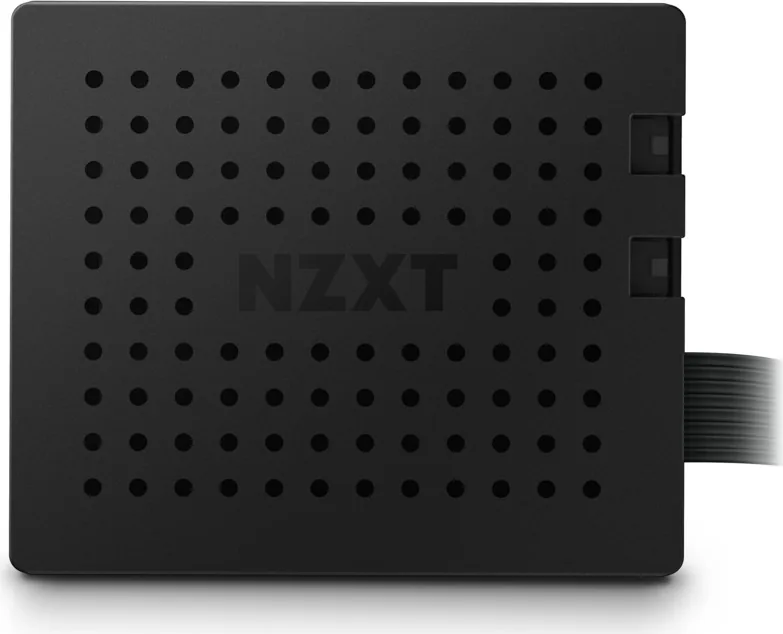
NZXT RGB & Fan Controller Manual

3.9 · 8 Ratings

PDF manual · 2 Pages

English

M: QW-35-FL
page

/ 2

Loading...
d310859371f309137342aa4a4f46228374c4 page 1
POWER
RGB & FAN
CONTROLLER
TWO RGB LIGHTING CHANNELS AND
THREE DIGITALLY-CONTROLLED FAN CHANNELS
PACKAGING CONTENT HARDWARE INTRODUCTION
A NZXT RGB & Fan Controller
x1
D Magnets
x2
C 3M Velcro
x2
B Fan Splitter Cables (1 to 3 split)
x3
STEP 1
STEP 2
A .
NZXT Controlador de Iluminación RGB y Ventilador
B .
Cables divisores de ventilador (1 a 3 )
C .
Velcro 3M
D .
Imanes
1 .
CANALES DE VENTILADOR
2 .
CANALES DE ILUMINACIÓN
3 .
Cable Interno-USB
4 .
Cable de alimentación SATA
1 .
CANAUX DE VENTILATION
2 .
CANAUX D'ÉCLAIRAGE
3 .
Cable Interno-USB
4 .
Cable de alimentación SATA
1 .
LÜFTERKANÄLE
2 .
BELEUCHTUNGSKANÄLE
3 .
Internes-USB kabel
4 .
SATA stroomkabel
1 .
CANALI VENTOLE
2 .
CANALI DI ILLUMINAZIONE
3 .
Cavo Interno-USB
4 .
Cavo di alimentazione SATA
1 .
CANAIS DE FAN
2 .
CANAIS DE ILUMINAÇÃO
3 .
Cabo interno-USB
4 .
Cabo de energia SATA
1 .
КАНАЛЫ УПРАВЛЕНИЯ ВЕНТИЛЯТОРАМИ
2 .
КАНАЛЫ ПОДСВЕТКИ
3 .
Кабель внутренний-USB
4 .
Кабель питания SATA
1 .
팬 채널
2 .
조명 채널
3 .
내부 USB 케이블
4 .
SATA 전원 케이블
1 .
ファンチャンネル
2 .
照明チャンネル
3 .
内部USBケーブル
4 .
SATA電源ケーブル
1 .
风扇通道
2 .
照明通道
3 .
Internal-USB 连接线
4 .
SATA 电源线
1 .
風扇通道
2 .
照明通道
3 .
Internal-USB 纜線
4 .
SATA 電源線
A .
RGB- und Lüftersteuerung
B .
Lüftersplitterkabel (Splitten 1 zu 3)
C .
3M Klettstreifen
D .
Magneten
A .
Contrôleur de Ventilateur et Éclairage RGB NZXT
B .
Câbles séparateurs de ventilateur (1 à 3)
C .
Velcro 3M
D .
Aimants
A .
Controller ventole e RGB NZXT
B .
Cavi splitter (1-3 split)
C .
Velcro 3M
D .
Magneti
A .
Controlador de Fan e RGB NZXT
B .
Cabos do divisor de Fans (divisão de um para três)
C .
Velcro 3M
D .
Ímãs
A .
Контроллер NZXT вентиляторов и подсветки RGB
B .
Кабели для вентиляторов(1 к 3)
C .
Застежка-липучка 3M
D .
Магниты
A .
NZXT RGBとファンコントローラー
B .
ファンスプリッター ケーブル( 1:3分岐)
C .
3Mベルクロ
D .
磁石
A .
NZXT RGB및 팬 컨트롤러
B .
팬 스플리터 케이블(1~3 분할)
C .
3M 벨크로
D .
자석
A .
NZXT RGB 和风扇控制器
B .
风扇分频器线缆(1 分 3)
C .
3M 魔术贴
D .
磁吸
A .
NZXT RGB 和風扇控制器
B .
風扇分線器纜線(1 對 3 分線)
C .
3M 魔鬼氈
D .
磁鐵
Make sure your PC is turned off. Connect the power cable to the SATA power connector.
Asegúrese de que su PC esté apagado. Conecte el cable de alimentación al conector de alimentación SATA.
Assurez-vous que votre PC est éteint. Branchez le câble d'alimentation au connecteur d'alimentation SATA.
Vergewissern Sie sich, dass Ihr PC ausgeschaltet ist. Schließen Sie das Stromkabel an den SATA-
Stromanschluss an.
Accertarsi che il PC sia spento. Collegare il cavo di alimentazione al connettore di alimentazione SATA.
Desligue o computador. Conecte o cabo de energia ao conector de energia SATA.
Убедитесь, что ПК выключен. Подключите кабель питания к разъему SATA.
PC전원을 반드시 끕니다. 전원 케이블을 SATA 전원 커넥터에 연결합니다.
PCの電源オフを確認します。電源ケーブルをSATA電源コネクターに接続します。
确保完全关闭 PC。将电源线连接至 电源 SATA 接口。
確認 PC 已關閉。將電源線連接到 SATA 電源接頭。
Connect the USB cable to an internal USB 2.1 port on the motherboard.
Conecte el cable USB a un puerto interno USB 2.1 de la placa base.
Connectez le câble USB à un port interne USB 2.1 de la carte mère.
Verbinden Sie das USB-Kabel mit dem internen USB 2.1-Anschluss auf der Hauptplatine.
Collegare il cavo USB a una porta USB 2.1 interna sulla scheda madre.
Conecte o cabo USB a uma porta USB 2.1 interna na placa-mãe.
Подключите USB-кабель к внутреннему порту USB2.1 на материнской плате.
USB 케이블을 메인보드의 내부 USB 2.0 헤더 포트에 연결합니다.
USBケーブルをマザーボードの内部USB 2.1ポートに接続します。
将 USB 线连接至主板上的内部 USB 2.1 插针。
將 USB 纜線連接到主機板的內部 USB 2.1 連接埠。
INSTALLATION
INSTALACIÓN
INSTALLATION
MONTAGE
INSTALLAZIONE
INSTALAÇÃO
УСТАНОВКА
설치
取り付け
安装
安裝
CONTENIDO DEL EMBALAJE
CONTENU DE L'EMBALLAGE
VERPACKUNGSINHALT
CONTENUTO DELLA CONFEZIONE
CONTEÚDO DA EMBALAGEM
СОДЕРЖИМОЕ УПАКОВКИ
패키지 구성품
パッケージ 内容
包装内容
包裝內容
INTRODUCCIÓN DE HARDWARE
DESCRIPTION DU MATÉRIEL
VORSTELLUNG DER HARDWARE
PRESENTAZIONE DELL'HARDWARE
INTRODUÇÃO AO HARDWARE
ПРЕДСТАВЛЕНИЕ ОБОРУДОВАНИЯ
하드웨어 설명
ハードウェアの概要
硬件介绍
硬體介紹
STEP 3.1
STEP 3.2
STEP 4
Connect any RGB lighting accessories to the 4-pin connector. RGB lighting accessories are sold
separately.
Conecte uno de los accesorios de iluminación RGB al conector de 4 pines. Los accesorios de iluminación
RGB se venden por separado.
Branchez un accessoire d'éclairage RGB au connecteur à 4 broches. Les accessoires d'éclairage RGB
sont vendus séparément.
Verbinden Sie das RGB-Beleuchtungszubehör mit dem 4-poligen Anschluss. RGB-Beleuchtungszubehör
ist separat erhältlich.
Collegare gli accessori di illuminazione RGB al connettore a 4 piedini. Gli accessori di illuminazione RGB
sono venduti separatamente.
Conecte qualquer acessório de iluminação RGB ao conector de quatro pinos Os acessórios de iluminação
RGB são vendidos separadamente.
Подключите дополнительные принадлежности для подсветки RGB к 4-контактному разъему.
Дополнительные принадлежности для RGB подсветки поставляются отдельно.
모든 RGB 조명 액세서리를 4핀 커넥터에 연결합니다. RGB 조명 액세서리는 별매입니다.
RGB照明アクセサリを4ピンコネクターに接続します。RGB照明アクセサリは別売りです。
将 RGB 照明配件连接至 4 Pin 接口。RGB 照明配件需单独购买。
將任何 RGB 照明配件連接到 4 針腳接頭。RGB 照明配件另售。
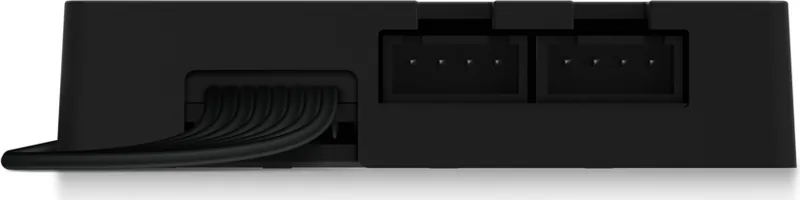
Connect up to three fans directly to the three channels using the connections from the fans. To connect
more than three fans, use the included fan splitters. The first fan connector with 4-pins on the fan
splitter will be the primary fan.
Important - Do not mix 4-pin PWM fans with 3-pin fans on one channel.
Note - To most effectively use NZXT CAM’s smart Adaptive Noise Reduction feature, you should connect
your CPU fan to the NZXT RGB and Fan Controller. If you choose to use this feature, you will need to
disable the CPU Fan warning in your motherboard’s BIOS settings; please consult your motherboard
manual for details on completing this step.
Conecte hasta tres ventiladores directamente a los tres canales utilizando las conexiones para los
ventiladores. Para conectar más de tres ventiladores, utilice los cables divisores incluidos. El primer
conector del ventilador con 4 pines del cable divisor será el ventilador principal.
Importante - No es possible mezclar ventiladores PWM de 4 pines con ventiladores de 3 pines en un canal.
Nota - Para utilizar de manera más efectiva la función adaptativa de reducción de ruido de NZXT CAM,
conecte el ventilador de su CPU al Controlador de Iluminación RGB y Centilador. Si decide utilizar esta
función, desactive la advertencia de ventilador de la CPU en los ajustes del BIOS de la placa base;
consulte el manual de la placa base para obtener más información sobre cómo completar este paso.
Connectez jusqu'à trois ventilateurs directement aux trois canaux à l'aide des connexions des ventilateurs.
Pour connecter plus de trois ventilateurs, utilisez les cables séparateurs fournis. Le premier connecteur de
ventilateur avec 4 broches du cable séparateur sera le ventilateur principal.
Important - Ne pas mélanger des ventilateurs PWM à 4 broches avec des ventilateurs à 3 broches sur un canal.
Remarque - Pour utiliser le plus efficacement possible la fonction intelligente de Réduction Adaptative
du Bruit de NZXT CAM, vous devez connecter le ventilateur de votre CPU au Contrôleur du Ventilateur et
Éclairage RGB. Si vous choisissez d'utiliser cette fonction, vous devrez désactiver l'avertissement de
ventilateur de CPU dans les paramètres du BIOS de votre carte mère ; veuillez consulter le manuel de votre
carte mère pour plus de détails sur cette étape.
Schließen Sie bis zu drei Lüfter direkt an die drei Kanäle an, indem Sie die Verbindungen von den Lüftern
nutzen. Um mehr als drei Lüfter anzuschließen, verwenden Sie die mitgelieferten Lüftersplitter. Der erste
Lüfteranschluss mit 4 Pins am Lüftersplitter ist der primäre Lüfter.
Wichtig: Verwenden Sie keine 4-poligen PWM-Lüfter zusammen mit 3-poligen Lüftern auf einem Kanal.
Hinweis: Um die intelligente adaptive Geräuschunterdrückung von NZXT CAM optimal nutzen zu können,
sollten Sie Ihren CPU-Lüfter an die NZXT RGB- und Lüftersteuerung anschließen. Wenn Sie diese Funktion
nutzen möchten, müssen Sie die CPU-Lüfterwarnung in den BIOS-Einstellungen der Hauptplatine
deaktivieren; Details dazu entnehmen Sie bitte dem Handbuch für die Hauptplatine.
For RGB lighting accessories, connect the lighting connection cable to an LED channel.
Para instalar los accesorios de iluminación RGB, inserte el cable conector de iluminación a un canal LED.
Pour les accessoires d'éclairage RGB, branchez le câble de raccordement de l'éclairage à un canal LED.
Für RGB-Beleuchtungszubehör: Schließen Sie das Beleuchtungsverbindungskabel an einen LED-Kanal an.
Per gli accessori di illuminazione RGB, collegare il cavo dell'illuminazione a un canale LED.
Para acessórios de iluminação RGB, conecte o cabo de conexão de iluminação a um canal de LED.
При использовании дополнительных принадлежностей для подсветки RGB: подключите соединительный
кабель подсветки к каналу светодиодов.
RGB 조명 액세서리의 경우, 조명 연결 케이블을 LED 채널에 연결합니다.
RGB照明アクセサリの場合、照明接続ケーブルをLEDチャンネルに接続します。
对于 RGB 照明配件,将照明线缆连接至 LED 通道。
對於 RGB 照明配件,請將照明連接纜線連接到 LED 通道。
Fan Channels
Lighting Channels
PRIMARY FAN CONNECTOR
Internal USB Cable
SATA Power Cable
4
2 2
B
A A
1
3
x3
x2
x1
x1
1
2
3
4
Collegare fino a tre ventole direttamente ai tre canali tramite le connessioni delle ventole. Per collegare più
di tre ventole, utilizzare gli splitter forniti. Il connettore della prima ventola con 4 piedini sullo splitter sarà
la ventola principale.
Importante: non mescolare ventole PWM a 4 piedini con ventole a 3 piedini su un singolo canale.
Nota: per utilizzare nella maniera più efficiente la funzione di riduzione adattiva intelligente del rumore di
NZXT CAM, collegare la ventola della CPU al controller ventole e RGB NZXT. Per utilizzare questa funzione,
occorrerà disattivare l'avviso relativo alla ventola della CPU nelle impostazioni del BIOS della scheda
madre. Per le istruzioni, consultare il manuale della scheda madre.
Conecte até três fans diretamente aos três canais usando as conexões dos fans.. Para conectar mais de três
fans, use os divisores de fans inclusos. O primeiro conector de ventilador com quatro pinos no divisor de
fans será o fan primário.
Importante: não misture fans PWM de quatro pinos com fans de três pinos em um único canal.
Observação: para um uso mais eficaz do recurso de Redução de ruído adaptável inteligente do NZXT CAM,
conecte o fan da CPU ao controlador de Fan e RGB NZXT. Se você optar por usar esse recurso, precisará
desabilitar o aviso de CPU Fan nas configurações de BIOS da placa-mãe. Consulte o manual da placa-mãe
para obter detalhes sobre como concluir essa etapa.
Используйте соединительные кабели вентиляторов, чтобы подключить до трехвентиляторов непосредственно
к тремвентиляционным каналам. Для подключения большего количество вентиляторов используйте
разветвительные кабели, которые поставляются в комплекте. Основной вентилятор подключается к первому
4-контактному разъему разветвительного кабеля.
Важно! Не подключайте 4-контактные вентиляторы с ШИМ и 3-контактные вентиляторы одновременно к одному каналу.
Примечание. В программе NZXT CAM реализована интеллектуальная Адаптивная Функция Шумоподавления.
Для максимально эффективной работы этой функции необходимо подключить вентилятор ЦП к контроллеру
NZXT подсветки RGB и вентиляторов. При использовании этой функции необходимо отключить предупреждение
для вентилятора ЦП в настройках BIOS материнской платы. Информацию о выполнении этой процедуры см. в
руководстве для материнской платы.
ファンからの接続を使用して、最大3つのファンを直接3つのチャンネルに接続します。4つ以上のファンを接続するには、付属のファ
ンスプリッター を使 用します。ファンスプリッター の
4ピンのある最初のファンコネクターがプライマリファンです。
重要 - 1つのチャンネルに4ピンのPWMファンと3ピンのファンを混在させないでください。
注意 - NZXT CAMのスマートなアダプティブノイズリダクション機能を最も効果的に利用するには、CPUファンを NZXT RGBとファ
ンコントローラーに接続する必要があります。この機能を使用する場合には、マザーボードの
BIOS設定でCPUファンの警告を無効
にする必要があります。この手順の詳細については、マザーボードのマニュアルを参照してください。
팬 연결 단자를 이용하여 팬을 최대 3개까지 세 채널에 직접 연결합니다. 팬 3개 이상을 연결하려면 포함된 팬 스플리터를 사
용합니다
. 팬 스플리터에 있는 첫 번째 4핀 팬 커넥터가 기본 팬이 됩니다.
중요 - 한 채널에서 4핀 PWM 팬과 3핀 팬을 함께 사용하지 마십시오.
참고 - NZXT CAM의 스마트 적응형 소음 제거(ANR) 기능을 효과적으로 사용하려면 CPU 팬을 NZXT RGB와 팬 컨트롤러에
연결해야 합니다. 이 기능을 사용하는 경우에는 메인보드 BIOS 설정에서 CPU 팬 경고를 비활성화해야 합니다. 이 설정에 대
한
자세한 내용은 메인보드 설명서를 참고하십시오.
使用风扇上的接头将风扇(最多三个)直接连接至三个通道。如要连接更多风扇,请使用随附的风扇分频器。风扇分频
器上连接第一个 4 Pin 接头的风扇将被作为主风扇。
注意 - 4 Pin PWM 风扇与 3 Pin 风扇不可在同一通道上一起使用。
提示 - 为最大程度发挥 NZXT CAM 智能自适应降噪功能效果,建议将 CPU 风扇连接到 NZXT RGB 和风扇控制器上。
如果您选择使用该功能,需要在主板的 BIOS 设置中开启禁用 CPU 风扇警告功能。关于如何设置请参阅主板使用手册。
使用風扇的連接,將最多 3 個風扇直接連接到 3 個通道。若要連接 3 個以上的風扇,請使用隨附的風扇分線器。風扇
分線器上第一個有 4 針腳的風扇接頭將是主風扇。
重要 - 請勿在一個通道上混合使用 4 針腳 PWM 風扇和 3 針腳風扇。
注意 - 為了最有效使用 NZXT CAM 的智慧型調適性雜訊抑制功能,您應該將 CPU 風扇連接到 NZXT RGB 和風扇控制
器。如果選擇使用此功能,則需要在主機板的 BIOS 設定中停用「CPU 風扇」警告;如需完成此步驟的詳細資訊,請
查閱主機板手冊。

Chat with your NZXT RGB & Fan Controller manual using AI

Get instant AI answers from your NZXT RGB & Fan Controller manual

Ask anything about the NZXT RGB & Fan Controller. Answers come from this manual, with the pages they are based on.

Ask a Question

0/1000

Do you recommend RGB & Fan Controller?

Yes No
0
User Pic

QuamSed67

7 months ago

Does this fan controller support standard RGB fans from other brands, or is it locked to NZXT hardware only?

0
User Pic

Manual.ly

7 months ago

The controller is optimized for NZXT AER RGB fans to utilize full RGB control through the NZXT CAM software. While it supports standard PWM fans for speed management, the LED connections are proprietary. Official adapter cables for third-party fans are not included. For best results, use compatible NZXT hardware to ensure full functionality.

M: QW-35-FL
M: QW-35-FL

Frequently Asked Questions

A

You must download and install NZXT Cam from the website. This software allows you to manage fan speeds and RGB lighting colors.

Is this answer helpful?

A

It can handle up to three fans directly on the three channels. You can add more using the included fan splitter cables.

Is this answer helpful?

A

Yes, you are restricted to a maximum of 40 LEDs or 6 accessories per channel. Mixing Gen 1 products is not allowed in the same channel.

Is this answer helpful?

A

No, it is strictly recommended not to mix 4-pin PWM fans with 3-pin fans on the same channel to avoid issues.

Is this answer helpful?

A

Connect your CPU fan to the NZXT controller. You must also disable the CPU Fan warning in your motherboard's BIOS settings first.

Is this answer helpful?

A

Fans have a standard two-year warranty coverage under the NZXT Global Warranty Policy. Proof of purchase is required for service.

Is this answer helpful?

A

Yes, it comes with magnetic strips for magnetic surfaces. For non-magnetic cases, use the included 3M Velcro tape.

Is this answer helpful?

M: QW-35-FL

Advantages and Disadvantages

Advantages

  • Simplifies cable management with fan splitters included
  • Integrates seamlessly with NZXT Cam software
  • Supports two digital lighting channels for RGB setups
  • Comes with both magnets and 3M Velcro for mounting
  • Enables noise reduction features for quieter PCs
VS

Disadvantages

  • Cannot mix Gen 1 products like HUE+ in same channel
  • Requires specific internal USB 2.1 port on motherboard
  • Mixing 4-pin PWM and 3-pin fans on one channel is not allowed
  • Requires NZXT Cam software for full customization
  • CPU fan warning must be disabled in BIOS for noise reduction
M: QW-35-FL

Product Specification

Type

Fan Control, Light Control

Form Factor

Special Form Factor

Fans

3

Channels

3 (RPM), 2 (Lighting, 2x proprietary NZXT)

Power

10W/Channel (Fan)

Display

N/A

Power Supply

1x 15-Pin SATA

Fan Connectors

3x 4-Pin

Control Via

1x USB Input (USB 2.0 Header, Software Control)

Front I/O

N/A

M: QW-35-FL

Product Description

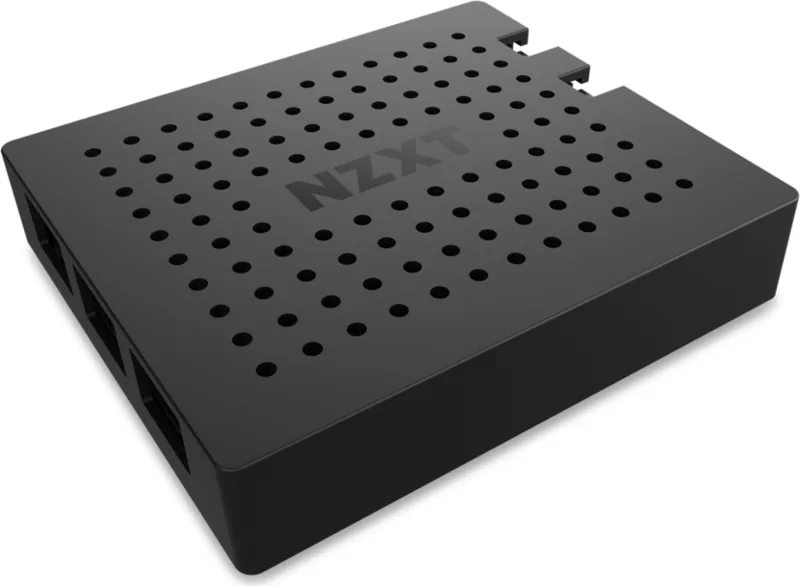
Elevate Your PC Build with the NZXT RGB Fan Controller

Building a custom PC often involves managing complexity within the chassis. The NZXT RGB Fan controller simplifies this process significantly for enthusiasts seeking organization. It offers two digital lighting channels and three digitally controlled fan channels. This versatile hardware allows users to control up to three fans directly or utilize included splitters for additional setups. Proper management ensures clean cable routing throughout your system.

Key Features and Performance

The controller connects via standard SATA power and an internal USB 2.1 port. This ensures stable power delivery and reliable control over connected devices. NZXT Cam software is required for full functionality and customization. It enables the smart Adaptive Noise Reduction feature for optimal acoustic performance. Users should connect the CPU fan specifically to this controller for best performance. The software integration allows for detailed speed curves and lighting synchronization. This helps maintain temperatures and quieter operation during intensive task.

Installation and Compatibility

Installation is straightforward with provided magnets or 3M velcro strips. You can mount it on magnetic surfaces or non-magnetic ones depending on your case design. However, mixing 4-pin Pwm fans with 3-pin fans on one channel is strictly not recommended. Rgb compatibility supports most Ntzxt Rgb products. The limit is 40 leds or 6 accessories per channel. Generations one products like Hueplus strips cannot be mixed in the same channel. The model Ac-sdv02-b1 supports this ecosystem well.

Notes on Installation

You must disable the CPU fan warning in your mothers board bios settings if you use the noise reduction feature. The usb cable connects to an internal usb 2.1 port on the motherboard. Power is supplied through the sata power connector. These steps ensure stable operation without system errors during boot.

Warranty and Support

Ntzxt provides a solid global warranty policy covering most parts for two years. Fans and lighting accessories enjoy this standard coverage. Power supplies have extended coverage under specific programs. If issues arise, customers should contact support with proof of purchase. The product complies with Fcc rules for safety. Support contacts are available via email and phone for global inquiries.

Conclusion

This device helps organize cables and reduce fan noise effectively within a case. It fits well with the broader Ntzxt ecosystem products. If you value clean build aesthetics and system silence, this is a solid choice for your next build. It provides reliability and control over your cooling system.

M: QW-35-FL

© Copyright 2026 Manual.ly