Manual.ly Logo

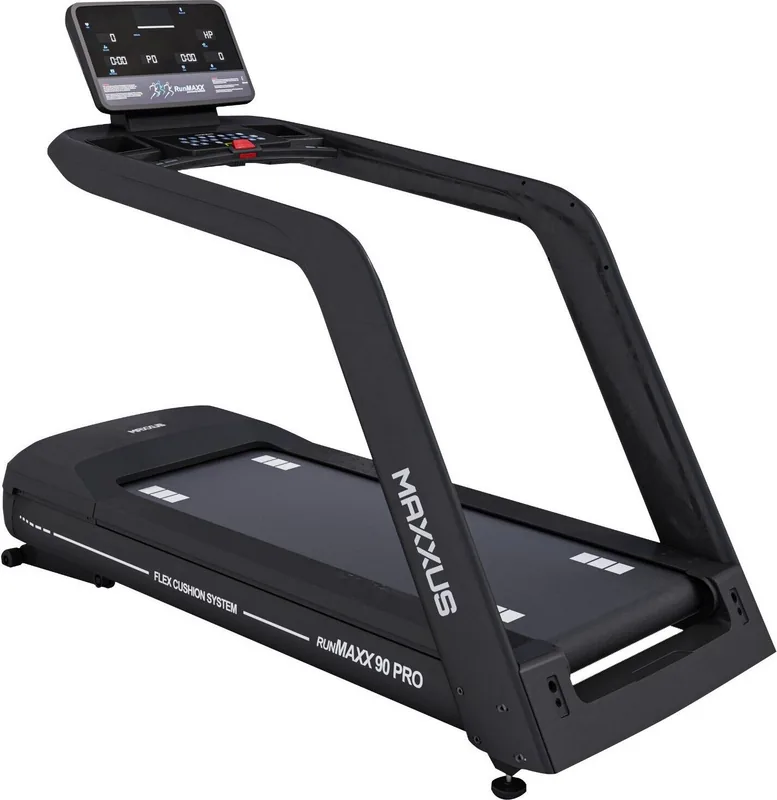
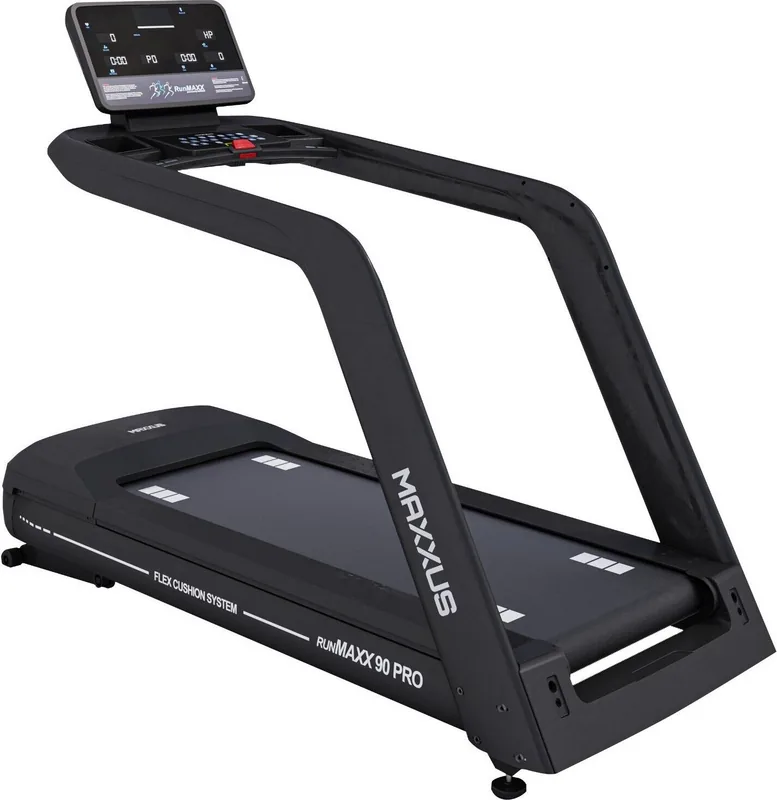
Maxxus RunMaxx 90 Pro Manual

0.0 · 0 Ratings

PDF manual · 32 Pages

English

M: QW-35-FL
page

/ 32

Loading...
41547c99b6bdbae4ae2b9e3c0aa180621cd1 page 1a
Teileliste
26
••••••••• • • • • • • ••••••••••••••••• •••••••••••••••••••• ••••••••••
••••
•••••••••••••••••••••••••••••••••••••••• •••••••••••••••• ••
••••
•••••••••••••••••••••••••••••••••••••••• •••••••••••••••• ••
••••
•••••••••••••••••••••••••••••••••••••••• •••••••••••••• ••
••••
• •••• • ••• ••••••••••• • •••••• • •••• •••••••••••••••••••• ••
••••
••••••• ••••••••••••••••• ••
••••
•••••••••••••••••••••••••••••••••••••••••••• ••
••••
•••••••••••• ••
••••
••••••• ••••• • ••••••• ••
••••
• •••••••••••••••••••••••• • ••••••••••••••• ••••••••••••••••••••• • ••••••••••••••••• ••
••••
• •••••••••••••••••••••• •••••• •••••••••••• ••••••••••••••••••••• • ••••••••••• ••
••••
• •••••••••••••••••••••• •••••• •••••••••••• ••••••••••••••••••••• • ••••••••••• ••
••••
• •••••••••••••••••••••• •••••• •••••••••••• ••••••••••••••••••••• • ••••••••• ••
••••
• •••••••••••••••••••••• •••••• •••••••••••• ••••••••••••••••••••• • ••••••••• ••
••••
• ••••••••••••••••••••••••••••••••••••••••••••••••••••••••••••• •••••••••••••••••• ••
••••
• •••••••••••••••••••••••••••• •••••••••••••••••••••••••• ••••••• • ••••••••• ••
••••
• •••••••••••••••••••••••• • ••••••••••••••• ••••••••••••••••••••• • ••••••••••••••••• ••
••••
• •••••••••••••••••••••••• • ••••••••••••••• ••••••••••••••••••••• • ••••••••••••••••• ••
••••
••••• • •••••••••••••••••••••• ••••••••••••••••••••••• ••• ••
••••
• •••••••••••••••••••••• •••••• •••••••••••• ••••••••••••••••••••• • ••••••••• ••
••••
• •••••••••••••••••••••• •••••• •••••••••••• ••••••••••••••••••••• • ••••••••• ••
••••
••••••••••••••••• • •••• •••••• ••
••••
• •••••••••••••••• • •• • ••••••• • ••••• ••
••••
••••••••••••••••• • • • •••••• •••••• ••
••••
••••••••••••••••• • •••• •••••• ••••
••••
• •••••••••••••••• • •• • ••••••• • ••••• ••
••••
••••••••••••••••• • •••• •••• ••••
••••
•••••••••••••••••••••• ••
••••
••••••• ••••• • ••••••••••••••••• ••••••••••••••••••••• • •••• ••
••••
••••••• ••••• • ••••••••••••••••• •••••••••••••••••••••••••••••• ••
••••
•••••••••••••••••••••• •••••••••••••• ••
••••
•••••••••••••••••••••• •••••••••••••• ••
••••
• •••••••• ••• •••••••••••••• •••••••••••••••••• • ••••••• ••
••••
••••••••••••••••••••••••••••••••••••••••••••••• ••••••••••••••••••••••••••••••••• •••••••••••• ••
••••
••••••••••••••••••••••••••••••••••••••••••••••• ••••••••••••••••••••••••••••••••• •••••••••••• ••
••••
••••••••••••••••••• •• •• •••••••••• • ••••••••••• • • •••••••• • •• • ••••••••••• •••••••••••• ••••
••••
••••••••••••••••••• •• •• •••••••••••• ••••••••••••••••••••••••••••••• • ••••••••• ••
••••
••••••••••••••••••• •• •• •••••••••• • ••••••••••• • • •••••••• • •• • ••••••••••• •••••••••••• ••••
••••
••••••••••••••••• • •••• ••••••• ••••• ••
••••
••••••••••••••••••• •• •• •••••••••••• ••••••••••••••••••••••••••••••• • ••••••••• ••••
••••
••••••••••••••••••• •• •• •••••••••• • ••••••••••• • • •••••••• • •• • ••••••••••• •••••••••••• ••••
••••
•••••• •••••• • •••••••••••••••••••••••••••••••••••• ••• •••• ••
Teileliste
26
••••••••• • • • • • • ••••••••••••••••• •••••••••••••••••••• ••••••••••
••••
•••••••••••••••••••••••••••••••••••••••• •••••••••••••••• ••
••••
•••••••••••••••••••••••••••••••••••••••• •••••••••••••••• ••
••••
•••••••••••••••••••••••••••••••••••••••• •••••••••••••• ••
••••
• •••• • ••• ••••••••••• • •••••• • •••• •••••••••••••••••••• ••
••••
••••••• ••••••••••••••••• ••
••••
•••••••••••••••••••••••••••••••••••••••••••• ••
••••
•••••••••••• ••
••••
••••••• ••••• • ••••••• ••
••••
• •••••••••••••••••••••••• • ••••••••••••••• ••••••••••••••••••••• • ••••••••••••••••• ••
••••
• •••••••••••••••••••••• •••••• •••••••••••• ••••••••••••••••••••• • ••••••••••• ••
••••
• •••••••••••••••••••••• •••••• •••••••••••• ••••••••••••••••••••• • ••••••••••• ••
••••
• •••••••••••••••••••••• •••••• •••••••••••• ••••••••••••••••••••• • ••••••••• ••
••••
• •••••••••••••••••••••• •••••• •••••••••••• ••••••••••••••••••••• • ••••••••• ••
••••
• ••••••••••••••••••••••••••••••••••••••••••••••••••••••••••••• •••••••••••••••••• ••
••••
• •••••••••••••••••••••••••••• •••••••••••••••••••••••••• ••••••• • ••••••••• ••
••••
• •••••••••••••••••••••••• • ••••••••••••••• ••••••••••••••••••••• • ••••••••••••••••• ••
••••
• •••••••••••••••••••••••• • ••••••••••••••• ••••••••••••••••••••• • ••••••••••••••••• ••
••••
••••• • •••••••••••••••••••••• ••••••••••••••••••••••• ••• ••
••••
• •••••••••••••••••••••• •••••• •••••••••••• ••••••••••••••••••••• • ••••••••• ••
••••
• •••••••••••••••••••••• •••••• •••••••••••• ••••••••••••••••••••• • ••••••••• ••
••••
••••••••••••••••• • •••• •••••• ••
••••
• •••••••••••••••• • •• • ••••••• • ••••• ••
••••
••••••••••••••••• • • • •••••• •••••• ••
••••
••••••••••••••••• • •••• •••••• ••••
••••
• •••••••••••••••• • •• • ••••••• • ••••• ••
••••
••••••••••••••••• • •••• •••• ••••
••••
•••••••••••••••••••••• ••
••••
••••••• ••••• • ••••••••••••••••• ••••••••••••••••••••• • •••• ••
••••
••••••• ••••• • ••••••••••••••••• •••••••••••••••••••••••••••••• ••
••••
•••••••••••••••••••••• •••••••••••••• ••
••••
•••••••••••••••••••••• •••••••••••••• ••
••••
• •••••••• ••• •••••••••••••• •••••••••••••••••• • ••••••• ••
••••
••••••••••••••••••••••••••••••••••••••••••••••• ••••••••••••••••••••••••••••••••• •••••••••••• ••
••••
••••••••••••••••••••••••••••••••••••••••••••••• ••••••••••••••••••••••••••••••••• •••••••••••• ••
••••
••••••••••••••••••• •• •• •••••••••• • ••••••••••• • • •••••••• • •• • ••••••••••• •••••••••••• ••••
••••
••••••••••••••••••• •• •• •••••••••••• ••••••••••••••••••••••••••••••• • ••••••••• ••
••••
••••••••••••••••••• •• •• •••••••••• • ••••••••••• • • •••••••• • •• • ••••••••••• •••••••••••• ••••
••••
••••••••••••••••• • •••• ••••••• ••••• ••
••••
••••••••••••••••••• •• •• •••••••••••• ••••••••••••••••••••••••••••••• • ••••••••• ••••
••••
••••••••••••••••••• •• •• •••••••••• • ••••••••••• • • •••••••• • •• • ••••••••••• •••••••••••• ••••
••••
•••••• •••••• • •••••••••••••••••••••••••••••••••••• ••• •••• ••
Part Description Type Qty
43 Communication wire 3 L-2200mm 1
44 Communication wire 2 L-2200mm 1
45 Communication wire L-900mm 1
46 Side rail guider Ø25xØ5x4.5 1
47 Power Socket 1
48 Fuse holder (with wire) 1
49 Switch 1
50 Power cord 1
51 Allen C.K.S. half thread screw M12x80x20 2
52 Allen Column full thread screw M10x35 4
53 Allen Column full thread screw M10x80 3
54 Allen Column full thread screw M8x25 8
55 Allen Column full thread screw M8x10 8
56 Allen Column half thread screw M10x50x30 8
57 Allen C.K.S. full thread screw M8x20 4
58 Allen C.K.S. half thread screw M10x40x20 1
59 Allen C.K.S. half thread screw M12x70x20 1
60 Square cushion 35x35xt5.0xØ8 4
61 Allen Column full thread screw M8x20 1
62 Allen Column full thread screw M8x55 2
63 Flat washer Ø12 3
64 Hex locked Nut M12 3
65 Spring washer Ø10 4
66 Flat washer Ø10 11
67 Hex locked Nut M10 4
68 Flat washer Ø8 13
69 Ground wire 1
70 Power cord wire L-450mm (red) 2
71 Power cord wire L-450mm (black) 2
72 Ground wire L-150mm 1
73 Ground wire L-200mm 3
74 Magnetic ring Ø35xØ22xt15.0 1
75 Phillips countersunk self-tapping Screw ST4x16 8
76 Phillips countersunk self-tapping Screw ST3x10 2
77 Phillips C.K.S. self-tapping Screw ST4x10 10
78 Phillips C.K.S. full thread Screw M5x15 6
79 Phillips C.K.S. self-tapping Screw ST4x15 41
80 Flat washer Ø4xØ12 8
81 Phillips C.K.S. full thread Screw M4x16 15
82 Phillips C.K.S. self-tapping Screw ST4x15 73
83 Outer serrated lock washer Ø5 9

Chat with your Maxxus RunMaxx 90 Pro manual using AI

Get instant AI answers from your Maxxus RunMaxx 90 Pro manual

Ask anything about the Maxxus RunMaxx 90 Pro. Answers come from this manual, with the pages they are based on.

RunMaxx 90 Pro Maintenance Schedule

Remind me when maintenance is due
Weekly
Check lubrication of running belt

Lift the front part of the belt and feel for lubricant in the middle. Lubricate if insufficient.

Weekly
Check belt run alignment

Ensure the belt runs straight along the center of the deck. Correct immediately if it runs to one side.

Monthly
Clean motor compartment

Remove cover and vacuum visible dust. Never use detergent or compressed air.

Monthly
Check mounting materials

Check bolts and nuts at least once a month and tighten if necessary.

After each workout
Clean the treadmill

Clean with a damp cloth to remove perspiration and liquid residues. Do not use solvents.

Free maintenance reminders

Timed to your purchase date. Always free, unsubscribe anytime.

By submitting you agree to the privacy policy. Unsubscribe with one click in any email.
M: QW-35-FL

Ask a Question

0/1000

Do you recommend RunMaxx 90 Pro?

Yes No

Frequently Asked Questions

A

To begin, press the START button after turning on the unit. You can choose a manual mode or one of the 36 programs using the P and M keys. Ensure the safety key is inserted securely before starting to activate the treadmill.

Is this answer helpful?

A

The treadmill includes a Safety Key that stops the belt if pulled away, an Emergency Stop button on the console, and requires specific electrical grounding. Users must also maintain a safe perimeter of 200 cm behind and 100 cm on sides during operation.

Is this answer helpful?

A

You should check the lubrication weekly. The manual recommends applying silicone oil every week. If the belt feels dry or makes noise, apply it immediately. Using the correct silicone oil is crucial to avoid warranty voids.

Is this answer helpful?

A

No, the treadmill is strictly designed for indoor use. It must be kept in a temperate, dry, and clean room. Outdoor conditions or humidity can damage the electronics and mechanical parts, voiding the warranty.

Is this answer helpful?

A

Start the treadmill at 12 km/h. If it runs to the right, turn the right screw clockwise and left counter-clockwise. If it runs left, reverse the directions. Adjust in 1/8 turns until the belt tracks centrally.

Is this answer helpful?

A

The device requires a 220-230V supply with an individually protected 16 Amp socket. It must be grounded by a professional. Do not use power strips or extension cords unless they comply with VDE safety guidelines.

Is this answer helpful?

A

Yes, the console has hand pulse sensors located on the handrails. Place both hands firmly on the metal sensors to get a reading. Note that these are for short-term checks, while a chest strap allows continuous monitoring.

Is this answer helpful?

M: QW-35-FL

Advantages and Disadvantages

Advantages

  • Features 36 distinct training profiles for varied workouts
  • Safety key system allows immediate machine stoppage
  • Quick selection buttons for instant speed and incline changes
  • Supports heart rate monitoring via hand sensors or chest strap
  • Front transport rollers enable easy relocation and storage
VS

Disadvantages

  • Requires specific electrical setup with grounded 16 Amp socket
  • Needs regular weekly lubrication to prevent belt damage
  • Assembly must be performed carefully by multiple adults
  • Demands a significant safety space of 200 cm behind the unit
  • Not designed for outdoor use or uneven ground surfaces
M: QW-35-FL

Product Specification

Motor Power

3.95 HP Continuous, 9.86 HP Peak

Speed

0.62-13.67 mph

Incline

0-15% electronically adjustable

Running Surface

61.02x23.62 in

Max User Weight

330.69 lbs

Dimensions

84.25x35.83x64.57 in

Weight

330.69 lbs

Features

Transport wheels, Hand pulse sensors, Chest strap compatible, Water bottle holder, App support (iOS, Android), USB, Bluetooth

M: QW-35-FL

Product Description

Elevate Your Home Fitness Routine with the MAXXUS 90 PRO

Achieving your fitness goals requires reliable equipment and clear guidance. The MAXXUS 90 PRO Laufband stands out as a robust solution for indoor running enthusiasts seeking professional results. Understanding operational details is crucial, making the Maxxus RunMaxx 90 Pro Laufband Manual an essential resource in your home gym setup. This comprehensive guide details everything from initial assembly to advanced training profiles.

Comprehensive Training Options and Features

One of the standout features is the incredible variety of programs included to keep your workouts engaging. Users can select from 36 distinct training profiles designed to target different fitness zones. Manual training allows presetting time, distance, or calorie targets for focused sessions. The digital display provides real-time feedback on speed, incline, and steps. Whether you are walking lightly or running intensely, the quick selection buttons for speed and incline allow for instant adjustments without interrupting your flow. Heart rate monitoring is also available via hand sensors or an optional chest strap transmitter, ensuring you stay in your desired heart rate zone.

Safety First in Home Environments

Safety is prioritized in the design and layout of this treadmill. The Safety Key is a critical component that stops the machine immediately if pulled away, preventing accidents during emergencies. The unit requires a specific electrical setup, needing a grounded 16 Amp socket with individual safety. Space requirements are also strictly specified to ensure safe operation, mandating at least 200 cm behind and 100 cm on the sides. This ensures ample room to react if they stumble. The emergency stop button offers an additional layer of security for rapid response times during unexpected physical issues.

Maintenance and Longevity

To keep the machine running smoothly, regular maintenance is non-negotiable for users. The lubrication of the running belt is vital to prevent friction damage to the deck and motor. The manual instructs users to check lubrication weekly and apply silicone oil as needed to reduce wear. Belt alignment and tension also require periodic adjustment to prevent slipping or off-center drifting. By following the guidelines found in the Maxxus RunMaxx 90 Pro Laufband Manual, owners can avoid warranty voids and extend the equipment life significantly. Regular cleaning protects electronics from failure due to accumulated debris. Front rollers allow easy relocation within the room.

Warranty and Support

The manufacturer provides guidelines for warranty claims. Contact the service department for technical issues. Unauthorized repairs may void protection. Only certified technicians should handle internal components.

M: QW-35-FL

© Copyright 2026 Manual.ly
