
Kerbl Automatic Chicken Door Control 70550 Manual
PDF manual · 80 Pages
English



Quick check
Incorrect answer, please try again.
Chat with your Kerbl Automatic Chicken Door Control 70550 manual using AI
Get instant AI answers from your Kerbl Automatic Chicken Door Control 70550 manual
Ask anything about the Kerbl Automatic Chicken Door Control 70550. Answers come from this manual, with the pages they are based on.
Automatic Chicken Door Control 70550 Maintenance Schedule
Disconnect the mains plug before cleaning. Keep the door running freely; remove dirt and objects from the closing area and lubricate guide rails if needed.
Check the cord for abrasion and replace it in good time with replacement cord ref. 70552.
Replace batteries at regular intervals even when using the power pack, to prevent battery leakage.
Free maintenance reminders
Timed to your purchase date. Always free, unsubscribe anytime.
Ask a Question
Do you recommend Automatic Chicken Door Control 70550?
Yes NoFrequently Asked Questions
It accepts a 230 V mains adapter and four AA batteries. You can use either supply or both in parallel so batteries act as a backup during mains failure.
Is this answer helpful?
Press and hold the Menu button for about 3 seconds to enter time settings. Use the arrow keys to set weekday open/close times, then weekend open/close times. Confirm each value with OK.
Is this answer helpful?
Both can be active: scheduled close times always execute regardless of light; scheduled open times wait until the sensor detects sufficient brightness. The sensor waits ~1 minute before reacting to avoid transient flashes.
Is this answer helpful?
Ensure the slider weight is sufficient (min 0.5 kg) and not jammed; align guide rails, clean and lubricate tracks, or add weight to the door if it’s too light.
Is this answer helpful?
Press Up when the door is open or Down when closed to reactivate automatic mode. If AC ON is enabled, the controller can also auto-return to automatic mode on the next daily cycle.
Is this answer helpful?
Mount it where it sees unobstructed daylight, away from artificial lights, streetlamps, vehicle headlights or reflections that could influence readings.
Is this answer helpful?
Regularly clean and lubricate guide rails, remove debris from the door path, inspect and replace the pull cord if worn (use spare Art. 70552), and change batteries when the display shows a battery symbol.
Is this answer helpful?
Advantages and Disadvantages
Advantages

- Dual power options (230 V adapter + batteries) with backup capability
- Supports both timed schedules and light-sensor automation with adjustable threshold
- Simple user interface with display and dedicated buttons for easy configuration
- Compact electronics unit with supplied mounting and pulley accessories
- Clear safety and maintenance guidance plus compatibility with original spare parts
Disadvantages

- Requires correct mechanical setup (slider alignment, weight 0.5–2.5 kg) to function reliably
- Mains installations must be performed by a qualified electrician
- Light sensor can be affected by artificial or stray light if poorly positioned
- External pushbutton cannot re-enable automatic mode — must use unit buttons
- Power adapter is not moisture-protected, needs dry sheltered outlet
Product Specification
Suitability
Chickens
Product Description
Kerbl Automatic Chicken Door — Kerbl Automatic Chicken Door Manual
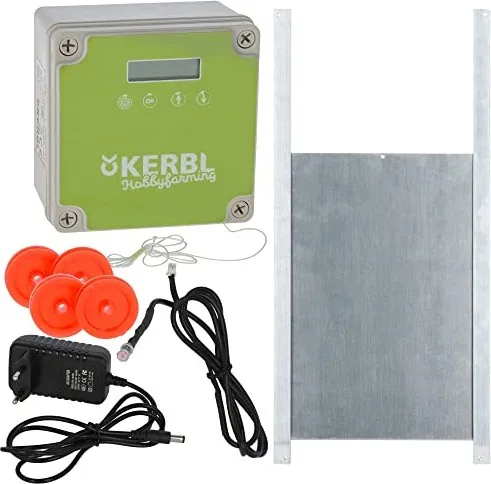
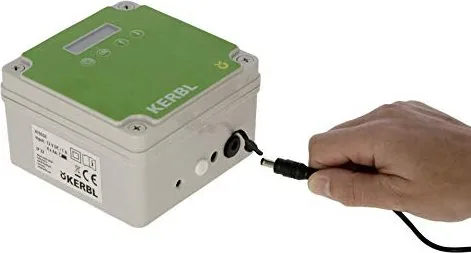
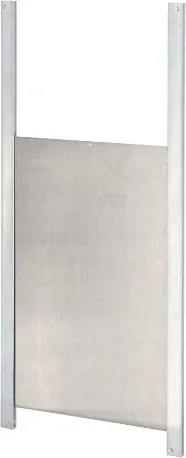
The Kerbl Automatic Chicken Door is a reliable, user-friendly controller designed to automate vertical sliding coop doors (compatible with Kerbl sliders such as Art. 70560, 70570, 70580). It operates the door via a pull cord and can be powered by the included 230 V adapter, batteries (4×AA, preinstalled) or both in parallel for backup. The unit senses ambient light with a supplied sensor and also supports programmable open/close times for weekdays and weekends. A clear display and tactile buttons (Menu, OK, Up, Down) let you set date/time, configure schedules, adjust light-thresholds using an internal dial, and switch between automatic and manual modes.
Installation and setup are straightforward but require planning: select a sheltered, level mounting area, ensure the slider moves freely and weighs between 0.5–2.5 kg, route the cord without friction using supplied pulleys if needed, and fasten the electronics upright with the cord outlet downward. During hookup, move the electronics to the upper end position, set the slider to its upper stop (leave ~50 mm clearance), attach and knot the cord, then trim the excess. For mains installations, have a qualified electrician handle wiring and place the mains adapter in a dry protected outlet.
Operation covers timed automation and light-based control. You can assign independent open/close times for weekdays and weekends, and enable an AC ON option so the controller re-enters automatic mode on the next daily cycle after manual intervention. The light sensor lets the door open/close based on dawn/dusk conditions; the sensor ignores transient flashes by waiting about one minute before reacting. If both timer and light sensor are active, scheduled close times always take precedence, while scheduled open times wait for sufficient light. Manual control is available via on-unit Up/Down buttons or an optional external pushbutton (external button triggers manual mode but cannot re-enable automatic mode). A battery symbol on the display warns when cells need replacing; after battery replacement re-enter date/time.
Maintenance is minimal: keep guide rails clean and lubricated, inspect and replace the pull cord (spare Art. 70552) if abraded, and remove dirt from the door path to avoid motor strain. For faults, consult the troubleshooting table (timer off, light-sensor adjustments, insufficient door weight, obstructions, or incorrect clock settings). Only original spare parts should be used; repairs and mains-cable replacements must be done by qualified electricians or the manufacturer.
Notes:
- Max slider weight 2.5 kg, min 0.5 kg; keep slider movement smooth.
- Use the light-sensor adjustment wheel to fine-tune dawn/dusk thresholds.
- Dispose of the unit and batteries per local e-waste regulations; do not place in household trash.
Search for 67,706 Manuals online


Type-in Brand or Model