
Manual.ly Logo

GIGABYTE AORUS NVMe Gen4 Manual

0.0 · 0 Ratings

PDF manual · 2 Pages

English

M: OA-GPT-54-NAN
page

/ 2

Loading...
5c295c6d885cf86f1ead39d63268bbeeb75f page 2
Solid State Drives (SSD) Quick Installation Guide
Installation Guide
Follow the steps below to correctly install an M.2
SSD in the M.2 connector.
Step 1:
Use a screw driver to unfasten the screw and nut
from the motherboard. Locate the proper mounting
hole for the M.2 SSD to be installed and then screw
the nut first.
Step 2:
Slide the M.2 SSD into the connector at an angle.
Step 3:
Press the M.2 SSD down and then secure it with
the screw.
Step 4:
The installation is completed, as shown in the
picture above.
* On the motherboard there are three length
adjustment holes for the M.2 SSD. Select the
proper hole for the M.2 SSD to be installed and
refasten the screw and nut.
English
Installations Handbuch
Führen Sie bitte die nachfolgenden Schritte aus, damit
die M.2 einwandfrei im M.2 Anschluss installiert
werden kann
Schritt 1:
Benutzen Sie einen Schraubendreher um die Schraube
und Mutter vom Mainboard zu lösen. Suchen die
das passende Montage Loch damit die M.2 SSD
installiert werden kann und ziehen Sie dann zuerst
die Mutter fest.
Schritt 2:
Schieben Sie die M.2 SSD in einem Winkel in den
Anschluss
Schritt 3:
Drücken Sie die M.2 SSD herunter und sichern Sie
sie mit der Schraube
Schritt 4:
Die Installation ist vollständig und sollte aussehen wie
auf dem oben gezeigten Bild.
* Auf dem Mainboard befinden sich für 3 verschiedene
Längeneinstelllöcher für die M.2 SSD. Wählen Sie
das richtige Loch für die zu installierende M.2 SDD
aus und ziehen Sie die Schraube und die Mutter
wieder an.
Deutsch
安裝說明
請依下列步驟將M.2 SSD正確地安裝於M.2
插座。
步驟一:
請用螺絲起子依序將螺絲和螺柱拆下,依實
際要安裝的M.2 SSD規格找到適合螺絲孔位
之後,先鎖上螺柱。
步驟二:
將M.2 SSD以斜角方式放入插座。
步驟三:
壓住M.2 SSD之後,再將螺絲鎖上。
步驟四:
如上圖所示即表示安裝完成。
* 主機板上有3個螺絲孔,請依實際安裝的
M.2 SSD規格調整螺絲和螺柱的位置。
繁體中文
Guía de Instalación
Siga los pasos debajo para instalar correctamente
un SSD M.2 en el conector M.2.
Paso 1:
Use un destornillador para soltar el tornillo y la tuerca
de la placa base. Ubique el agujero correcto para
montaje del SSD M.2 que se instalará y atornille la
tuerca primero.
Paso 2:
Deslice el SSD M.2 al conector en el ángulo correcto.
Paso 3:
Presione la SSD M.2 hacia abajo y luego asegúrela
con el tornillo.
Paso 4:
La instalación está completada, como se muestra en
la imagen de arriba.
* En la placa base hay tres orificios de ajuste de
longitud para el SSD M.2. Seleccione el orificio
adecuado para el SSD M.2 a instalar y vuelva a
ajustar el tornillo y la tuerca.
Español
설치 설명서
M.2 SSD을 M.2 슬롯에 올바르게 설치하기
위하여 아래의 단계를 따라 주십시오.
1단계:
드라이버를 이용하여 메인 보드의 M.2 슬롯용
나사와 너트를 풀어 주십시오. M.2 SSD의
길이에 맞게 너트를 메인 보드에 고정시킵니다.
2단계:
M.2 SSD을 M.2 슬롯에 비스듬히 밀어 넣습니다.
3단계:
M.2 SSD을 아래로 누른 상태에서 나사를
감아 줍니다.
4단계:
위 그림처럼 설치가 완료가 되었습니다.
* 메인 보드에는 M.2 SSD의 길이에 따라 설치가
가능한 조정 구멍이 세 개가 있습니다. M.2
SSD의 길이에 따라 알맞은 조정 구멍을
선택한 후 나사와 너트를 다시 조입니다.
한국어
Guia de Instalação
Siga os passos abaixo para instalar corretamente
um SSD M.2 no conector M.2
Passo 1:
Use uma chave philips para soltar o parafuso e
porca da placa-mãe. Localize o orifício correto para
montagem do SSD M.2 a ser instalado e, em seguida,
aperte a porca primeiro
Passo 2:
Deslize o SSD M.2 no conector usando o ângulo
correto
Passo 3:
Pressione o SSD M.2 para baixo e prenda-o com
o parafuso
Passo 4:
A instalação está completa, conforme demonstrado
na figura acima
* Na plac a-mãe há três furos de ajuste de
comprimento para o M.2 SSD. Selecione o orifício
apropriado para o M.2 SSD a ser instalado e volte
a apertar o parafuso e a porca.
Português
インストールガイド
M.2
コネクターに
M.2対応SSD
に
増設
する
場合、以
下
の
手順
に
従
ってください
。
ステップ
1:
スクリュードライバーを
使用
してマザーボードか
らネジとナットを
緩
めてください
。取
り
付
け
穴
の
位置
を
確認
してから
、最初
にナットを
締
めます
。
ステップ
2:
コネクターに
斜
めの
角度
で
M.2対応SSD
をスラ
イドさせます
。
ステップ
3:
M.2対応S SD
を
下
に
押
してからネジ で
固定
し
ます
。
ステップ
4:
上
の
写真
のように
取
り
付
けを
完了
します
。
*
マザーボード
上
に
M.2対応SSD用
の
3
つの
長
さ
調
整穴
があります
。
インストールする
M.2対応SSD
を
固定
する
適切
な
穴
を
選択
し
、
ネジとナットを
締
め
直
してください
。
日本語
安装说明
请依下列步骤将M.2 SSD正确地安装于M.2
插座。
步骤一:
请用螺丝起子依序将螺丝和螺柱拆下,依实
际要安装的M.2 SSD规格找到适合螺丝孔位
之后,先锁上螺柱。
步骤二:
将M.2 SSD以斜角方式放入插座。
步骤三:
压住M.2 SSD之后,再将螺丝锁上。
步骤四:
如上图所示即表示安装完成。
* 主板上有3个螺丝孔,请依实际安装的M.2
SSD规格调整螺丝和螺柱的位置。
简体中文
Инструкция по установке
Для того, чтобы корректно подключить M.2
SSD-накопитель к соответствующему разъему,
следуйте предписаниям инструкции
Шаг 1:
C п омо щью отверт ки уда лите винт, а затем втулку
с резьбой, которая установлена на материнской
плате. Определите подходящее монтажное
отверстие для установке выбранного M.2 SSD-
накопителя и установите в нег о вт улку с резьбой.
Шаг 2:
Установите M.2 SSD-накопитель в разъем
под углом.
Шаг 3:
Прижмите M.2 SSD-накопитель ко втулке и
закрепите его винтом.
Шаг 4:
Процедура инсталляции завершена, как показано
на рисунке выше.
* На материнской плате расположены три
монтажных отверстия для установки M.2
SSD-накопителя. Определите подходящее
отверстие для установки выбранного M.2
SSD-накопителя, установите на плату втулку с
резьбой и закрутите винт.
Русский

Chat with your GIGABYTE AORUS NVMe Gen4 manual using AI

Get instant AI answers from your GIGABYTE AORUS NVMe Gen4 manual

Ask anything about the GIGABYTE AORUS NVMe Gen4. Answers come from this manual, with the pages they are based on.

Ask a Question

0/1000

Do you recommend AORUS NVMe Gen4?

Yes No

Frequently Asked Questions

A

Insert the SSD into the M.2 connector at a slight angle, press it down, and fasten it with the screw. Make sure you use the correct mounting position for the drive length supported by your motherboard.

Is this answer helpful?

A

The warranty applies to the original purchaser only. It is generally not transferable to secondhand buyers, even if the product appears unused or sealed.

Is this answer helpful?

A

You should keep your proof of purchase, such as a receipt or invoice, and the original packaging. These items help verify the purchase date and product eligibility.

Is this answer helpful?

A

Accidental damage, misuse, neglect, unauthorized disassembly, repair, modification, or improper installation can void coverage. Use the drive according to the installation and operating guidelines.

Is this answer helpful?

A

No. GIGABYTE does not cover data loss, corruption, or recovery costs. Users are expected to back up all important files and passwords separately.

Is this answer helpful?

A

It should not be used in life-support, medical, automotive, aviation, nuclear, or other ultra-hazardous applications. The warranty does not apply to such uses.

Is this answer helpful?

M: OA-GPT-54-NAN

Advantages and Disadvantages

Advantages

  • Fast NVMe Gen4 M.2 form factor supports modern high-speed storage upgrades.
  • Compact design helps keep builds cleaner with fewer cables and easier airflow.
  • Warranty support includes repair or replacement for qualifying manufacturing defects.
  • Installation steps are straightforward and suitable for standard motherboard M.2 slots.
VS

Disadvantages

  • Warranty is limited to the original purchaser and usually not transferable.
  • Coverage requires proof of purchase and may depend on original packaging.
  • Damage from misuse, accidents, or unauthorized repairs is not covered.
  • Data loss, backups, and recovery services are excluded from warranty protection.
M: OA-GPT-54-NAN

Product Specification

Form factor

Solid State Module (SSM)

Form factor

M.2 2280

Interface

M.2/M-Key (PCIe 4.0 x4)

Read

5000MB/s

Memory modules

3D-NAND TLC, Kioxia, 96 Layer (BiCS4)

Reliability forecast

1.77 Million hours (MTBF)

Controller

Phison PS5016-E16, 8 Channels

Protocol

NVMe 1.3

Data protection features

256bit AES

Dimensions

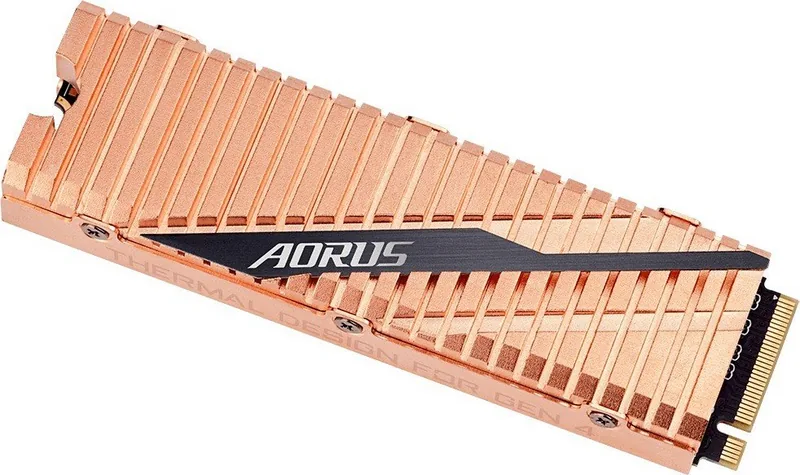
3.15x0.93x0.45in (with heatsink)

Special features

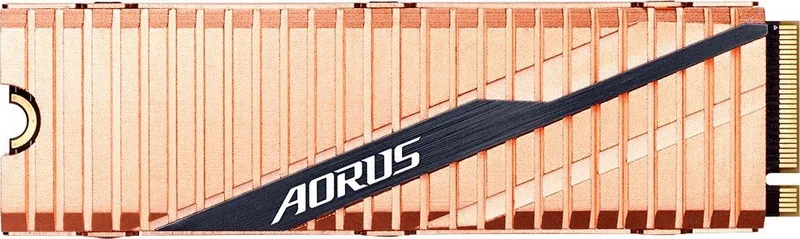
M.2 heatsink

Warranty

60 months (or until TBW limit is reached)

M: OA-GPT-54-NAN

Product Description

GIGABYTE AORUS NVMe Gen4 SSD, M.2: Compact Speed for Modern Builds

The GIGABYTE AORUS NVMe Gen4 SSD, M.2 is built for users who want fast storage in a slim, easy-to-install form factor. Designed for desktop systems that support M.2 drives, it brings a clean upgrade path for gaming rigs, creative workstations, and everyday PCs that need quicker load times and responsive file access.

At the heart of its appeal is the balance between performance and practicality. The drive fits directly into an M.2 connector, helping reduce cable clutter while keeping the build neat and efficient. For many users, the GIGABYTE AORUS NVMe Gen4 SSD, M.2 Manual guidance is especially valuable because it explains the installation process clearly: align the drive at an angle, secure it with the proper screw, and choose the correct mounting position for the board’s length support.

Beyond the hardware itself, the product comes with a warranty framework that reflects standard expectations for a premium SSD. Coverage is aimed at the original purchaser and generally depends on proof of purchase, original packaging, and use under normal conditions. In the event of a manufacturing issue, GIGABYTE’s approach centers on repair or replacement, which is a practical safeguard for a storage device that may carry important workloads.

This SSD is best suited for users who value organized installation, reliable system integration, and a high-speed storage upgrade path. While its warranty terms are strict, they also encourage careful handling, responsible setup, and regular backups. That makes it a strong choice for builders who understand both the performance benefits of NVMe storage and the importance of maintaining their data separately.

Notes

  • Keep your receipt and packaging if you may need warranty service later.
  • Install the drive in the correct M.2 slot and match the proper mounting hole length.
  • Always back up important files, since SSD warranties do not cover data recovery.
  • Avoid misuse, modification, or unsupported applications that could void coverage.
M: OA-GPT-54-NAN

© Copyright 2026 Manual.ly