
Fantec NVMe31 Manual
PDF manual · 2 Pages
English



Quick check
Incorrect answer, please try again.
Chat with your Fantec NVMe31 manual using AI
Get instant AI answers from your Fantec NVMe31 manual
Ask anything about the Fantec NVMe31. Answers come from this manual, with the pages they are based on.
Ask a Question
Do you recommend NVMe31?
Yes NoFrequently Asked Questions
This case supports M.2 PCIe NVMe drives. Specifically, Key M or Key M+B types are compatible. Formats include 2280, 2260, and 2242 sizes. Do not use AHCI drives or they will not work.
Is this answer helpful?
It works with Windows 7, 8.1, or 10 systems. Both 32-bit and 64-bit versions are supported. For Mac users, OS X version 10.14.3 or higher is required for full functionality.
Is this answer helpful?
Yes, formatting is needed if the drive is not recognized. You must use Disk Management to initialize and assign a volume letter. Note that this will erase all existing data on the drive.
Is this answer helpful?
The package includes one USB 3.1 Type-C to Type-C cable. You need this to connect the case to your computer. No USB-A adapter is mentioned in the contents.
Is this answer helpful?
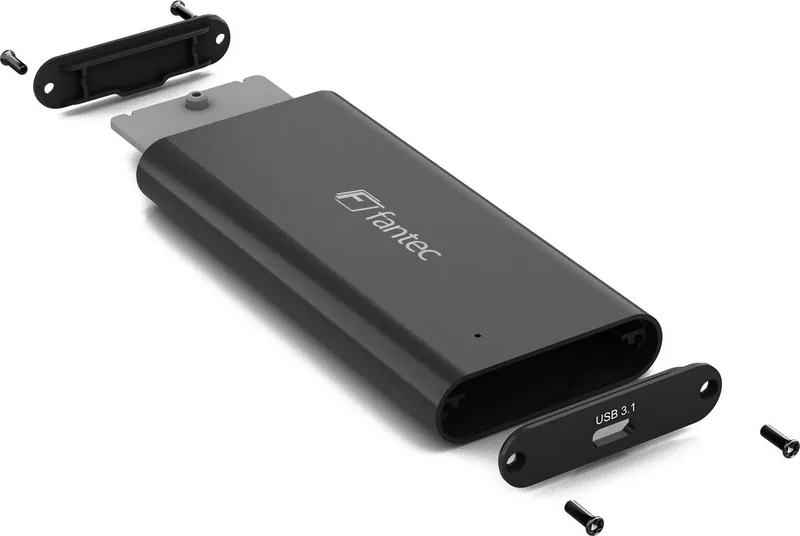
Remove side screws, slide out the PCB, align SSD, and screw it down. Ensure the thermal pad is correctly placed. Reinsert the board and fasten the cover. Avoid static discharge during this process.
Is this answer helpful?
Yes, just loosen the front screws and slide the PCB out. The board lifts from the blue thermal pad. Do not pull the pad itself as it stays attached to the case chassis.
Is this answer helpful?
The device uses USB 3.1 Type-C for connection to the host PC. This interface allows for significantly faster data rates compared to older USB versions. It is plug and play after setup.
Is this answer helpful?
Advantages and Disadvantages
Advantages

- Supports fast USB 3.1 transfer speeds
- Compatible with multiple M.2 sizes like 2280
- Simple installation without complex tools
- Blue thermal pad aids in cooling
- Compact design fits portable needs
Disadvantages

- Does not support M.2 AHCI SSDs
- Requires formatting after first install
- No USB-A cable included in box
- Compact body may warm up during use
- Small screws can be hard to find
Product Specification
Form Factor
M.2 2280, M.2 2260, M.2 2242
Internal Interface
1x M.2 (PCIe 3.0, NVMe)
External Interface
1x USB-C 3.1 (10Gb/s)
RAID Level
N/A
Fan
N/A
Dimensions
4.33x1.97x0.55 in
Weight
0.21 lbs
Color
Black
Features
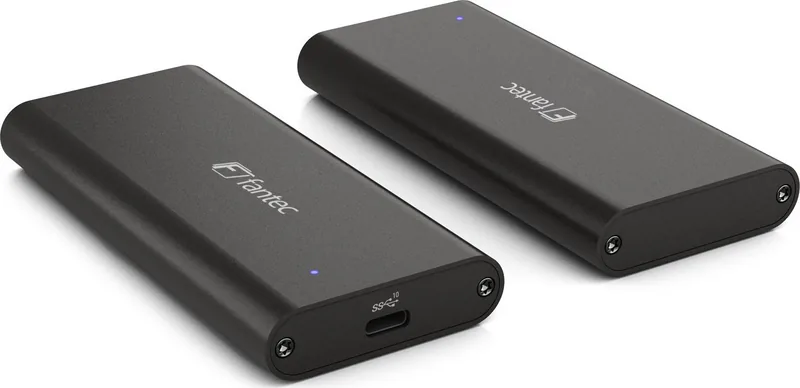
Aluminum housing, including USB cable (USB-C)
Manufacturer Warranty
2 years
USB Reference
Link
Product Description
Elevate Your Storage Performance with Fantec NVMe31
Transform your outdated storage experience with the Fantec NVMe31 M.2 NVMe SSD Case black, USB-C 3.1. This sleek enclosure brings desktop-level speed to portable solutions. Many users struggle with slow external drives that bottleneck their workflow. Many professionals need reliable backups. This case solves that problem effectively by housing high-performance M.2 PCIe NVMe modules. The design prioritizes both durability and thermal management for long sessions. Inside, a blue thermal pad helps dissipate heat during heavy data transfer tasks. This ensures consistent performance even under sustained load.
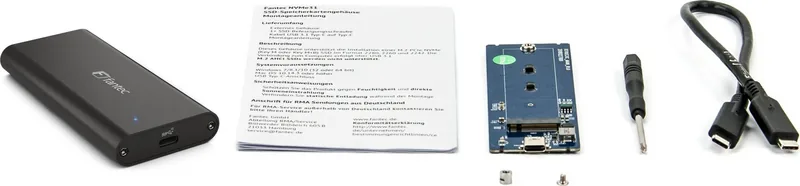
The installation process is straightforward for tech enthusiasts and beginners alike. You simply remove the screws on the side with the USB port using a magnetic screwdriver. Then, hold the enclosure at an angle and slide the circuit board out carefully. Align the SSD edge connector on the specific socket. It sits at an angle naturally within the chassis. Secure it firmly with the provided silver screw on the back. Finally, slide the board back into the L-shaped rails and replace the cover. This ensures a flush fit against the outer shell. Note that some formatting is required in Windows Disk Management usually. This process initializes the disk correctly for your operating system.
Compatibility is a strong point for this versatile device. It works with Windows 7 through 10 on both 32 or 64-bit systems easily. Mac OS users on version 10.14.3 or higher can also utilize this drive seamlessly without driver issues. The connection relies on USB 3.1 Type-C technology standards. This provides fast data transfer rates suitable for media editing and large file backups efficiently. This connectivity ensures broad adoption. It accepts M.2 SSD formats 2280, 2260, and 2242 for various use cases. However, M.2 AHCI SSDs are not supported by this specific enclosure model. Be sure to check your drive type before purchasing to avoid errors.
Safety is also important during handling and daily use. Protect the unit from moisture and direct sunlight exposure always. Avoid static discharge when handling the internal electronics carefully. The package includes the casing, one mounting screw, and the USB cable. Instructions guide you through the setup process step by step. Removing the drive is simple by loosening the screws and pushing the board out. Do not try to remove the thermal pad manually as it might damage. Keep the product clean and dry to ensure longevity. Ensure data integrity throughout the process. This solution offers a robust way to upgrade your computing workflow today effectively.
Search for 67,706 Manuals online


Type-in Brand or Model
Klaus Berger
8 months ago
Does this case feel sturdy? Is the build quality high?
Manual.ly
8 months ago
Yes, the case is described as robust and premium. Users confirm it feels valuable and solid, maintaining the high quality standards associated with Fantec brand products.