Manual.ly Logo

Ersa Independent 75 Manual

5.0 · 1 Ratings

PDF manual · 2 Pages

English

M: OA-GPT-5-NAN
page

/ 2

Loading...
2162dad06a2275c894b7926142d971f36296 page 1
Gas bijvullen (fig. 4)
Het uitlaatventiel moet gesloten zijn. Hou voor het bijvullen uw
Ersa INDEPENDENT 75 met de spits naar onderen en druk de
neus van de gascartouche in het vulventiel van de gassoldeer-
bout. De druk in de gascartouche en de zwaartekracht zorgen
voor het vullen. De maximale gasvulling is bereikt wanneer
er hoorbaar gas uit het vulventiel ontsnapt. Het ingebouwde
speciale ontluchtingsventiel laat het toe snel en eenvoudig gas
bij te vullen.
Riempimento gas (fig. 4)
L’interrutore gas deve essere nella posizione OFF prima
di riempire. Per riempimenti successivi vogliate tenere
l’INDEPENDENT 75 con la punte rivolta in basso mentre
effettuate la carica dalla cartuccia. L’erogazione del gas
dipende dalla gravità e dalla pressione. Tenere la bomboletta
e l’utensile in posizione verticale durante il riempimento. Non
riempire in posizione angolata. Interrompere il riempimento
quando il gas fuoriesce dalla valvola. La speciale valvola di
riempimento permette una carica veloce e facile.
Recargas del gas (fig. 4)
Antes de recargar, el interruptor de gas debe hallarse en la
posición „OFF“. Para la reposición, sostenga su soldador
de gas con la punta hacia abajo y presione la boquilla del
cartucho de gas al interior de la válvula de reposición del
soldador de gas. La recarga depende de la gravedad y de la
presión. Durante la recarga mantenga el soldador en posición
vertical, nunca en horizontal. La cantidad máxima cargable de
gas se habrá alcanzado si el mismo rebosa por la válvula. La
válvula especial de purga de aire permite la reposición rápida
y fácil del gas en su soldador de gas Ersa INDEPENDENT 75.
De spits uitwisselen (fig. 3)
Alle beschikbare spitsen (zie Fig. 3) kunnen door middel van
de bevestigingsmoer eenvoudig worden gemonteerd, wegge-
nomen en uitgewisseld.
Opgelet! Uit de gasuitlaat komen warme gassen bij een tem-
peratuur van 580° C. Laat het toestel nooit onbevoegd achter.
Indien u het toestel neerlegt, let er dan steeds op dat de gas-
uitlaat naar boven is gericht en dat het lichaam van de soldeer-
bout op de afsluitkap ligt (zie Fig. 5).
Temperatuurbereiken
Soldeerspits: max. 580°C (1,075°F)
Vlampijp: max. 1,300°C (2,372°F)
Warme gassen pijp: max. 625°C (1,150°F)
Gloeilemmet: max. 580°C (1,075°F)
Sostituzione punte (fig. 3)
Tutte le punte si rimuovono e si montano facilmente, svitando
l’anello di ritenzione e facendo scivolare la punta, il collare
ed il dado sopra l’assemblaggio di accensione. Rimuovere la
punta e sostituire con una nuova od un’altra. Far scivolare in
posizione ed avvitare (vedere fig. 3).
Attenzione: Gas caldi di 580° C vengono espulsi dai fori
di scarico della punta. Non lasciare il INDEPENDENT 75
incustodito. Se si mette su una supercie, posizionare le
aperture in modo che siano rivolte all’insù e appoggiare il
saldatoio sul coperchio come nella g. 5.
Gamma temperature delle punte
Punte per saldare: fino a 580°C (1,075°F)
Ugello fiamma: fino a 1300°C (2,372°F)
Ugello per gas caldo: fino a 625°C (1,150°F)
Lama incandescente: fino a 580°C (1,075°F)
Sustitución de puntas (fig. 3)
Las diferentes puntas pueden ser fácilmente recambiadas.
Desenrosque el anillo de sujeción, retira la punta a sustituir,
seguidamente coloque la que desee y apriete de nuevo el
anillo de sujeción.
Atención: De la salida de gas se emiten gases calientes
de 580° C. No deje el soldador de gas sin vigilancia. Al
colocarlo, mantenga el soldador de gas con la salida de
gas hacia arriba. El cuerpo metálico debe encontrarse
sobre la caperuza (véase g. 5).
Temperatura de las puntas
Puntas de soldar: hasta los 580°C (1075°F)
Boquilla para soldar a la llama: hasta los 1300°C (2372°F)
Boquilla para gases calientes: hasta los 625°C (1150°F)
Cuchilla de incandescencia: hasta los 580°C (1075°F)
1
Prima nella messa in funzione è
necessario assicurarsi di quanto
segue:
A observar antes de la puesta en
servicio:
Vooraleer de gassoldeerbout te
gebruiken dient u op het volgende
te letten:
Lees vór het eerste gebruik, deze gebruikershandleiding
en de veiligheidsvoorschriften volledig door.
• Om veiligheidsredenen isde gassoldeerbout nietdoor de
producent gevuld
• De gassoldeerbout INDEPENDENT 75 van Ersa bevat
brandbaar Butagas onder druk. Let daarom a.u.b. op een
zorgvuldig onderhoud.
• De omgevingstemperatuur voor de Ersa INDEPENDENT 75
mag niet hoger zijn dan +50° C (120° F).
•
Hou de gassoldeerbout steeds verwijderd van lichaam en gezicht.
• Nooit in nabijheid van ontvlambare producten gebruiken of
aansteken!
• Vergewis er u van, voor u de soldeerbout neerlegt, dat de
vlammen volledig gedoofd zijn. Indien de vlam 30 s na de
ontsteking niet dooft, moet de spits worden uitgewisseld.
• Voor u de afsluitkap aanbrengt of het apparaat gaat bijvullen,
erop letten dat de Ersa INDEPENDENT 75 uitgeschakeld is
en dat de spits is afgekoeld.
• Breng, om veiligheidsredenen, nooit veranderingen aan
de Ersa INDEPENDENT 75 aan (niet met geweld openen,
doorboren of verbranden). Alle noodzakelijke reparaties
dienen in de fabriek te worden uitgevoerd.
• Buitenhetbereikvankinderenbewaren.
Leggete attentamente questo manuale di istruzioni e l’i-
struzioni di sicurezza prima di mettere in funzione la sta-
zione.
• Permotividisicurezza,ilsaldatoioagasnonèriempitodal
produttore.
• Il saldatore a gas Ersa INDEPENDENT 75 contiene gas
combustible sotto pressione. Maneggiatelo con cura.
• La temperatura ambiente per l‘INDEPENDENT 75 non
dovrà superare i +50° C (120° F).
• E’ importante accendere l’utensile con la punta rivolta via
dalla faccia e corpo.
• Non accendere o usare vicino a sostanze combustibili.
• Assicurarsi che la fiamma sia completamente spenta prima
di mettere giù l’utensile. Qualora la fiamma non si spenga
entro 30 sec. la punta dovrà essere sostituita.
• Primadel riempimentoedell‘inserimentodelcappucciodi
chiusura fare attenzione che l‘INDEPENDENT 75 sia disin-
serto e che la punta si sia raffreddata.
• PerragionidisicurezzailsaldatoreagasINDEPENDENT
75 non va manomesso (non abrire a forza, non trapana-
re, non ruciare il saldatore a gas). Le eventuali riparazioni
richieste saranno eseguite allo stabilimento.
•
Tenere l‘INDEPENDENT 75 lontano della portate dai bambini.
Antes de usar la herramienta, ¡lea al completo las instruccio-
nes de servicio y las instrucciones de seguridad!
• Pormotivosdeseguridad,elfabricantenollenaelsoldador
a gas
•
El soldador de gas Ersa INDEPENDENT 75 contiene gas
combustible que se encuentra bajo presión. Préstese
atención, por ello, a un manejo cuidadoso.
• La temperatura ambiente para el Ersa INDEPENDENT 75
no deberá ser superior a +50° C (120° F).
• Nor dirigir jamás la punta de soldar hacia el rostro o el
cuerpo.
•
No utilizar o encender cerca de sustancias combustibles.
• Nocolocarelsoldadordegasaningúnladoantesdehaberse
apagado la llama. Si la llama no se apaga dentro de 30 s
después del encendido, se tendrá que sustituir la punta.
• Antes de reponer el gas y aplicar la tapa de cierre,
asegúresedequesehayaapagadolallamayestéenfriada
la punta.
• Porrazonesdeseguridad,nuncahagacualquiercambioal
soldador de gas INDEPENDENT 75 (no abrirlo a la fuerza,
no perforarlo ni quemarlo). Las reparaciones necesarias
serán efectuadas por el fabricante.
•
Mantenga este producto fuera del alcance de los niños.
Bruikbare gassen
Uw gassoldeerbout Ersa INDEPENDENT 75 werkt met nor-
maalButagas voor aanstekers.Gebruikalleengelterdgas,
van bekende merken, zoals Ronson, Braun of Colibri. In het
kijkvenster moet ietwat vloeibaar gas zichtbaar zijn. Gasdamp
alleen is voor de goede werking van het apparaat niet vol-
doende.
Tipo de gas
Il saldatore a gas Ersa INDEPENDENT 75 funziona con normale
gas butano degli accendini. Usare solo gas filtrato tipo Ronson,
Braun, Colibri. Un po’ di gas dovrebbe essere visibile attraverso
la sezione trasparente sopra il regolatore di temperatura;
il vapore del gas da solo non creerà sufficiente pressione.
Tipo de gas
Su soldador de gas Ersa INDEPENDENT 75 funciona a base
de gas butano que es el mismo que se emplea también en los
encendedoresdecigarillos.Empleeúnicamentegasfiltrado,
o sea marcas conocidas como Ronson, Braun, o Colibri. Un
poquito de gas líquido debe ser visible por el indicador del
nivel de gas. El vapor de gas sólo no engendrará la presión
suficiente.
Ontstekingsprocedure (fig. 1)
De Ersa INDEPENDENT 75 wordt door middel van een piëzo-
elektrisch systeem aangestoken. De aan/uit schakelaar voor
het gas is gekenmerkt met het opschrift „GAS”. De ontste-
kingsschakelaar is voorzien van een „bliksemsymbool”.
Opgelet! Na gebruik kunnen de spits en de bevestigings-
moer nog zeer heet zijn. Laten afkoelen a.u.b. vooraleer
met de handen aan te raken.
Soldeer-, blaas- en snijfunctie
De gewenste spits inbrengen en met de bevestigings-
moer vastzetten. Temperatuurregelaar op „max.” instellen.
Gastoevoer openen door de „GAS” schakelaar naar voren
te schuiven. De ontstekingsschakelaar achteruit schuiven en
vervolgens lossen. Indien de ontsteking lukte zal de katalysa-
tor in de spits gaan gloeien.
Branderfunctie
De temperatuurregelaar vóór het ontsteken op de „middelste”
waarde instellen.
Opgelet! De vlam kan onder bepaalde omstandigheden
onzichtbaar zijn.
Temperatuurinstelling
Door aan het regelventiel voor het gas te draaien, kan u de
temperatuur van de spits stappenloos instellen. Ter oriëntatie
is op het lichaam een +/- merkteken aangebracht. De ideale
instelling dient u proefondervindelijk vast te stellen, aangezien
de soldeeroppervlakte en de onderdelen zeer uiteenlopend
kunnen zijn en hierdoor zeer verschillende eisen kunnen stel-
len. Het is niet noodzakelijk dat de katalysator helder rood-
gloeiend wordt om de juiste temperatuur te bereiken.
Sequenza di accensione (fig. 1)
Il Ersa INDEPENDENT 75 viene acceso mediante un sistema
piezo-elettrico.L’interruttoredelgasOn/Offèmarcato“GAS”.
L’interruttorediaccensioneèindicatodaunlogodi“colpodi
fulmine”.
Attenzione: Dopo l’uso la punta e l’anello di ritenzione
possono essere caldi, lasciar raffreddare prima di toccare.
Punte per saldare, punta aria calda e
lama calda
Inserire la punta prescelta e l’anello di ritenzione. Ruotare il
regolatore temperatura al massimo. Far fluire il gas spingendo
in avanti l’interruttore. Ricliccare sull’interruttore di accensione
del piezo, e permettere all’interruttore di ritornare in posizione.
Il catalitico che brilla negli ugelli di scarico della punta darà
conferma dell’operazione.
Fiamma
Utilizzare dei settaggi basso-medi. La fiamma potrebbe spe-
gnersi con alta erogazione di gas. N.B. In talune situazioni di
luceèdifficilevederelafiamma.
Regolazione temperatura
Girando la valvula di regolazione del gas, la temperatura della
punta si regola in modo continuo. Per l’orientamento vedere
i contrassegni (+/-). Vogliate accertare la regolazione ideale
mediante delle prove su un oggetto campione conforme. Non
è necessario che la punta brilli rosso acceso per ottenere
temperature soddisfacenti per saldare.
Secuencia de encendido (fig. 1)
El Ersa INDEPENDENT 75 incluye un encendido de tipo
piezoelectrónico. El interruptor de gas ON/OFF está marcado
con la palabra “GAS“. El botón de encendido está marcado
con el simbolo de encendido.
Atención: Después del uso, la punta y el anillo de
retención pueden estar calientes, por lo que se debe
esperar que se enfríen antes de tocarlos.
Puntas para soldar, boquilla para gases
calientes, y cuchilla de incandescencia
Coloque la punta a usar y ajuste el anillo de retención.
Regule el mando de temperatura al máximo. Haga fluir el gas
avanzando el interruptor. La señal incandescente que aparece
en el catalizador situado en la punta confirma que el soldador
está funcionando.
Punta llama
Para activar la llama, regule la temperatura a un nivel medio.
La visión de la llama puede ser dificultada en ambientes con
gran luminosidad.
Regulación de la temperatura
Mediante el giro del regulador de la temperatura se podrá
ajustar la temperatura de la punta sin escalonamiento alguno.
Para la orientación correspondiente, la caja está identificada
con +/-. El ajuste ideal se podrá averiguar mediante unos
ensayos apropiados en una pieza (objeto), puesto que tanto
el sitio para soldar como también los componentes son de
composiciones muy variadas, de modo que también sus
exigencias pueden ser distintas. Para obtener buenas juntas
soldadas, no es necesario que el catalizador resplandezca
brillante.
Temperatuurregelaar
Regolazione temperatura
Regulador de la temperatura
Kijkvenster
Finestra controllo gas
Indicador del nivel de gas
Ontstekingsschakelaar
Interruttore d’accensione
Interruptor de encendido
Gas aan/uit schakelaar
Interruttore Gas ON-OFF
Interruptor de gas ON-OFF
Fig. 1
Soldeerspits
Punta
Punta
Spitshouder
Tubo ritegno punta
Anillo de retención
Lichaam
Corpo metallico
Cuerpo metálico
Katalysator
Catalitico
Catalizador
Bevestigingsmoer
Dado di ritegno / Porca de retención
Fig. 2
0G072CN 0G072KN 0G072AN 0G072VN 0G072BE 0G072MN 0G072FE 0G072RE
Fig. 3
Fig. 4 Fig. 5
Ersa GmbH • Otto-Schott-Str. 3-7 • D-97877 Wertheim / Germany
Tel. +49 (0) 9342/800-0 • Fax -100 • info@ersa.de • www.ersa.de
Vervangingsonderdelen Ricambi Piezas de recambio
G070KN Gassoldeerbout INDEPENDENT 75
met soldeerspits G072KN
G072CN Soldeerspits (1,0 mm beitelvormig)
G072KN Soldeerspits (2,4 mm beitelvormig)
G072AN Soldeerspits (3,2 mm beitelvormig)
G072VN Soldeerspits (4,8 mm beitelvormig)
G072BE Vlampijp
G072MN Gloeilemmet
G072FE Warme gassen pijp
G072RE Reectorlemmet
A20 Houder
006 Reinigingssponsje
G156 Sponshouder
KF006 Kunststoffen etui
G070KN Saldatore a gas INDEPENDENT 75
con punta G072KN
G072CN Punta per saldare (1,0 mm, a forma di cesello)
G072KN Punta per saldare (2,4 mm, a forma di cesello)
G072AN Punta per saldare (3,2 mm, a forma di cesello)
G072VN Punta per saldare (4,8 mm, a forma di cesello)
G072BE Ugellodelbeccùccioamma
G072MN Lama incandescente
G072HE Ugello del beccùccio per gas caldo
G072RE Riettoresovrapposizionato
A20 Staffa di sostegno
006 Spugna di pulizia
G156 Contenitore per spugna
KF006 Custodia per trasporto
G070KN Soldador de gas INDEPENDENT 75
con punta para soldar G072KN
G072CN Punta para soldar (1,0 mm biselada)
G072KN Punta para soldar (2,4 mm biselada)
G072AN Punta para soldar (3,2 mm biselada)
G072VN Punta para soldar (4,8 mm biselada)
G072BE Boquilla para soldar a la llama
G072MN Cuchilla de incandescencia
G072HE Boquilla para gases calientes
G072RE Reectorsobrepuesto
A20 Soporte
006 Esponja de limpieza
G156 Esponjera
KF006 Estuche de materia plástica

Chat with your Ersa Independent 75 manual using AI

Get instant AI answers from your Ersa Independent 75 manual

Ask anything about the Ersa Independent 75. Answers come from this manual, with the pages they are based on.

Independent 75 Maintenance Schedule

When flame fails to extinguish
Replace tip if flame does not go out

If the flame does not extinguish within 30 seconds of ignition, replace the tip immediately.

Before refilling
Ensure tip is cooled before handling

Allow the tip and retaining collar to cool down completely before touching or refilling the gas.

M: QW-35-FL

Ask a Question

0/1000

Do you recommend Independent 75?

Yes No
0
User Pic

maria_k

9 months ago

Is the soldering iron easy to use right away, or do I need to read the manual to get it working?

0
User Pic

Manual.ly

9 months ago

Yes. Based on user feedback, the device is ready to use quickly after unpacking and filling gas. After unlocking it and pressing the Piezo switch once, the soldering iron can be used immediately. Users also report it is intuitive to operate without having to read the instructions first. If you want the best results, still follow the basic start-up steps (unlocking, gas fill, and initial ignition) and observe the recommended warm-up and safe handling guidance.

M: OA-GPT-5-NAN
M: OA-GPT-5-NAN

Frequently Asked Questions

A

The Independent 75 uses filtered butane (same type as lighter gas). Use reputable brands such as Ronson, Braun, or Colibri. A small amount of liquid gas should be visible in the inspection window for proper pressure.

Is this answer helpful?

A

Switch the gas to OFF, hold the tool with the tip pointing down, press the cartridge nozzle into the refill valve and keep tool and can vertical. Refill stops when gas overflows from the valve. Use the venting valve for a quick, safe refill.

Is this answer helpful?

A

Available tips include chisel soldering tips (1.0–4.8 mm), flame nozzle, hot-gas nozzle and hot blade. Unscrew the retaining collar, slide out the old tip, insert the new tip and screw the collar back in place.

Is this answer helpful?

A

Soldering tips reach up to 580°C, hot-gas nozzles up to 625°C, and the flame nozzle up to 1300°C. Use the continuous temperature regulator to tune heat to the task; the catalyst need not glow bright red to be effective.

Is this answer helpful?

A

Keep the tool away from face and body, do not use near flammables, ensure the flame is fully out before laying down, allow tips to cool before handling, and store out of children’s reach. Do not open, drill, or modify the unit.

Is this answer helpful?

A

If the flame does not go out within 30 seconds after switching off, the tip must be replaced. Always ensure the device is off and cooled before refilling or fitting the closure cap.

Is this answer helpful?

A

No. For safety reasons do not force open, drill, burn, or modify the unit. Any necessary repairs should be performed by the manufacturer or authorized service centers.

Is this answer helpful?

M: OA-GPT-5-NAN

Advantages and Disadvantages

Advantages

  • Portable gas operation allows use without mains power or cords.
  • Interchangeable tips (soldering, flame, hot-gas, hot blade) for many tasks.
  • Piezo ignition and continuous temperature regulator for easy control.
  • Fast, simple refilling via built-in venting valve and inspection window.
  • High maximum temperatures (up to 1300°C for flame nozzle) for heavy-duty jobs.
VS

Disadvantages

  • Contains pressurized butane—requires careful handling and storage.
  • Exhaust ports emit very hot gases (≈580°C); risk if left unattended.
  • Not prefilled by manufacturer; user must refill safely and correctly.
  • Flame can be hard to see in bright light, complicating visual checks.
  • Repairs must be done by the factory; no user modifications allowed.
M: OA-GPT-5-NAN

Product Specification

Power

75W

Temperature

max. 1076°F

Soldering Tip Width

0.09in

Heat-up Time

46s

Weight

0.66lb

Package Contents

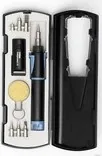
Box, 4x Soldering Tip, 2x Nozzle

M: OA-GPT-54-NAN

Product Description

Ersa Independent 75 Profi Set Gaslötkolben Manual

The Ersa Independent 75 Profi Set is a versatile gas-powered soldering iron designed for professionals and hobbyists who need portable, high-temperature performance without an electrical connection. Compact and robust, the Independent 75 accepts multiple interchangeable tips—soldering chisel tips, flame nozzles, hot-gas nozzles and a hot blade—making it suitable for precision soldering, brazing, heating, shrink tubing, and light cutting tasks. A piezo-electric ignition and an adjustable temperature regulator let you control heat output smoothly for different applications.

As a handheld tool that runs on filtered butane (brands such as Ronson, Braun or Colibri recommended), the unit relies on cartridge pressure and gravity for refilling. The refill procedure requires the gas switch to be OFF, holding the tool tip-down, and pressing the cartridge nozzle into the refill valve until excess gas escapes. An integrated venting valve simplifies and speeds up refills. The transparent gas inspection window lets you confirm a small visible liquid gas level for reliable operation.

Safety and usability are emphasized: follow manufacturer guidance to keep the ambient temperature below 50°C, never point the tip toward face or body, avoid use near flammable materials, and allow tips to cool before handling. If a flame does not extinguish within 30 seconds after ignition, replace the tip. The tool must not be forcibly opened, drilled or modified; repairs should be carried out by the manufacturer. When resting the device, position exhaust ports upward and set the iron body on the closure cap to prevent heat damage.

Temperature ranges are broad: soldering tips reach up to 580°C, the flame nozzle up to 1300°C, and hot-gas nozzles around 625°C—providing the flexibility to tackle delicate electronics soldering as well as more demanding heating tasks. Tips are quickly swapped by unscrewing the retaining collar and sliding the chosen tip into place. The glowing catalyst in the tip exhaust confirms successful ignition and operation.

Compact, reliable and adaptable, the Ersa Independent 75 is a powerful solution when mains power is unavailable or mobility is essential. Its modular tip system and continuous temperature control make it an all-purpose gas soldering tool for fieldwork, repairs, and workshops.

Notes

  • Use only filtered butane from reputable brands and confirm liquid gas visibility in the inspection window.
  • Always refill with the tool OFF and tip pointing downward; stop when gas escapes from the valve.
  • Keep out of reach of children and do not alter the unit; factory servicing only.
M: OA-GPT-5-NAN

© Copyright 2026 Manual.ly