
Enermax K8 Manual
PDF manual · 22 Pages
English


Quick check
Incorrect answer, please try again.
Chat with your Enermax K8 manual using AI
Get instant AI answers from your Enermax K8 manual
Ask anything about the Enermax K8. Answers come from this manual, with the pages they are based on.
Ask a Question
Do you recommend K8?
Yes NoFrequently Asked Questions
Yes, the Enermax K8 accommodates a wide range of form factors including E-ATX, ATX, Micro-ATX, and Mini-ITX boards, making it versatile for different build requirements.
Is this answer helpful?
The front panel supports a radiator up to 360mm in length, allowing for premium liquid cooling configurations to keep your hardware temperatures low.
Is this answer helpful?
Yes, an ARGB and PWM control hub is included in the accessory box, which simplifies connections and lighting synchronization across your build.
Is this answer helpful?
Support for vertical GPU installation is present, but it requires careful planning during the initial assembly phases to ensure proper cable routing and fitment.
Is this answer helpful?
Removing the side panels is simple for access to interior components. The panels are designed for quick detachment to facilitate easier installation of hardware.
Is this answer helpful?
The power supply unit mounts at the bottom of the case, which includes a built-in dust filter to prevent debris accumulation over time.
Is this answer helpful?
You have access to dedicated bays for both 2.5 inch SSDs and 3.5 inch HDDs using the available mounting locations designed for easy access and organization.
Is this answer helpful?
Advantages and Disadvantages
Advantages

- Extensive motherboard support from E-ATX down to Mini-ITX form factors for flexibility.
- Generous cooling options including 360mm radiator support at the front.
- Built-in fan hub allows for centralized ARGB control simplifying wiring.
- Dedicated bays for both 2.5 SSDs and 3.5 HDDs for storage.
Disadvantages

- Installation process involves multiple steps requiring careful planning.
- Vertical GPU installation requires specific planning during initial assembly.
- Dust filter at PSU location may require periodic cleaning maintenance.
- Cable management behind the motherboard tray can be slightly tight.
Product Specification
External
N/A
Internal
1x 2.5/3.5 (horizontal, Drive Trays), 1x 2.5/3.5 (horizontal, Hard Drive Cage)
Ports
1x USB-C 3.1 (10Gb/s, 20-Pin Key-A Header), 1x USB-A 3.0 (5Gb/s), 1x 3.5mm Jack (Line-Out), 1x 3.5mm Jack (Line-In)
PCI Slots
7
Fan (Front)
2x 4.72 (ARGB lit) or 3x 5.51 (optional) or 3x 4.72 (optional)
Fan (Rear)
1x 4.72 (ARGB lit)
Fan (Left)
N/A
Fan (Right)
N/A
Fan (Top)
2x 5.51 (optional) or 3x 4.72 (optional)
Fan (Bottom)
N/A
Fan (Other)
N/A
Radiator Sizes
4.72/5.51/9.45/11.02/14.17 front, 4.72/9.45 top, 4.72 rear, N/A other
Motherboard
up to ATX
Supported Motherboards
Mini-ITX (6.7"x6.7")/Micro-ATX (9.6"x9.6")/ATX (12"x9.6")
Power Supply
ATX
Power Supply Position
bottom
CPU Cooler
max. 6.69 height
Graphics Cards
max. 15.35 (Without Radiator, 13.78 With Radiator)
Lighting
RGB Header 3-Pin ARGB (+5V/DATA/GND), integrated LED controller, lit fans
Dimensions (WxHxD)
8.66x19.33x18.39
Volume
3078.65 cu in
Weight
19.86 lbs
Chassis Type
Midi-Tower
Front
closed, partial glass
Top
partially closed, largely fan grille, dust filter outside
Bottom
partially closed, partially fan grille, dust filter outside
Left
largely door, closed, largely glass
Right
closed
Rear
partially closed, fan grille top right, PCI Slots (7x horizontal)
Front I/O Position
Case Side: Top, Height: Middle, Position: Right
Motherboard Orientation
Motherboard Orientation: to the left
Features
Cable Management, Dust Filters, Glass Window
USB Orientation
Left
Product Description
Enermax K8 Case Overview
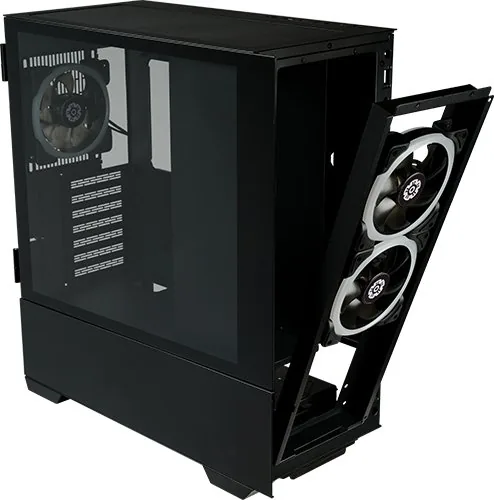
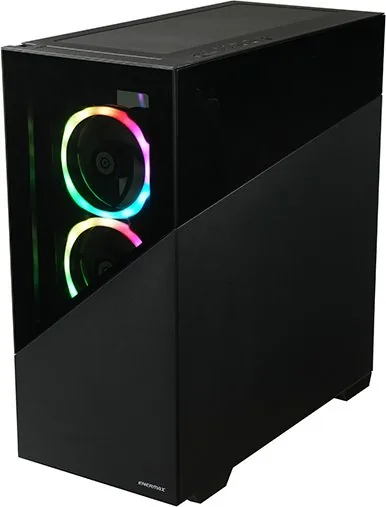
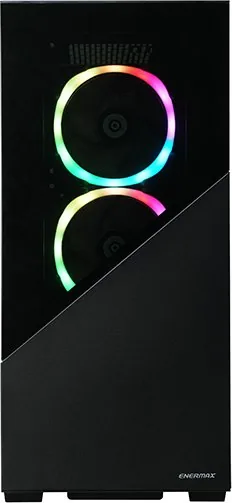
Building a high performance PC requires a precise housing system. The Enermax K8 stands out as a robust choice for enthusiasts seeking stability and exceptional airflow capabilities. This mid tower chassis is designed with a primary focus on thermal management, ensuring your critical components stay cool even under the heaviest computational loads. The exterior features sturdy tempered glass panels that showcase internal aesthetics well.
The motherboard support is extensive, accommodating formats ranging from E-ATX down to Mini-ITX form factors. This flexibility makes the unit suitable for various builds, from dedicated gaming setups to productive workstation towers. You can install both 2.5 inch SSDs and 3.5 inch HDDs using the available mounting locations designed for easy access. The cable management system is specifically designed to keep wiring clean and organized behind the motherboard tray, ensuring better airflow patterns within the chassis without obstruction.
Cooling options are very generous to support high-end hardware. The front supports a 360mm radiator for premium liquid cooling solutions. The top and rear panels offer multiple fan mounts to optimize air intake and exhaust dynamics effectively. There is also support for vertical GPU installation which requires careful planning during the initial assembly phases. The included fan hub allows for centralized ARGB control, simplifying connections and lighting synchronization across your build without complex wiring.
Assembly is straightforward if you follow the detailed guides provided during the initial setup process. Removing the side panels is simple for access to interior components like the motherboard or power supply unit. The power supply unit mounts at the bottom with a built-in dust filter to prevent debris accumulation. Overall, this case offers a solid balance between price and performance features that enthusiasts appreciate. It is an excellent foundation for a stable and visually appealing computer system that prioritizes functionality and looks.
The installation process involves several key steps to ensure safety. First disconnect all power sources before handling components. The front mesh design aids in dust reduction while maintaining airflow. The rear I/O area is spacious enough for various cable types. You can manage power LEDs and USB connections easily. Always check stand-off positions for your specific motherboard model before screwing anything in. This prevents short circuits and ensures electrical safety during the build. Users often praise the rigidity of the frame during transport and operation. The finish on the metal surfaces is durable against scratches and fingerprints. Ultimately this case delivers value and performance for serious builders looking for quality construction.
Search for 67,706 Manuals online


Type-in Brand or Model