
Eltako FT55R Manual
PDF manual · 1 Pages
English


Quick check
Incorrect answer, please try again.
Chat with your Eltako FT55R manual using AI
Get instant AI answers from your Eltako FT55R manual
Ask anything about the Eltako FT55R. Answers come from this manual, with the pages they are based on.
Ask a Question
Do you recommend FT55R?
Yes NoFrequently Asked Questions
It is a wireless wall pushbutton for home and building automation. It sends radio commands for functions such as lighting or shading without needing a wired power supply.
Is this answer helpful?
No. It generates the energy for transmission when the rocker is pressed, so there is no battery replacement and no standby consumption.
Is this answer helpful?
It can be screwed onto a flat surface or into a 55 mm switch box, or fixed with the included adhesive foil on smooth surfaces like glass, furniture, or walls.
Is this answer helpful?
A single rocker can transmit two evaluable signals, while a double rocker can transmit four. The final function depends on the paired actuator and its setup.
Is this answer helpful?
The text specifies Busch Reflex and Duro cover frames. That means it is intended for those systems and may not match every frame type.
Is this answer helpful?
The pushbutton must be taught in to the matching wireless actuator. This pairing step allows the actuator to recognize the sensor and execute the commands correctly.
Is this answer helpful?
Advantages and Disadvantages
Advantages

- Self-powered wireless design avoids wiring, batteries, and standby loss.
- Compact 55 x 55 mm size fits neatly into modern interiors.
- Can be mounted by adhesive or screws, so it adapts to many surfaces.
- Supports two or four signals depending on rocker setup for flexible control.
Disadvantages

- Requires teach-in with a compatible actuator before it can be used.
- Best suited to Busch Reflex and Duro frames, which limits universal fit.
- Adhesive mounting may be less suitable for rough or heavily used surfaces.
- Installation must follow the alignment markings carefully to work correctly.
Product Specification
Type
Sensor
Standard
EnOcean
Function
Button
Topology
Star
Dimensions
2.17x2.17x0.59in
Product Description
Eltako FT55R Tipp-Funk Radio Pushbutton
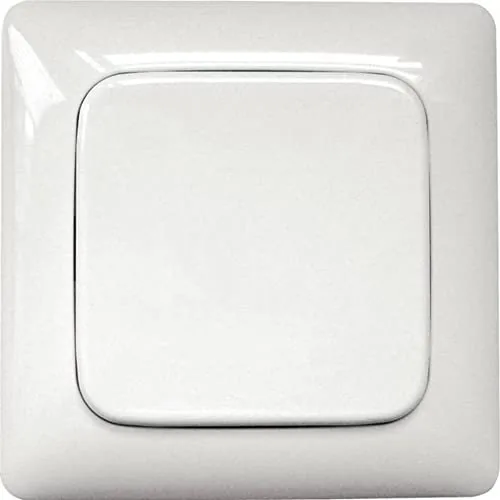
The Eltako FT55R Tipp-Funk radio pushbutton is a compact, modern control element for wireless building automation. Finished in alpine white, it blends into clean interior designs while offering a dependable way to trigger radio commands without visible wiring. It is simple in form, but the manual reveals a surprisingly flexible device built for practical everyday use.
Wireless convenience with a practical form
At just 55 x 55 mm and 15 mm high, the FT55R has a discreet footprint that suits living rooms, hallways, offices, and retrofit projects. Pressing the rocker generates the energy needed to send a wireless telegram, so the button does not require batteries or a permanent power connection. That means no standby loss, fewer maintenance concerns, and a cleaner installation overall. For spaces where a cable run would be difficult or unattractive, this self-powered concept is a major advantage.
Two mounting styles for different spaces
The mounting system is one of the most useful details. The pushbutton can be screwed to a flat surface or installed with the included adhesive foil on glass, furniture, or smooth walls. It can also be fitted into a 55 mm switch box using the recommended screws and sleeves. This adaptability makes the FT55R suitable for fast renovations, rental-friendly upgrades, and more permanent installations alike. It is also designed for Busch Reflex and Duro cover frames, helping it sit neatly within an existing interior style.
Flexible control, tidy appearance
Depending on the rocker configuration, the FT55R can send two or four evaluable signals. A single rocker gives straightforward up and down control, while the double rocker expands the number of commands for more complex tasks. That makes it a practical choice for lighting scenes, blinds, and other wireless functions where several actions may be needed from one compact switch. The factory-fitted module, clear alignment markings, and modular front pieces make the product feel well thought out and easy to integrate.
Because the unit is self-powered, it is also a smart solution for locations where batteries would be inconvenient or simply forgotten. In daily use, the rocker provides a direct tactile response, and the wireless design keeps the wall looking uncluttered. For anyone building a simple smart-home setup, the FT55R works as a dependable input point that pairs well with compatible actuators and keeps control intuitive.
Notes
- The actuator must be taught in before the pushbutton can control it.
- During installation, the rear marking should always point upward.
- Choose adhesive mounting for convenience or screw fixing for a stronger hold.
- Alpine white gives the unit a neutral, versatile look that suits many interiors.
Search for 67,706 Manuals online


Type-in Brand or Model
Berneice Fahey
8 months ago
Does the device work reliably and is the click noise loud when switching, especially with the Eltako FSR61G-230V Stromstoß-Schaltrelais?
Manual.ly
8 months ago
Based on user feedback and typical operation, it should work reliably and deliver good build quality. The switch action produces a clear click sound, but it is usually not significantly louder than a normal wall button (taster). If you notice unusually loud noise, double-check installation and wiring and confirm the relay is compatible (such as the Eltako FSR61G-230V Stromstoß-Schaltrelais).