
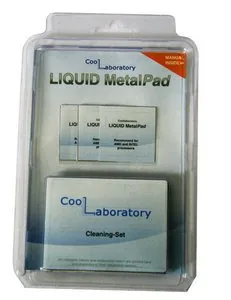
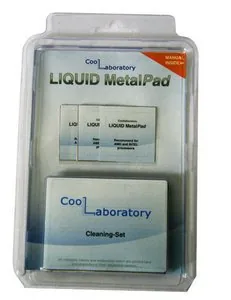
Coollaboratory Liquid MetalPad Manual
PDF manual · 5 Pages
English



Quick check
Incorrect answer, please try again.
Chat with your Coollaboratory Liquid MetalPad manual using AI
Get instant AI answers from your Coollaboratory Liquid MetalPad manual
Ask anything about the Coollaboratory Liquid MetalPad. Answers come from this manual, with the pages they are based on.
Ask a Question
Do you recommend Liquid MetalPad?
Yes No
Lea Schneider
10 months ago
Do I really need a burn-in for the Liquid MetalPad, and what should I do if my CPU temps do not drop because the pad does not melt or it shifts during cooler mounting?

Manual.ly
10 months ago
Yes, a burn-in is part of how the pad settles and fills micro-gaps. Make sure the CPU cooler is mounted flat and firmly: if the pad shifts while installing (especially on less-stable coolers), it can leave poor contact and prevent the expected temperature drop. Also use thorough cleaning (no residues), cut the pad exactly to CPU size, and avoid any paste leftovers on the surfaces. Liquid-metal pads work best with cooler bases that are not perfectly mirror-smooth; if your base is very smooth, you may need to use a suitable surface preparation method per the instructions. If you still see no improvement after a correct burn-in, remove, re-clean, verify contact and mounting pressure, and repeat with a fresh pad. Some mixed results come from uneven contact or surface mismatch rather than the product itself.
Frequently Asked Questions
The Liquid MetalPad melts at approximately 58°C. This matters because a one-time controlled melting (BurnIn) lets the metal flow into microscopic surface imperfections, creating optimal thermal contact and improved heat transfer.
Is this answer helpful?
Mount the pad and cooler, then reduce fan speed (using hardware or software control) to raise CPU temperature until the pad melts. Once melting is observed via temperature curve, restore fans to 100% to stabilize temperatures and complete the BurnIn.
Is this answer helpful?
Yes, but water cooling can prevent reaching the melting temperature. If safe, briefly disable the pump to allow temperatures to rise for melting, then immediately re-enable the pump. Consult your water-cooling documentation before doing this.
Is this answer helpful?
Thoroughly remove old paste or pads and clean surfaces of oils and residues using lint-free cloths or supplied cleaning materials. For prior metallic compounds, gently use a metal grinding pad or polish to ensure full contact area cleanliness.
Is this answer helpful?
Standard sizes provided include 38×38 mm for processors and 20×20 mm for graphics. Pads can be trimmed with cutting tools to match varying contact areas and different CPU/GPU designs.
Is this answer helpful?
Peel the pad carefully; remaining residues usually come off easily with a metal grinding pad (Scotch-Brite style). Avoid excessive pressure while cleaning to prevent surface damage or warranty issues.
Is this answer helpful?
If no improvement appears, recheck cleaning and contact area alignment. Residues from previous pastes or improper BurnIn are common causes. Repeat the BurnIn process and verify fan control and sensor readings during the procedure.
Is this answer helpful?
Advantages and Disadvantages
Advantages

- Superior thermal conductivity vs typical silicone pastes; often reduces temps by 4–7°C.
- One-time BurnIn process yields long-lasting, stable metal contact filling micro-gaps.
- Includes three CPU-sized pads and a cleaning kit for preparation and maintenance.
- Customizable pad sizing—can be trimmed to match various CPU/GPU contact areas.
- Removable without harsh solvents; residues can be cleaned with supplied metal pad.
Disadvantages

- Requires careful installation and controlled BurnIn; improper method can harm components.
- Melting requires reaching ~58°C, which may be hard with aggressive liquid cooling.
- Marginal improvement compared to Coollaboratory Liquid Pro in some setups.
- Must avoid rotating cooler after placement to prevent pad misalignment.
- Metallic nature demands thorough cleaning; leftover residues can insulate if not removed.
Product Specification
Type
Thermal pad (Liquid metal)
Quantity
3 Pieces
Shape
Pad
Product Description
Coollaboratory Liquid MetalPad, 3x CPU + Cleaning Kit Manual
The Coollaboratory Liquid MetalPad, 3x CPU + Cleaning Kit Manual describes a high-performance thermal interface solution composed entirely of metal. Designed to replace traditional thermal pastes and pads, the Liquid MetalPad transitions from solid to liquid at roughly 58°C. After a one-time "BurnIn" melting process, the pad fills microscopic surface imperfections to create an exceptionally conductive interface between CPU and cooler. The kit includes three CPU-sized pads and a cleaning kit to prepare contact surfaces for optimal heat transfer.
This solution targets enthusiasts and overclockers seeking lower operating temperatures. Installation requires careful surface cleaning—removing old paste or pads and ensuring contact areas are free of oils and residues. Coollaboratory provides nominal pad dimensions (38×38 mm for CPUs, 20×20 mm for GPUs) and the MetalPad can be trimmed to fit varied contact geometries. The manual emphasizes not rotating the cooler after placement to prevent pad misalignment.
Several installation workflows are covered: using a hardware fan controller, using software-based fan control (e.g., SpeedFan), and alternative heat sources such as a controlled hot-air gun or hair dryer. The recommended method is to place the pad, mount the cooler, then perform a controlled BurnIn by throttling fan speed so temperatures rise to the melting point, then restoring full fan speed to let the pad settle. Typical temperature improvements versus silicone-based pastes average 4–7°C; improvements versus Coollaboratory Liquid Pro are marginal.
For systems with water cooling, the manual warns that active coolant flow can prevent the pad from reaching melting temperature. Temporarily disabling the pump (if safe and supported by the hardware) can allow the pad to melt; re-enable the pump immediately after melting. Removing a MetalPad is straightforward—peel and gently clean residual material with the supplied metal grinding pad or a Scotch-Brite style pad, taking care not to overpress and risk surface damage.
The manual stresses safety: power off and disconnect the system before hardware work; monitor temperatures closely during BurnIn; and accept that improperly following the manual could risk component damage and void liability.
Notes
- Melting point ~58°C; requires one-time BurnIn to reach full performance.
- Clean contact surfaces thoroughly; residues can insulate and reduce effectiveness.
- Trim pads to match contact area; typical CPU size 38×38 mm.
- Exercise caution with water-cooling systems and when using heat guns.
Search for 67,706 Manuals online


Type-in Brand or Model
Leon Schreiber
9 months ago
Do Liquid MetalPad CPU thermal pads reliably melt and improve cooling during burn-in, or can they fail if my cooler or mounting surface is not perfectly compatible?
Manual.ly
9 months ago
They should melt during burn-in, but results depend heavily on contact and surface prep. For best chances, install exactly as the guide shows: clean off all old paste fully (no residue), ensure the cooler base and CPU IHS are clean, and mount without shifting the pad. The pad must be fully supported when the cooler is tightened, and it works best when the cooler base is suitable (very mirror-smooth or poor contact can reduce spreading and performance). If you do not reach the required burn-in temperature/time or the pad shifts during mounting, some users report that the pad does not melt properly and CPU temperatures stay high. If you see no change, re-check cleaning, flatness, and that the cooler mounts evenly.