Manual.ly Logo

Colbor CL60 Manual

0.0 · 0 Ratings

PDF manual · 2 Pages

English

M: QW-35-FL
page

/ 2

Loading...
e321548b56dae477f31fe0672fe29030d2b9 page 1
Thank you for choosing COLBOR product. Please read this manual
carefully before use and follow all instructions mentioned herein.
CL60
Video Light User Manual
Safety Instructions
Please read and fully understand this manual before using the product.
Please remove the COB protective lm to avoid damage by overheat before
rst use.
Please remove the COB protective cover to avoid damage by overheat
before every use.
Do not use the product under moist environment or with wet hands. Do not
allow the product to be splashed or soaked in water.
Keep the product away from corrosive chemicals and liquid to avoid
damage.
Keep the product out of children’s reach during use. Do not leave the
product unattended.
When the product is working, the COB and heat sink will produce high
temperature. Do not block, turn upside down and touch with hands.
To ensure the service life, the cooling system still runs for a while after
shutdown until the COB is below 45℃ .
Please disconnect the power supply and put away the power cord when it is
not in use.
During use, arrange the power cord in order to avoid tripping and cutting o
the power or damaging the product.
Let the product cool completely before storage. Remove the power cable
from the product and put it in the corresponding position of carrying bag
after cooling down.
Do not disassemble the product by yourself, otherwise the warranty will be
invalid. If any fault occurs, please refer it to an authorized technician for
inspection or maintenance.
Recommend to use the original parts of COLBOR. If the product is damaged
due to the use of the non-original parts, it is not included in the warranty of
our products.
Drop or external impact may cause product failure. Articial damage is not
covered by warranty.
COLBOR reserves the right of nal interpretation of the products. The
product design and specications are subject to change without notice.
Product Instructions
① COB Bead
② Bead Heat Sink
③ Bowen Mount Adapter
④ Ejector Pin
⑤ Rail
⑥ Vent
⑦ Quick-mount Holder
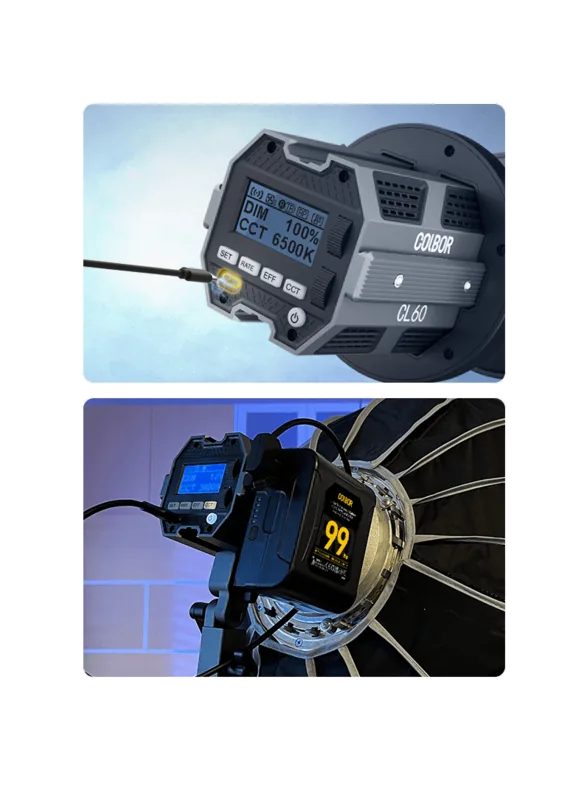
⑧ LCD Display Screen
⑨ Brightness Control
Wheel
⑩ Color Temperature
Control Wheel
⑪ Settings Button
⑫ EFF Rate Option
Button
⑬ EFF Mode Button
⑭ CCT Mode Button
⑮ Type-C Power
Input
⑯ Power Button
Installation & Disassembly
Hold the COB protective cover and pull it out as the
arrow shows.
Note: Make sure remove the cover before every use
to avoid heat damage.
① Align the inner frame of adapter ring with the outer frame of light, and
push the adapter ring into the light from the head. Fasten two marbles on the
adapter ring to the chute.
When disassembling, push the adapter ring towards the head of the light.
① Slide the quick-mount holder into the chute under the light and rotate the
knob a tightly.
② Install tripod into the quick-mount holder and rotate the knob b tightly.
③ Adjust the light to the desired angle and rotate the knob c tightly.
Slide the rail of one light into the chute of the other until the pins inlay.
When disconnecting, slide the light out of the chute.
Slide VM2 into the chute of light, determine the xed position and adjust the
lever to lock.
When removing, adjust the level to unlock and slide out of the light.
(1) DC power supply
Connect power adapter with Type-C power input and turn on.
(2) Battery power supply
Turn on power after installing V-mount and battery.
Operation Instructions
1. Remove COB protective cover
2. Install adapter and reector
3. Fixing of the video light
4. Multi-light connection & disassembly
5. Install VM2
6. Power supply
1. Before using the product for the rst time, please be sure to tear o the
protective lm in front of the COB bead.
2. Power On: connect the power cord with the power adapter, plug the
connector of adapter into the xture’s power input, then attach to an
electricity supply.
3. Function: long press the power button, then the power button lights up. The
product enters operation interface.
(Factory default mode: CCT)
4. Power O: press the power button.
After selecting wireless connection in Settings menu, the
icon will be displayed dynamically.
The icon is always on to indicate successful pairing with
mobile APP.
The icon disappears to indicate mobile APP pairing
failure, or the product is unpaired.
Smart Mode. The product will adjust the fan speed
according to the internal detected temperature to ensure
that it is in optimal working condition.
Status Icon Description
① APP Connection Status Icon
② Fan Status Icon
Quiet Mode. The fan keeps running at low speed for
minimum noise, and overheating protection will be
activated if the product temperature is higher than the
alarm value.
None grouping status. The product defaults to the factory
status, and will not be aected by other groups.
If the icon is always on, it means that Repeater function
is turned on, and if the icon disappears, it means the
function is turned o.
If the icon ashes, it means that the internal temperature
of the product is too high, and cooling measures need
to be taken. If the icon disappears, it means that the
operation is normal.
③ Group Status Icon
④ Repeater Status Icon
⑤ Product Overheated Alarm Icon
A stands for Group A. There are fteen groups (A~O). T
stands for Tx.
A stands for Group A. There are fteen groups (A~O). R
stands for Rx.
A stands for Group A. There are fteen groups (A~O). TR
stands for TxRx.
Brightness
Color
Temperature
Roll the wheel upwards
or downwards to adjust
brightness (DIM) within
0%~100%
Press down the wheel to
quickly switch the preset
brightness, 0%, 25%, 50%,
75%, and 100%
Roll the wheel upwards or downwards to adjust color temperature (CCT)
within 2700K~6500K
Press down the wheel to quickly switch the preset color temperature,
2700K, 3200K, 4000K, 5600K, and 6500K
CCT Mode (Short press CCT Mode Button to enter)
Brightness Control Wheel
Color Temperature Control Wheel
Rolling the wheel will enlarge the current setting parameter value, and
it will automatically return to the main screen after 1.5 seconds of no
operation
Brightness
Rate
Special
Eect
Color
Temperature
Roll the wheel upwards
or downwards to adjust
brightness (DIM) within
0%~100%
Press down the wheel to
quickly switch the preset
brightness, 0%, 25%, 50%,
75%, and 100%
Roll the wheel upwards or
downwards to adjust color
temperature (CCT) within
2700K~6500K
Press down the wheel to
quickly switch the preset
color temperature, 2700K,
3200K, 4000K, 5600K, and
6500K
Press the button to switch eect rate
from Lv.1 to Lv.5. Max rate: Lv.5
Press the button to switch special
eect: Fire → CCT Chase → Pulsing
→ TV → Explosion → Faulty Bulb
→ Welding → Strobe → Lightning
→ SOS
EFF Mode (Short press EFF Mode Button to enter)
Brightness Control Wheel
Color Temperature Control
Wheel
EFF Rate Option Button
EFF Mode Button
② Align the reector with the adapter ring and insert it. The ejector pin is
pinched by reector. Rotate the reector tightly clockwise and the ejector pin
springs back.
When disassembling, push the ejector pin and rotate the reector
anticlockwise.

Chat with your Colbor CL60 manual using AI

Get instant AI answers from your Colbor CL60 manual

Ask anything about the Colbor CL60. Answers come from this manual, with the pages they are based on.

Ask a Question

0/1000

Do you recommend CL60?

Yes No

Frequently Asked Questions

A

Products come with a 12-month limited warranty for original defects after purchase. Claims require proof of purchase and must not be due to accidental damage.

Is this answer helpful?

A

It is recommended to use the original power adapter. Using non-original parts may invalidate the warranty if damage occurs due to electrical incompatibility.

Is this answer helpful?

A

The system has Smart and Quiet modes. Smart adjusts fan speed based on internal temperature. Quiet runs at low speed until an alarm threshold is reached.

Is this answer helpful?

A

Yes, you can connect multiple lights. For groups larger than five, enable the repeater function on one light to ensure stable control signals.

Is this answer helpful?

A

The CL60 features a CRI of 97 or higher, ensuring highly accurate color reproduction for professional video and photography work without extra grading.

Is this answer helpful?

M: QW-35-FL

Advantages and Disadvantages

Advantages

  • High CRI 97+ ensures natural skin tones and accurate color rendering in post production.
  • Wireless app control allows for flexible operation without physical touchpoints.
  • Variable color temperature from 2700K to 6500K covers all lighting scenarios.
VS

Disadvantages

  • Fan noise might be audible in extremely quiet recording environments even on low settings.
  • Control distance is limited to 10 meters without using repeater function.
  • Protection covers must be removed before every use to prevent overheating damage.
M: QW-35-FL

Product Specification

Light Output

268.30 fc (3.28 ft), 1880.36 fc (3.28 ft w/ Reflector)

Color Temperature

2700-6500K

Power

65W

Base

No

Features

LED, Shade Holder

Dimensions

3.15x5.51x3.54in (WxHxD)

Weight

1.21 lbs

M: QW-35-FL

Product Description

Discover the Power of the Colbor CL60 Lighting System

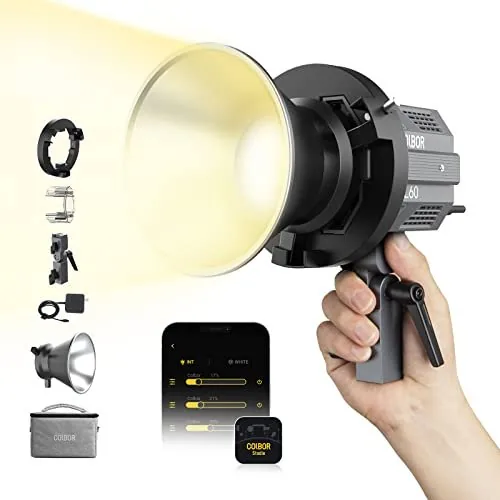
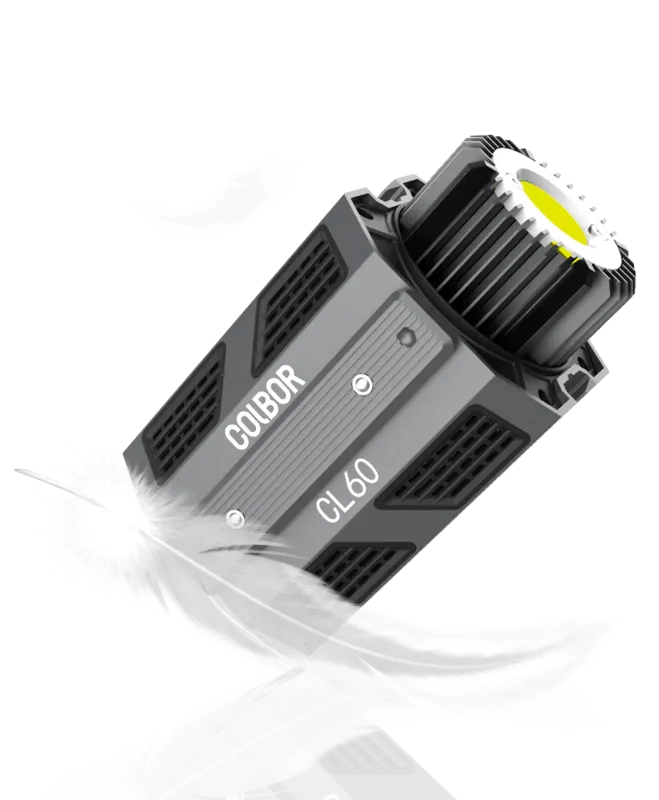
The Colbor CL60 represents a significant leap in portable video lighting technology for modern creators. This compact COB light delivers exceptional performance while maintaining a manageable form factor suitable for diverse shooting environments. Whether you are conducting interviews, filming high-end product videos, or working on content for major social media platforms, mastering your lighting setup is absolutely crucial for success. This comprehensive overview explores how this equipment performs in real-world scenarios to help you decide if it fits your needs. Reading the official Colbor CL60 Manual helps maximize the lifespan and utility of the device significantly.

Power Output and Versatility

At the core of this unit lies a high-efficiency COB bead capable of producing over 60 watts of sustained output power. The color rendering index reaches an impressive 97+, ensuring skin tones appear natural under any condition without post-production correction. The adjustable color temperature spans from 2700 Kelvin to 6500 Kelvin, covering warm tungsten to cool daylight scenarios seamlessly. You can fine-tune brightness from zero to full strength using the intuitive control wheels on the front panel for precise exposure control. Users can switch presets quickly for common settings like daylight or tungsten with a simple press.

Intelligent Features and Control

Modern workflows demand integration with software solutions. The CL60 connects via wireless technology to allow remote adjustment without physical interaction during shoots. A dedicated app provides full control over parameters including special effects like fire, lightning, or strobe modes for artistic flair. The cooling system is highly intelligent, adjusting fan speed based on internal temperatures to prevent overheating without being overly aggressive during operation. Quiet mode is specifically available for situations requiring minimal noise capture near the subject. Smart settings also allow the system to detect temperature automatically.

Installation and Physical Build Quality

The device features a standard bowens mount adapter included in the box, allowing compatibility with a vast array of softboxes and optical accessories from third parties. A robust heat sink manages thermal output during extended sessions to maintain consistent output. The aluminum alloy body is incredibly robust yet lightweight for travel. Safety protocols include automatic shutdown if temperatures exceed safe limits to protect the components. Power options include DC power via Type-C standard or V-mount batteries for location shooting without power outlets.

Conclusion and Recommendations

Investing in quality gear is essential for professional results that stand out online. Understanding the controls ensures you get the best output from your light. Users should follow safety guidelines regarding protective covers and cooling intervals before storage to ensure longevity. With proper care and adherence to instructions, this light becomes a staple tool in any studio setup or mobile kit for production teams everywhere. Always ensure the environment is dry and safe to prevent damage to the electronics.

M: QW-35-FL

© Copyright 2026 Manual.ly