Manual.ly Logo

Cameo AURO SPOT Z 300 Manual

0.0 · 0 Ratings

PDF manual · 94 Pages

English

M: OA-GPT-54-NAN
page

/ 94

Loading...
2d34c563be76cf483c04e134c1e922550b4c page 3
3
DMX
DEUTSCHFRANCAIS
ESPAÑOL
ENGLISH
ITALIANO POLSKI
ENGLISH
YOU‘VE MADE THE RIGHT CHOICE!
We have designed this product to operate reliably over many years. Please read this User‘s Manual carefully, so that you can begin making
optimum use of your Cameo Light product quickly. Learn more about Cameo Light on our website WWW.CAMEOLIGHT.COM.
PREVENTIVE MEASURES
1. Please read these instructions carefully.
2. Keep all information and instructions in a safe place.
3. Follow the instructions.
4. Observe all safety warnings. Never remove safety warnings or other information from the equipment.
5. Use the equipment only in the intended manner and for the intended purpose.
6. Use only sufficiently stable and compatible stands and/or mounts (for fixed installations). Make certain that wall mounts are properly
installed and secured. Make certain that the equipment is installed securely and cannot fall down.
7. During installation, observ e the applicable safety regulations for your country.
8. Never install and operate the equipment near radiators, heat registers, ovens or other sources of heat. Make certain that the equipment is
always installed so that is cooled sufficiently and cannot overheat.
9. Never place sources of ignition, e.g., burning candles, on the equipment.
10. Ventilation slits must not be blocked.
11. This appliance is designed exclusively for indoor use, do not use this equipment in the immediate vicinity of water (does not apply
to special outdoor equipment - in this case, observe the special instructions noted below). Do not expose this equipment to flammable
materials, fluids or gases.
12. Make certain that dripping or splashed water cannot enter the equipment. Do not place containers filled with liquids, such as vases or
drinking vessels, on the equipment.
13. Make certain that objects cannot fall into the device.
14. Use this equipment only with the accessories recommended and intended by the manufacturer.
15. Do not open or modify this equipment.
16. After connecting the equipment, check all cables in order to prevent damage or accidents, e.g., due to tripping hazards.
17. During transport, make certain that the equipment cannot fall down and possibly cause property damage and personal injuries.
18. If your equipment is no longer functioning properly, if fluids or objects have gotten inside the equipment or if it has been damaged in
anot her way, switch it off immediately and unplug it from the mains outlet (if it is a powered device). This equipment may only be repaired
by authorized, qualified personnel.
19. Clean the equipment using a dry cloth.
20. Comply with all applicable disposal laws in your country. During disposal of packaging, please separate plastic and paper/cardboard.
21. Plastic bags must be kept out of reach of children.
FOR EQUIPMENT THAT CONNECTS TO THE POWER MAINS:
22. CAUTION: If the power cord of the device is equipped with an earthing contact, then it must be connected to an outlet with a protective
ground. Never deactivate the protective ground of a power cord.
23. If the equipment has been exposed to strong fluctuations in temperature (for example, after transport), do not switch it on immediately.
Moisture and condensation could damage the equipment. Do not switch on the equipment until it has reached room temperature.
24. Before connecting the equipment to the power outlet, first verify that the mains voltage and frequency match the values specified on the
equipment. If the equipment has a voltage selection switch, connect the equipment to the power outlet only if the equipment values and the
mains power values match. If the included power cord or power adapter does not fit in your wall outlet, contact your electrician.
25. Do not step on the power cord. Make certain that the power cable does not become kinked, especially at the mains outlet and/or power
adapter and the equipment connector.
26. When connecting the equipment, make certain that the power cord or power adapter is always freely accessible. Always disconnect the
equipment from the power supply if the equipment is not in use or if you want to clean the equipment. Always unplug the power cord and
power adapter from the power outlet at the plug or adapter and not by pulling on the cord. Never touch the power cord and power adapter
with wet hands.
27. Whenever possible, avoid switching the equipment on and off in quick succession because otherwise this can shorten the useful life of
the equipment.
28. IMPORTANT INFORMATION: Replace fuses only with fuses of the same type and rating. If a fuse blows repeatedly, please contact an
authorised service centre.
29. To disconnect the equipment from the power mains completely, unplug the power cord or power adapter from the power outlet.
30. If your device is equipped with a Volex power connector, the mating Volex equipment connector must be unlocked before it can be re-
moved. However, this also means that the equipment can slide and fall down if the power cable is pulled, which can lead to personal injuries
and/or other damage. For this reason, always be careful when laying cables.
31. Unplug the power cord and power adapter from the power outlet if there is a risk of a lightning strike or before extended periods of disuse.
32. The device must only be installed in a voltage-free condition (disconnect the mains plug from the mains).
33. Dust and other debris inside the unit may cause damage. The unit should be regularly serviced or cleaned (no guarantee) depending on
ambient conditions (dust etc., nicotine, fog) by qualified personnel to prevent overheating and malfunction.
34. Please keep a distance of at least 0.5 m to any combustible materials.
35. Power cables to power multiple devices must have a cross-section of at least 1.5 mm². Within the EU, the cables must correspond to
H05VV-F, or similar. Suitable cables are offered by Adam Hall. With these cables, you can connect multiple devices via the power OUT
connection to the power IN connection of an additional device. Make sure that the total current consumption of all connected devices does not
exceed the specified value on all connected devices (label on the device). Make sure to keep power cable connections as short as possible.

Chat with your Cameo AURO SPOT Z 300 manual using AI

Get instant AI answers from your Cameo AURO SPOT Z 300 manual

Ask anything about the Cameo AURO SPOT Z 300. Answers come from this manual, with the pages they are based on.

AURO SPOT Z 300 Maintenance Schedule

After use
Cool down before handling

Wait at least 10 minutes after operation before touching or transporting the device to allow cooling.

Regularly
Clean exterior surfaces

Use a dry cloth for cleaning. Do not open the unit or modify it.

As needed
Internal maintenance and cleaning

Qualified personnel should service or clean the unit regularly depending on ambient conditions like dust, nicotine, or fog to prevent overheating.

M: QW-35-FL

Ask a Question

0/1000

Do you recommend AURO SPOT Z 300?

Yes No

Frequently Asked Questions

A

It supports DMX-512 control in two modes (17-channel and 20-channel). It also provides Master/Slave operation and standalone functions such as Auto programs and Static user macros. The onboard menu lets you set DMX address and operating mode directly.

Is this answer helpful?

A

Use the MODE button to open the options menu, then select System Settings and the DMX Address option. The start address digits can be adjusted with the arrow keys, then confirmed with ENTER. Press MODE to return to the main screen.

Is this answer helpful?

A

When DMX is interrupted, the display indicates the loss of DMX and changes its background color. The fixture can be configured for DMX fail behavior, such as holding the last command or triggering blackout, depending on the selected system setting.

Is this answer helpful?

A

Yes. Static mode allows you to set pan/tilt, color, gobos, strobe, zoom, focus, frost, and prism parameters directly using the fixture controls. Four user macros are available so you can save and recall favorite settings for fast, repeatable looks.

Is this answer helpful?

A

Yes. The spotlight complies with the RDM standard, allowing an RDM-capable controller to request status and configure supported RDM endpoints. This is useful for monitoring and management in larger setups.

Is this answer helpful?

A

DMX devices are connected in series using DMX IN and DMX OUT. Keep connecting cables as short as possible for better transmission reliability. Also, the last device in the chain should be equipped with a terminator to reduce errors.

Is this answer helpful?

M: OA-GPT-54-NAN

Advantages and Disadvantages

Advantages

  • 200 W LED moving head with zoom, focus, and frost filter for versatile looks
  • Color wheel, 2 gobo wheels, and 2 prisms enable layered, creative effects
  • DMX control with 17CH and 20CH modes plus Master/Slave and standalone programs
  • Static mode and 4 user macros allow scene building without an external controller
  • RDM support enables status requests and remote configuration with RDM-capable controllers
VS

Disadvantages

  • Standard channel tables and operation rely on proper DMX addressing and cabling practices
  • Standalone and macro results depend on careful in-fixture menu setup by the user
  • Safety requirements include indoor-only use and professional handling for overhead installs
M: OA-GPT-54-NAN

Product Specification

Beam pattern

Spot

Light source

LED

Power consumption

200W

Beam angle

10-25°

PAN angle

540°

TILT angle

270°

Color mixing

LED (RGBW)

Effects

Dimmer, Strobe

Control

DMX (20 channels), Master/Slave

Dimensions

11.10x18.46x7.32in (WxHxD)

Weight

24.69lbs

M: GO-GEM-FL-25

Product Description

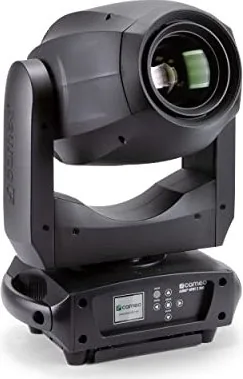
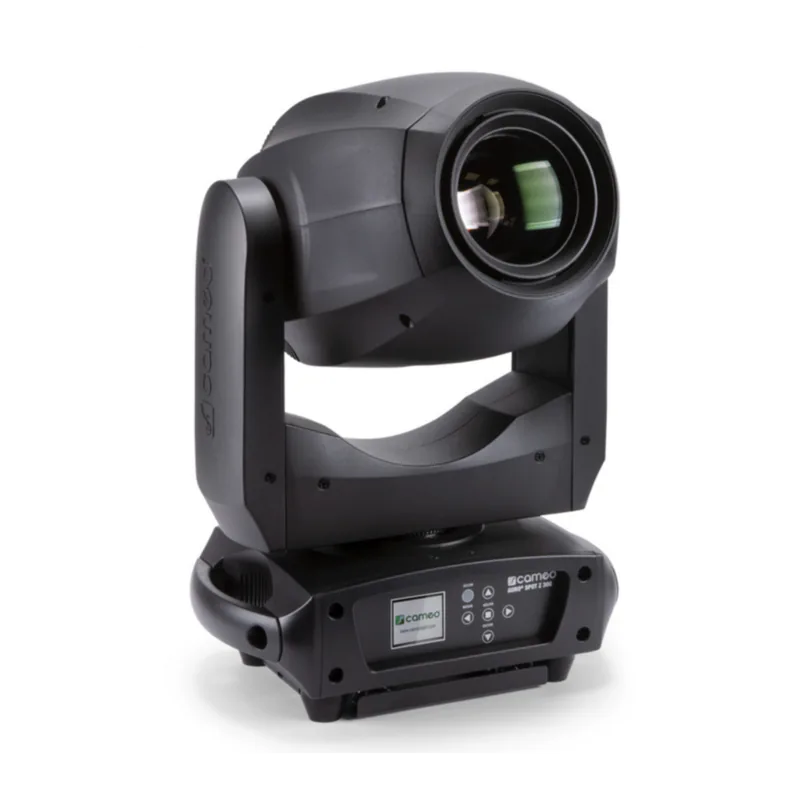
Cameo AURO SPOT Z 300 - Powerful LED Moving Head Zoom for Stage and Events

The Cameo AURO SPOT Z 300 is a professional LED moving head designed for reliable, long-term performance in event lighting. Built around a 200 W LED engine, it delivers a sharp, dynamic beam with zoom control, focus, and an atmospheric look thanks to a frost filter. With a color wheel and two gobo wheels, plus two prisms, the spotlight supports versatile looks ranging from crisp gobos to layered, sparkling effects.

Control is flexible and production-friendly. You can operate it via DMX using DMX-512 in two channel modes, 17-channel or 20-channel. For live workflows, it also supports Master/Slave operation and standalone programs. If you want to start quickly on location, the onboard display and battery-powered settings let you configure system options even when the unit is not connected to power, making setup faster and more efficient.

The operating experience is guided by clear menu logic: you can set DMX start address, select operating mode, and adjust key behavior such as dimmer curves, pan/tilt inversion, and LED PWM frequency. The unit also features DMX fail behavior options (hold last command or blackout), an optional automatic position correction, and motor reset and function test tools. When DMX is interrupted, the display can clearly indicate the status, helping operators troubleshoot in real time.

For effects design, the Static mode is especially useful. It allows you to build custom scenes directly on the fixture by assigning values for pan/tilt movement, dimmer, strobe behavior, color and gobo selections, zoom, focus, frost intensity, and prism settings. Four user macros help store and reuse favorite setups, so you can reproduce looks consistently without an external controller.

Finally, the Cameo AURO SPOT Z 300 complies with the RDM standard (Remote Device Management), enabling RDM-capable controllers to request status and configure compatible endpoints. The result is a spotlight that fits both fixed installations and touring rigs, offering strong output, rich effect variety, and practical control features.

Key results you can expect

  • High-impact 200 W LED output with zoom, focus, frost filter, and multi-layer optical effects
  • DMX-512 control in 17CH or 20CH, plus Master/Slave and standalone auto programs
  • Quick setup via LC display, onboard menu, and battery-backed system settings
  • Static mode and user macros for controller-independent scene building
  • RDM support for status checks and remote configuration (RDM-capable setups)

Notes

  • Always follow the Cameo AURO SPOT Z 300 Manual safety guidance: indoor use, do not block ventilation, and avoid looking into the LED beam.
  • For DMX chains, keep cables short and use a terminator on the last fixture.
  • Overhead installation requires qualified experience and proper safety measures.
M: OA-GPT-54-NAN

© Copyright 2026 Manual.ly