Manual.ly Logo

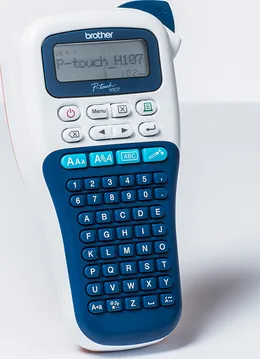
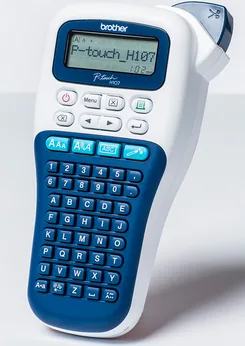
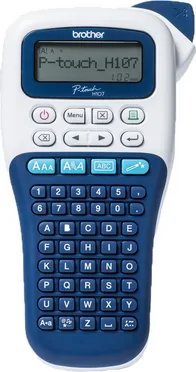
Brother P-touch PT-H107B Manual

4.8 · 4 Ratings

PDF manual · 2 Pages

English

M: QW-35-FL
page

/ 2

Loading...
362cc86175ce1cb095d4499ebf3c5ebb1f14 page 2
BASIC USAGE
Switching Upper Case/Lower Case
Upper case ( ON) Lower case ( OFF)
Making Two Lines of Text
To make two lines of text, do one of following:
a)
Enter the text for the first line and then press for the
second line.
b)
Move the cursor to where the second line starts and press
.
Use either 9mm or 12mm wide tape for two line text.
NOTE
Do not press after the second line; otherwise the “Line Limit!”
error message will appear.
To Clear
By pressing , the letters will be deleted one by one.
To delete all text and settings :
To delete text only :
Entering Accented Characters
• To cancel the current operation, press .
• The order of accented characters differs depending on the
selected LCD language.
Changing Label Length
NOTE
• After the label is printed, cut along the printed dots (:) with
scissors so that the label length matches the P-touch setting.
• If a specific label length has been selected, also appears in
the LCD.
Preview
You can preview the text before printing.
Only the text can be previewed, not the size, font or any
additional features.
Feeding (Tape Feed)
Printing
• If you need only 1 copy of the label, press without
selecting the number of copies.
• The number of copies can also be specified by pressing a
number key.
• To prevent damage to the tape, do not touch the cutter lever
while the message “Printing...” or “Feeding...” is displayed.
• To cut off the label, push in the tape cutter lever on the upper-
right corner of the P-touch.
• Peel the printed label from the backing and apply the label.
• You can print up to 9 copies of each label.
Setting Margin
[Full]/[Half]/[Narrow]
For leaving equal margins on both sides of the text.
[Chain Print]
For creating a label containing text in various styles.
1. Enter text.
2. Press , then [Copies: ] appears.
3. Press / or enter number with number keys to
select the number of copies.
4. Press . Printing will start, and then the message
“OK to Feed?” appears.
5. Press to enter more text.
6. Clear the text, enter the text for the next label, and then
press .
7. When the message “OK to Feed?” appears after the last
label is printed, press .
8. After the tape is fed, press the cutter lever to cut off the
chain of labels.
NOTE
• When [Half] or [Narrow] is set, the displayed label length is the
length from the printed dots ( ) to the end of the label.
• To print more than 1 copy of a label with minimum margin, set
the margin to [Narrow].
• When [Chain Print] is set, feed the tape before using the cutter
otherwise a part of the text may be cut off. Also, cut along the
printed dots ( ) with scissors so the text is centred in the label.
*Feed the tape before using the cutter.
• Do not pull the tape since this may damage the tape cassette.
You can save up to 9 labels and recall them for printing at a later
date. A maximum of 80 characters can be saved per file. You can
also edit and overwrite the stored label.
Print
Save
Open
NOTE
If you try to store a label when there is already a label stored to that
number, a message “Overwrite?” will appear. Press to save
your new label. Press to cancel.
If the cutter blade becomes blunt after repetitive use and the tape
cannot be cut cleanly, turn around the cutter board as shown in the
illustration 1.
If you still have difficulty replace with a new cutter unit (stock no.
TC-4) by obtaining one from an authorised Brother reseller.
Replacing the Cutter Unit
1. Pull out the two sections of the cutter unit (green) in the
direction of the arrows shown in the illustration 2.
2. Install the new cutter unit. Push it in until it snaps into
place.
You can reset the P-touch when you want to initialise the settings,
or in the event the P-touch is not working properly.
1
Turn off the P-touch, hold down and and
then press to turn the P-touch back on.
2 Release and .
The P-touch turns on with the internal memory reset.
NOTE
All text, settings and stored files are cleared.
Entering Text
LCD display Label image
/ [Text&Format]
/ [Text Only]
- / /
Aa
CDc d
Ee
GIg i
KLk l
NRn r
Oo
STs t
Uu
YZy z
/ [Label Length]
/ [Auto/30-300 mm]
Printing Labels
/ [Preview]
/ [Feed]
[Copies: 1] / / -
/ [Margin]
/ [Full/Half/Narrow/Chain Print]
LCD display Label image
Full
Half
Narrow
25 mm
4 mm
4 mm
25 mm
ABC ABC
12 mm 12 mm
ABC
Full
Half
Narrow
67 mm
ABC
41 mm
ABC
25 mm
ABC
Saving Label Files
/ [File] / [Print]
/
[Copies: ] / -
/ [File] / [Save]
/
/ [File] / [Open]
/
Accessories
Tape Cassettes: Visit the Brother support website at
support.brother.com for the latest
information about consumables
Cutter Unit: TC-4 (replacement)
Do not touch the cutter blade directly with your fingers.
Resetting the P-touch
Cutter board
USING TEMPLATES
The P-touch comes installed with preset label designs. You can
easily create labels using these designs.
Example:
If [Surprise!] is selected, a frame, style and graphics are selected randomly.
This function allows you to create unique labels by using built-in templates.
Example:
NOTE
• Depending on the format you have selected, the entire contents of your text may
not be printed. For example, if you selected a fixed Label Length and the text is too
long, the “Text Limit!” error message will appear. (Only for DECO MODE function)
• The template designs cannot be edited.
• Only the highlighted symbols in “Symbol Key” can be used in DECO MODE.
• To clear all text, press , and “Clear?” appears. Press to clear. Press
to cancel.
• When you access DECO MODE or Auto Designs, your most recently printed
DECO MODE or Auto Designs text and label length will be recalled.
• Press to return to the previous step.
• To exit DECO MODE or Auto Designs and return to the text input screen, press
/ to select [Cancel], and then press when [Print] is displayed.
• The DECO MODE features are only available when using 12mm tape cassettes.
• The maximum label length is 200mm for the DECO MODE.
• When [Surprise!] is selected in Auto Designs, label length will not be displayed in
the text input screen.
• When [Auto] is selected for “Label Length”, the label will automatically adjust to the
correct length for the text.
• Press to return to the [Auto] setting for “Label Length” mode.
Press to select the frame design.
NOTE
Frames cannot be printed on 3.5mm tape.
NOTE
With the Cable Label function, [Auto] is automatically selected for
the label length and [Full] for the margins.
USEFUL FUNCTION KEYS
1 Press or or + to select the
settings to enter the text.
2 Press / to select the settings.
Press to select various symbols.
To enter Basic symbols :
Only the highlighted symbols can be used in DECO MODE.
To enter Pictograph symbols :
The selected symbol is displayed as “A1” in the text input screen.
For example, a car is displayed as in the screen.
To print all pictographs :
NOTE
Press to return to the previous step.
Auto Designs
[★Category★] / [Pets]
[★Input text★] Rusty's Food [Print]
Congrats Sports
People Fashion
Pets Flower
Kitchen Space
Business Surprise!
DECO MODE
/ [Deco mode]
[Design X] (X:1-12) [Input Text] ABCDEF
[Label Length] / [Auto/30-200mm] [Print]
17
28
39
410
511
612
Frame Key
/ Select a frame
2
47
58
369
Cable Label
This function allows you to create labels with 2
lines of text which can be wrapped around
cables. Always use Brother Flexible ID tape to
print these labels.
Refer to the insertion sheet supplied with the
Flexible ID tape for recommended usage
conditions.
[Input text] ABC 159
/
[Cable]
[Print OK?] [Copies: 1]
/
/ -
ABC
159
ABC
159
Text Keys / /
+
or or +
/
Select an item
Size
Large
Medium
Small
Style
Normal
Bold
Outline
Shadow
Italic
I+Bold
I+Outline
I+Shadow
Vertical
Width
+
Normal
× 2
× 1/2
Short Cut Keys
Width
Label Length
Margin
File
Cable
Deco mode
Preview
Feed
Unit
Language
Symbol Key
/ [Basic] / Choose a symbol
1
2
3
4
5
6
7
8
9
10
11
12
13
14
/ [Pictograph] / Select category
/ Choose a symbol
123456789
A
B
C
D
E
F
G
H
I
J
K
L
/ [Print List] [Print OK?]

Chat with your Brother P-touch PT-H107B manual using AI

Get instant AI answers from your Brother P-touch PT-H107B manual

Ask anything about the Brother P-touch PT-H107B. Answers come from this manual, with the pages they are based on.

P-touch PT-H107B Maintenance Schedule

As needed
Clean the print head if a blank line appears

Remove tape cassette and gently wipe print head with dry cotton swab or use optional cleaning cassette TZe-CL3.

As needed
Replace cutter unit when blade becomes blunt

If tape cannot be cut cleanly after repetitive use, turn around cutter board or replace with new TC-4 unit.

M: qwen/qwen3.8-flash

Ask a Question

0/1000

Do you recommend P-touch PT-H107B?

Yes No
0
User Pic

Jan Schmidt

5 months ago

Does this device work with batteries or does it need a power adapter? One review mentioned AA batteries.

0
User Pic

Manual.ly

5 months ago

This printer requires six AA batteries to function. Please note that the batteries are not included in the box. You will need to purchase them separately. Standard rechargeable or alkaline batteries work well for regular labeling tasks.

M: QW-35-FL
M: QW-35-FL

Frequently Asked Questions

A

The printer operates using six AAA alkaline batteries (LR03) or six AAA Ni-MH rechargeable batteries (HR03). All batteries must be replaced simultaneously, and users should ensure correct polarity.

Is this answer helpful?

A

Only Brother TZe tapes are recommended. Supported widths include 3.5mm, 6mm, 9mm, and 12mm. Other brands may cause jams or print quality issues.

Is this answer helpful?

A

Use a soft dry cloth or a cotton swab to gently wipe the print head. Do not use organic solvents. For deep cleaning, an optional cleaning cassette can be used.

Is this answer helpful?

A

This message indicates the batteries are weak. Replace alkaline batteries with new ones or fully charge Ni-MH batteries to resolve the issue.

Is this answer helpful?

A

Yes, you can save up to nine label files in memory. These can be recalled and edited later. However, memory is cleared after three minutes of power loss.

Is this answer helpful?

A

Turn off the P-touch, hold down specific keys while turning it back on, then release them. This initializes settings but clears all stored files.

Is this answer helpful?

A

Store the device out of reach of children. Prevent them from swallowing small parts or putting labels in their mouths to avoid injury.

Is this answer helpful?

M: QW-35-FL

Advantages and Disadvantages

Advantages

  • Compact portable design suitable for home or office organization
  • Supports multiple tape widths from 3.5mm to 12mm
  • Long battery life using six AAA batteries
  • Easy to use with clear LCD display and buttons
  • Built-in templates for creative label designs
VS

Disadvantages

  • Memory settings clear if disconnected for over three minutes
  • Cannot charge rechargeable batteries directly
  • No built-in display screen beyond the small LCD
  • Cutter blade requires manual replacement when dull
  • Limited characters on very small tape widths like 3.5mm
M: QW-35-FL

Product Specification

Type

Handheld, Thermal Transfer

Print Resolution

180 dpi

Ribbon Width

0.14 in, 0.24 in, 0.35 in, 0.47 in

Print Lines

2

Print Length

1.18-11.81 in

Print Height

0.35 in

Print Speed

0.79 in/s

Font Sizes

3

Fonts

4

Font Styles

9

Template Memory

9

Print Functions

Multi-print (1-9), Vertical Print

Display

monochrome, 1-line

Keyboard

ABC

Power Supply

Battery (6x AAA)

Dimensions

4.33x8.19x2.32 in

Weight

0.86 lbs

Consumables

TZe

Features

Manual Cutter

Warranty

3 Years

Note

PTH110ZG1 = DE Model, PTH110ZG2 = AT Model

M: QW-35-FL

Product Description

Discover the Brother P-touch PT-H107B Label Maker

Organizing your life requires efficient tools. Users often consult the Brother P-touch PT-H107B Manual for optimal operation of this versatile device. It ensures users understand how to operate the hardware safely. This compact label maker is perfect for home and office organization. It creates professional labels for cables, storage bins, and files. The manual emphasizes safety to prevent injury from batteries or the cutter blade. Following instructions is vital for longevity.

Battery and Power Configuration

Powering the unit requires six AAA batteries. Users may install alkaline or Ni-MH rechargeable types. It is crucial to replace all six batteries at the same time. Mixing old and new batteries causes immediate performance issues. Never disassemble the batteries or insert them reversed. The device will turn off automatically if no keys are pressed for five minutes. Power loss for three minutes clears all memory settings. Always remove batteries if not used for a long duration. The system does not charge batteries internally.

Tape Width and Cassette Types

Compatible cassettes include Brother TZe tapes. Several widths are supported including 3.5mm, 6mm, 9mm, and 12mm. Only use tapes marked with the official logo. Do not use other brands as they may jam. The tape exit slot feeds the material to the print head. You can chain print multiple labels easily without reloading. Remember to cut the tape along the printed dots. The cutter lever is located on the upper right corner. Replace the cutter blade when it becomes dull.

Features and Customization

The LCD display shows 12 characters but accepts longer input. You can change character sizes, styles, and add frames. Auto designs offer random styles for creative labeling. Storing up to nine labels helps recall designs later. The machine supports accented characters for international use. Saving files allows editing for future projects. Clearing data is possible if settings need resetting. Preview functionality shows text before printing. Cable label functions create wrapped text for wires.

Safety and Maintenance Protocols

Maintain the device by cleaning the print head gently. Use a soft dry cloth for the exterior only. Never use solvents or touch internal parts directly. Avoid high humidity or dust locations. Keep away from heat sources. If fluids leak from batteries, rinse skin immediately. Store the unit out of reach of children. Do not put parts in mouths. Follow all warning signs in the manual strictly. Do not print without a cassette installed.

Troubleshooting and Problem Solving

Error messages guide you to solutions quickly. Low battery indicates weak power needs replacement. Invalid messages mean bad numbers were entered. No Text shows empty memory during print commands. Blank displays often mean weak batteries or insertion issues. Tape jams require checking guides carefully. Resetting clears internal memory for fresh starts. Consulting the guide helps resolve locked up states quickly. Cleaning the head removes dust preventing clear prints.

M: QW-35-FL

© Copyright 2026 Manual.ly