Manual.ly Logo

Britax Romer Trifix 2 i-Size Manual

0.0 · 0 Ratings

PDF manual · 2 Pages

English

M: gpt-5.6-terra
page

/ 2

Loading...
b75e58ae760621f1e49a5c1e55b11ac346f4 page 2
1
2
b
c
a
3
4
5
1 cm
7
6
15
16
13
22
22
16
06
23
13
02
5. SAFETY NOTES
Please take the time to read these instructions carefully and keep them
to hand in the intended storage compartment
14
on the child safety seat
at all times. The instructions must be kept with the child safety seat if the
latter is passed on to a third party.
DANGER! For the protection of your child:
• In the event of an accident with a collision speed of more than 10km/h, the
child safety seat may be damaged without the damage becoming immediately
visible. In this case the child safety seat must be replaced. Please dispose of
it properly.
• As a rule, have your child safety seat checked if it was damaged (e.g if it falls
on the ground).
• Regularly check all important parts for damage. Ensure that all mechanical
parts, in particular, are fully functional.
• Never lubricate or oil parts of the child seat.
•
Never leave your child unattended in the child seat in the vehicle.
• Only allow your child to enter and exit the vehicle on the pavement side.
• Protect the child safety seat from intensive direct sunlight when it is not in use.
The child safety seat can get very hot in direct sunshine. Children's skin is
sensitive and could be harmed as a result.
•
The more snugly the belt fits over your child's body, the better they will be pro-
tected. Therefore, avoid putting thick clothes on your child under the belt.
• Take regular breaks on long journeys in order to give your child the opportu-
nity to run about and play.
• Use on the rear seat: Move the front seat far enough forwards to ensure that
your child's feet cannot hit the backrest of the front seat (to prevent the risk of
injury).
DANGER! For the protection of all vehicle occupants:
In the case of an emergency stop or an accident, unsecured persons or ob-
jects may cause injury to other vehicle occupants. Please always check that...
• no other load-bearing contact points are used other than those specified in
these instructions and marked out on the child safety seat.
• the backrests of the vehicle seats are locked (i.e. that a foldable rear seat
bench latch is engaged).
• all heavy or sharp-edged objects in the vehicle (e.g. on the parcel shelf) are
secured.
• all persons in the vehicle have their seatbelts fastened.
• the child safety seat is always secured when it is in the vehicle, even if no child
is being transported.
WARNING! For your protection when handling the child seat:
• Never use the child safety seat free-standing, not even for test sitting.
•
To avoid damage, ensure that the child safety seat is not jammed in between
hard objects (car door, seat rails, etc.).
•
Keep the child safety seat in a safe place when it is not in use. Do not place any
heavy objects on the seat and do not store it directly next to sources of heat or
in direct sunlight.
CAUTION! To protect your vehicle:
• Certain car seat covers made from more sensitive materials (e.g. velour,
leather, etc.) may sustain signs of wear and tear when using child safety seats.
For optimum protection of your car seat covers, we recommend using the
BRITAX RÖMER car seat protector from our range of accessories.
PAGE II
1. If your vehicle is not fitted with ISOFIX insertion aids by standard, clamp the
two insertion aids
02
, which are included in the scope of delivery of the
seat*, with the section pointing upwards to the two ISOFIX fastening points
01
of your vehicle.
TIP: The ISOFIX fastening points are located between the surface and the
backrest of the vehicle seat.
2. Move the headrest of the vehicle seat into the top position.
* The insertion aids facilitate the installation of the child safety seat with the use of the
ISOFIX fastening points and prevent damage to the car seat covers. As long as they are
not used, remove them and keep them in a safe place. For vehicles with a foldable back-
rest, the insertion aids need to be removed before folding the backrest. Any problems
occurring usually come from soiling or external objects on the insertion aids and on the
hook. Remove soiling or external objects to rectify such problems.
6. PREPARATORY WORK
7. INSTALLATION OF THE CHILD SAFETY SEAT
1. PREPARING THE ISOFIX
1.1 Pull the grey fabric loop
15
,
until the ISOFIX
locking arms
16
are fully extended.
1.2 Push the green safety button
06
and the red
release button
05
on both sides of the seat
towards each other. This ensures that both
hooks on the ISOFIX locking arms
16
are
open and ready to use.
8. USING THE CHILD SAFETY SEAT
2. PREPARING THE TOP TETHER
2.1 Remove the top tether
13
from the user and
operating instructions compartment
14
and
place it over the child safety seat.
TIP: Only remove the red rubber band if the
length of the top tether
13
is not sucient for
your vehicle model.
2.2 Place the child seat facing forward (in the
direction of travel) on a suitable vehicle seat.
Adjust the backrest angle of the car seat so
that the gap between the car seat and the
child safety seat is as small as possible.
2.3 Take the top tether
13
and press the metal
tongue
26
away from the harness in order
to make the harness longer and pull the top
tether
13
on the snap-in hook
22
until it
forms a V shape.
2.4 Guide the top tether
13
on the left and right
side up to the headrest.
3. FASTENING THE TOP TETHER
Fit the snap-in hook
22
into the top-tether
anchoring point recommended in your vehicle's
operating instructions.
CAUTION! Make sure that you do not use
the luggage hooks instead of the top-tether
anchoring points. Look for the following symbol
in your vehicle:
4. FASTENING THE ISOFIX
4.1 Position the two ISOFIX locking arms
16
directly in front of the two insertion aids
02
.
4.2 Push both ISOFIX locking arms
16
into the
insertion aids
02
until the ISOFIX locking
arms
16
engage on both sides with a click-
ing sound.
DANGER! The green safety button
06
must be visible on both sides so that the
child safety seat is correctly fastened.
5. PUSHING THE CHILD SAFETY SEAT UNTIL
SECURE
Push the child safety seat firmly backwards as far
as it will go.
6. CHECKING THE FASTENING
Shake the child safety seat to ensure that it is
securely fastened and check the safety buttons
06
to make sure that the two indicators are fully
on in green.
7. TENSIONING THE TOP TETHER
Tighten the belt strap of the top tether
13
, until
the belt tension indicator
23
turns green and the
top tether
13
is taut.
8. SECURING YOUR CHILD
Carry out the steps specified in Section 8, "US-
ING THE CHILD SAFETY SEAT".
1. LOOSENING THE SHOULDER STRAPS
To loosen the shoulder straps, press the adjust-
ment button
09
and, at the same time, pull both
shoulder straps
08
forward.
IMPORTANT! Do not pull the shoulder
pads
07
.
2. OPENING THE HARNESS BUCKLE
To open the harness buckle
04
, press the red
button on the harness buckle.
5. ADJUSTING THE HEADREST
A correctly adjusted headrest
03
ensures opti-
mum protection for your child in the child safety
seat:
The headrest
03
must be adjusted so that the
shoulder straps
08
are at the same level as your
child’s shoulders or slightly higher.
To adjust the headrest:
5.1 Pull the adjusting ring
12
of the head rest
03
upwards.
5.2 Move the headrest
03
to the correct shoul-
der strap height and make sure it is correctly
fastened by moving the headrest
03
down
slightly.
3. POSITIONING CHILD IN THE SEAT
Place your child in the child safety seat.
Make sure that the buckle
04
is folded forwards
and place your child in the child safety seat.
4. FITTING THE SHOULDER STRAPS
Lay the shoulder straps
08
over your child's
shoulders.
WARNING!
Do not twist or swap the shoulder
straps, as this will invalidate the protective function.
6. FASTENING THE HARNESS BUCKLE
Bring the two buckle tongues
24
together and in-
terlock them before inserting them into the harness
buckle
04
– you must be able to hear a "click"
noise when doing this.
7. TENSIONING THE ADJUSTING STRAP
Pull the adjusting strap
10
until the strap lies flat
and snug on your child’s body.
WARNING!
The hip belt must lie as low as pos-
sible over your child’s groin.
• the child safety seat is securely fastened
• the top tether
13
is taut over the backrest of the car seat and the
belt tension indicator
23
is green
• the harness of the child safety seat is fitted snugly to the child’s
body without being constricting
• the shoulder straps
08
are correctly adjusted and the straps are
not twisted
• the shoulder pads
07
are in the correct position on your child’s
body
• the buckle tongues
24
are fastened into the harness buckle
04
.
DANGER! If your child tries to open the ISOFIX safety buttons
06
or
the
harness buckle
04
stop as soon as possible. Check whether the child safety
seat is correctly fastened and ensure that your child is correctly secured.
Explain to your child the dangers associated with their actions.
1. Loosen the top tether
13
by pushing away the metal tongue
26
from the
harness.
2. Unhook the snap hook
22
from the anchoring point in the vehicle and lay
the top tether
13
to the front over the child safety seat.
3. Loosen the ISOFIX fastening on both sides by pressing the green safety
button
06
and the red release button
05
towards each other.
4. Pull the seat forwards and stow the top tether
13
in the operating instruc-
tions compartment
14
.
5. Move the ISOFIX locking arms
16
back into the seat shell
17
.
TIP: The ISOFIX locking arms are protected against damage once they are
put back into the seat bottom.
DANGER! Remove the child safety seat from the vehicle. Never transport
the child safety seat in the car if it is not fastened properly.
Please observe the waste disposal regulations in your country.
Disposal of packaging Container for cardboard boxes
Seat cover Residual waste, waste incineration
Plastic parts To be placed in the corresponding
container according to labelling
Metal parts Container for metals
Belt straps Container for polyester
Buckle and tongue Residual waste
9. ADJUSTING THE SEAT ANGLE
The seat shell of the
TRIFIX² i-SIZE
can be used in three dierent reclined posi-
tions:
To adjust the seat angle:
Push up the adjusting handle
09
and pull / slide the
seat shell
17
into the desired position.
DANGER! The seat shell
17
must engage se-
curely regardless of its position. Pull up on the seat
shell
17
to ensure that it is engaged.
TIP: You can even adjust the reclined position of
the seat shell
17
while your child is sitting in the
child safety seat.
►The shoulder straps
08
must be adjusted so that
they run horizontally or just above your child’s
shoulders.
►The shoulder straps
08
are not allowed to run
behind your child’s back, or level with/above their
ears.
Before each car journey, in order to ensure your child’s
safety, make sure that:
• the child safety seat is fastened in the ISOFIX fastening points
01
on both
sides with the ISOFIX locking arms
16
and both safety buttons
06
are
completely green
11. DISPOSAL
10. REMOVING THE CHILD SAFETY SEAT
02
01
If you have any further questions regarding the use of the carrier,
please feel free to contact us:
BRITAX RÖMER
Kindersicherheit GmbH
Theodor-Heuss-Straße 9
89340 Leipheim
Germany
T.: +49 (0) 8221 3670 -199/-299
F.: +49 (0) 8221 3670 -210
www.britax.com
BRITAX EXELSIOR
LIMITED
1 Churchill Way West
Andover
Hampshire SP10 3UW
United Kingdom
T.: +44 (0) 1264 333343
F.: +44 (0) 1264 334146
E.:
www.britax.com
09
08
07
04
08
03
08
03
12
24
04
10
09
17
04

Chat with your Britax Romer Trifix 2 i-Size manual using AI

Get instant AI answers from your Britax Romer Trifix 2 i-Size manual

Ask anything about the Britax Romer Trifix 2 i-Size. Answers come from this manual, with the pages they are based on.

Trifix 2 i-Size Maintenance Schedule

As needed
Clean the seat cover

Remove and wash with mild detergent in washing machine at 30 C. Check care label.

As needed
Clean shoulder pads

Remove and wash with lukewarm soapy water.

As needed
Clean plastic parts and harnesses

Wipe with soapy water. Do not use sharp cleaning agents like solvents.

As needed
Clean buckle mechanism

If sticking or failing to latch, soak buckle in warm water with dish soap for one hour, rinse and dry.

After every accident over 10 km/h
Replace child seat

The seat must be replaced after an accident with impact speed over 10 km/h even if damage is not visible.

When damaged
Inspect and replace if damaged

Have the seat checked if it has been damaged or dropped. Replace if necessary.

M: QW-35-FL

Ask a Question

0/1000

Do you recommend Trifix 2 i-Size?

Yes No

Frequently Asked Questions

A

It is designed for children measuring 76 to 105 cm, with a maximum body weight of 22 kg. Check both your child's measurements and local child-restraint rules before use.

Is this answer helpful?

A

The seat is fitted forward-facing with ISOFIX connectors and a Top Tether. Both ISOFIX indicators should show green, and the Top Tether tension indicator should also be green after tightening.

Is this answer helpful?

A

No. The selected vehicle seat must have approved ISOFIX attachment points and a Top Tether anchorage. Consult the vehicle handbook for permitted seating positions and airbag-related restrictions.

Is this answer helpful?

A

Set the headrest so the shoulder straps run at the child's shoulder height or slightly above it. The straps must lie flat, must not be twisted, and should never run behind the child's back or near the ears.

Is this answer helpful?

A

Yes. The seat shell offers three recline positions. After changing the angle, confirm that the shell has locked securely by pulling on it gently.

Is this answer helpful?

A

Wash the removable cover at 30 C on a gentle cycle with mild detergent. Clean plastic parts and harnesses with soapy water. If the buckle is dirty or slow, clean it as directed and make sure it functions correctly before use.

Is this answer helpful?

M: gpt-5.6-terra

Advantages and Disadvantages

Advantages

  • i-Size approved for children from 76 to 105 cm and up to 22 kg.
  • ISOFIX and Top Tether create a stable installation with visible green confirmation indicators.
  • Adjustable headrest helps maintain correct shoulder-harness placement as a child grows.
  • Three recline positions add flexibility for everyday trips and longer journeys.
  • Removable washable cover supports routine cleaning and upkeep.
VS

Disadvantages

  • Requires a vehicle seating position with both ISOFIX anchors and a Top Tether anchorage.
  • Forward-facing use only, so it is not suitable for rear-facing travel.
  • Correct setup requires checking ISOFIX indicators and Top Tether tension before every journey.
  • The seat must be replaced after a collision above 10 km/h, even if damage is not obvious.
M: gpt-5.6-terra

Product Specification

Group

i-Size

Weight class

19.84-48.5 lb

Age group

15 months-4 years

Color

blue

Harness system

five-point safety harness

Installation

forward-facing

ISOFIX

yes, including ISOFIX base with top tether

Features

height-adjustable headrest and shoulder straps, side-impact protection, adjustable seating position, recline position, removable/washable cover, installation indicators, anti-tip system

Dimensions (W x H x D)

17.72 x 25.59 x 21.26 in

Weight

23.15 lb

M: gpt-5.6-terra

Product Description

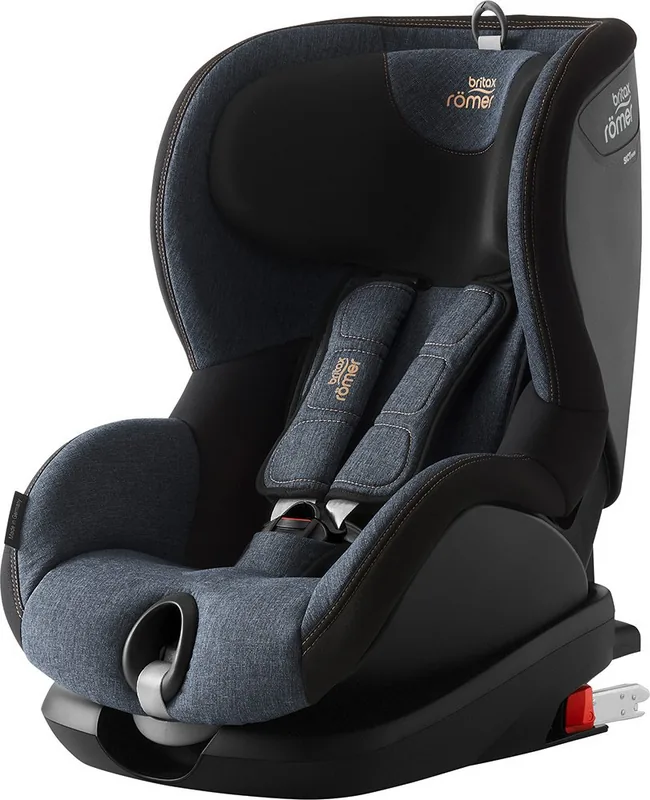
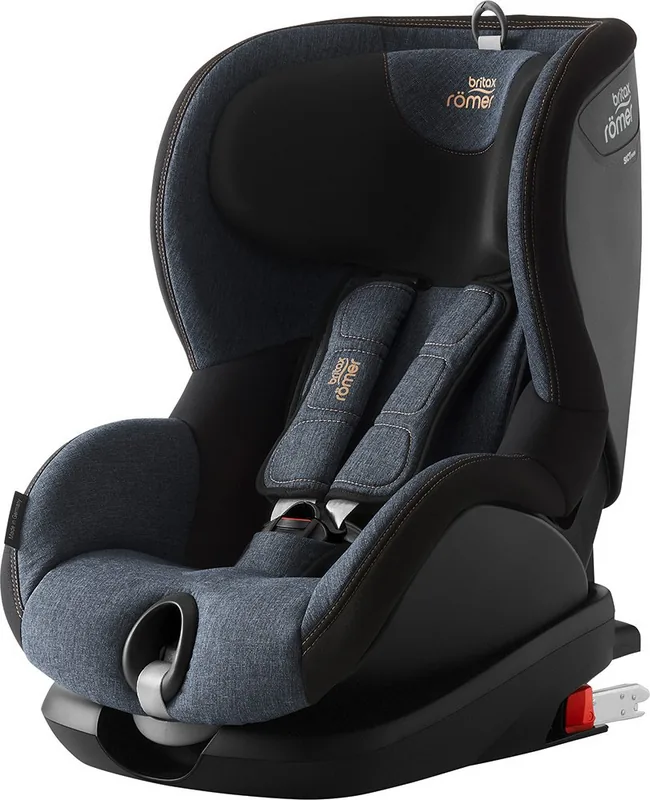
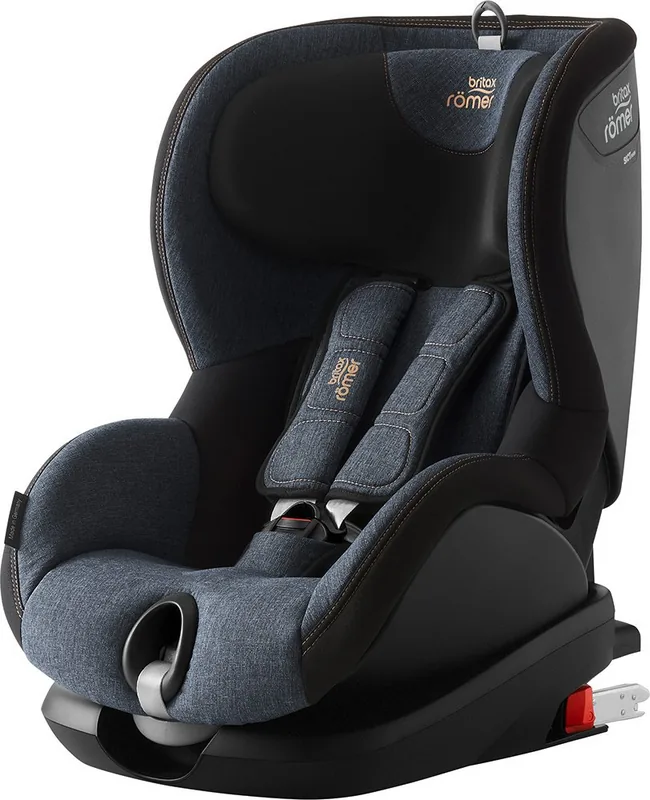
Britax Romer Trifix2 i-Size Blue Marble 2018/2019 Manual

The Britax Romer Trifix2 i-Size Blue Marble 2018/2019 is a forward-facing child car seat designed to support young passengers through an important stage of growth. Suitable for children measuring 76 to 105 cm and weighing up to 22 kg, it is approved to ECE R129/01, also known as the i-Size safety standard. Its Blue Marble finish gives the seat a modern, versatile appearance while the design focuses on secure daily travel.

ISOFIX and Top Tether installation

This model installs using both ISOFIX connectors and a Top Tether. The ISOFIX arms connect directly to approved anchor points in the vehicle, while the Top Tether attaches to the designated anchorage point behind or above the vehicle seat. Clear green indicators help confirm that the ISOFIX connection is locked, and the Top Tether tension indicator turns green when the strap is correctly tightened.

The seat is intended for use in the direction of travel only. Before fitting it, check that the chosen vehicle position has ISOFIX points and a Top Tether anchorage, and always follow vehicle-specific child-seat instructions. A securely fitted seat should not be used as a loose item in the car, even when no child is travelling in it.

Everyday comfort and adjustment

The Trifix2 i-Size has an integrated harness system with padded shoulder sections and a central buckle. The headrest can be raised as a child grows, helping position the shoulder straps at shoulder height or slightly above. This adjustment is important because straps that sit too high, too low, twisted, or loose can reduce protection.

Three recline positions allow the seat shell to be adapted for different journeys. The recline should always be checked to ensure it locks firmly into place. When securing a child, the harness should lie flat and close to the body without causing discomfort. Avoid bulky clothing under the harness, and make sure the lap section sits low across the hip area.

Care and practical checks

The removable cover can be washed on a gentle 30 C cycle with mild detergent. Plastic parts and harness webbing should be cleaned with soapy water only, avoiding solvents or harsh cleaners. Original replacement covers are recommended because the cover forms part of the seat's intended safety system.

Regularly inspect the seat, buckle, harness, and connectors for damage or dirt. If the buckle works slowly or does not click securely, it should be cleaned following the specified process. After a collision above 10 km/h, or after significant damage or a fall, the seat should be replaced or inspected as appropriate.

Notes

  • Keep the instructions stored in the seat's designated compartment.
  • Never modify the child seat or lubricate its components.
  • Protect the seat from prolonged direct sunlight when it is not in use.
M: gpt-5.6-terra

© Copyright 2026 Manual.ly