Manual.ly Logo

Britax Romer Baby-Safe 2 i-Size Manual

0.0 · 0 Ratings

PDF manual · 2 Pages

English

M: gpt-5.6-terra
page

/ 2

Loading...
8a69788f9f0032810bfb5e0d83978d7e8234 page 2
1. Choose a suitable position in the vehicle according
to the overview table in chapter 4. USE IN THE
VEHICLE.
2. Place the infant carrier rearward-facing on the vehicle
seat (baby is facing backwards).
3. Ensure that the handle
04
is in the upper position A.
4. Pull out the vehicle seat belt and place it across
theinfant carrier.
5. Engage the buckle tongue
29
in the vehicle seat
buckle
18
.
6. Place the lap belt section
17
in the belt guides
03
on both sides of the infant carrier. Make sure that
you do not twist the lap belt section
17
.
7. Tighten the lap belt section
17
by pulling on the
diagonal strap
16
.
8. Pull the diagonal strap
16
behind the head end
ofthe infant carrier over the adapter
13
.
9. Thread the diagonal strap
16
into the belt holder
12
.
Make sure that you do not twist the vehicle seat belt.
10. Tighten the diagonal strap
16
.
DANGER! Make sure that the vehicle seat buckle
18
is not in the belt guide
03
under any circumstances
and is not so far forward that it is in front of the belt
guide
03
(in direction of travel). If the vehicle seat
buckle is
18
in the belt guides
03
or in front of the
belt guides
03
, place the infant carrier on a dierent
seat. If you have any doubts about installing the seat
correctly, please contact your dealer.
11. Unscrew the SICT
26
anti-clockwise (on the side
closer to the vehicle door) until it has a distance of
5 mm to the vehicle door or has been unscrewed
tothe maximum.
The unscrewed SICT
26
provides additional protec-
tion in the event of a side impact.
Before securing the infant carrier in the vehicle, secure your baby in the infant
carrier as described in chapter 8.4 STRAPPING YOUR BABY IN.
DANGER! An airbag hitting the infant carrier can cause serious injuries
toyour baby, possibly resulting in death.
Do not use the infant carrier on passenger seats with activated front airbags!
For seats with side airbags, please observe the instructions in your owner's
manual.
B
C
A
C
B
A
USE
8.
Use the seat insert when your baby is still very small. The foam blocks can be
removed for use with larger babies.
To fit the insert:
1. Open the harness buckle
08
(press the red release
button).
2. Place the insert
19
into the infant carrier. The part
filled with the foam blocks must be facing down-
wards.
3. Thread the lower part of the insert underneath the
shoulder straps
07
. Make sure that the insert
19
isin contact with the backrest of the infant carrier.
8.2 USING THE SEAT INSERT
8.3 ADJUSTING THE HEIGHT OF THE SHOULDER STRAPS
A properly installed headrest
01
ensures optimal protection for your child in
the child seat. The headrest
01
must be adjusted so that the outlet slots for
the shoulder straps
07
are about two finger widths (25 mm) below the height
of your child's shoulders.
Adjusting the shoulder straps:
1. Open the harness buckle
08
(press the red release
button).
2. Open the instruction compartment
10
on the rear
side of the infant carrier.
3. Place the headrest
01
in the right position by
pressing and moving the adjustment button for the
shoulder straps
20
. (The headrest
01
must be ad-
justed so that the outlet slots for the shoulder straps
07
are about two finger widths (25 mm) below the
height of your child's shoulders.)
4. Make sure that the adjustment button for the shoul-
der straps is properly engaged
20
.
5. Close the instruction compartment
10
again.
To loosen the shoulder straps:
Press the adjustment button
21
and at the same time
pull both shoulder straps
07
forward.
To tighten the shoulder straps:
Pull the strap end
09
. Make sure that you pull the strap
end
09
straight out and not upwards or downwards.
8.4 STRAPPING YOUR BABY IN
The BRITAX RÖMER BABY-SAFE i-SIZE provides your baby with optimum
safety when the shoulder straps fit as snugly as possible over the body without
constricting the baby.
To strap in your baby
1. Loosen the shoulder straps
07
(as described in
chapter 8.3 ADJUSTING THE HEIGHT OF THE
SHOULDER STRAPS).
2. Open the harness buckle
08
(press the red release
button).
3. Put the shoulder straps
07
over the shoulders of
your baby.
WARNING!
Do not twist or swap the shoulder
straps, as this will invalidate the protective function.
4. Put the two buckle tongues
05
together.
5. Engage the buckle tongues
05
so that they make
an audible clicking sound.
6. Tighten the shoulder straps
07
until they fit snugly
over your baby's body (as described in chapter 8.3
ADJUSTING THE HEIGHT OF THE SHOULDER
STRAPS).
WARNING!
The hip belt must lie as low as
possible over your baby's groin.
A
INSTALLATION IN THE VEHICLE
9.
For the safety of your child, before every journey in the car check that:
►the infant carrier is fastened against the direction of travel,
►the infant carrier is only installed on the front passenger seat if no front
airbag can strike the infant carrier,
►the infant carrier is secured using a 3-point belt,
►the lap belt section runs through both belt guides
03
on the infant carrier,
►The diagonal strap
16
runs through the belt holder
12
,
►the vehicle seat buckle
18
is not in the belt guide or in front of the belt
guide
03
,
►the vehicle seat belt is tightened up and not twisted,
►the SICT
26
is installed and used correctly.
8.5 USING THE SUNSHADE
The sunshade
28
protects your baby's head from sunlight. It can be easily
folded up and down on the handle
04
. To remove or attach the sunshade
28
,
proceed as follows:
REMOVING THE SUNSHADE
1. Remove the sunshade
28
at the head end of the
infant carrier. To do this, release the fasteners at the
side and remove the elastic seam.
2. Unhook the cover loops
15
on both sides of the
handle from the sunshade hooks
14
.
FITTING THE SUNSHADE
1. Hook the cover loops
15
, on the right and left of
the handle, into the sunshade hooks
14
.
2. Pull the elastic seam over the head end of the infant
carrier. Secure the elastic seam at the side with the
fasteners.
USE WITH PUSHCHAIRS
10.
SAFETY NOTES
7.
Fitting the infant carrier to a pushchair
1. Always apply the brake as shown in the instructions
provided with the pushchair.
2. Prepare the pushchair for the Travel System as de-
scribed in the instructions for the pushchair (e.g.ad-
just the pushchair seat, unhook the seat cover).
3. With the infant carrier in a rearward-facing position,
lift it above the pushchair.
WARNING! Never try to attach the infant carrier
tothe pushchair in a forward-facing position.
4. Engage the fixation prongs
22
of the infant carrier
into the fixation slots
23
on both sides. The control
indicators
25
on both sides of the infant carrier must
be green.
WARNING! Ensure that the infant carrier is securely
attached to the pushchair by pulling the handle
04
upwards.
Please refer to the user instructions supplied with your pushchair.
The infant carrier can be used as a Travel System on all pushchair frames
which are approved for use with BRITAX/RÖMER infant carriers.
WARNING! This Travel System is not suitable...
... for transporting more than one child.
... for commercial use.
... in conjunction with other frames.
... as a substitute for a cot or a cradle. Carrycots, pushchairs and
buggies must only be used to transport babies or children.
WARNING! Always strap your baby into the infant carrier and ensure that
the infant carrier is securely fastened to the pushchair. Never lift or push the
pushchair by the infant carrier. Always apply the brake before fitting the infant
carrier onto the pushchair or removing it.
Removing the infant carrier from a pushchair
1. Always apply the brake as shown in the instructions
provided with the pushchair.
2. Ensure that the handle
04
is in the upper position A
(see chapter 8.1 ADJUSTING THE HANDLE).
3. Pull and hold the grey release latch
24
.
4. Lift the infant carrier until the fixation prongs
22
release from the fixation slots
23
.
WARNING! Keep a firm grip on the infant carrier
while doing this.
5. Remove the infant carrier from the pushchair.
A
If you have any further questions regarding the use of the carrier,
please feel free to contact us:
BRITAX RÖMER
Kindersicherheit GmbH
Theodor-Heuss-Straße 9
D-89340 Leipheim
Germany
T.: +49 (0) 8221 3670-199/-299
F.: +49 (0) 8221 3670-210
www.britax.com
BRITAX EXCELSIOR LIMITED
1 Churchill Way West
Andover
Hampshire SP10 3UW
United Kingdom
T.: +44 (0) 1264 333343
F.: +44 (0) 1264 334146
E.:
www.britax.com
04
04
02
08
10
20
21
07
09
08
07
15
28
08
19
07
06
04
23
22
25
04
24
04
16 17
03
12
13
16
18
29
05
14
Please take the time to read these instructions carefully and keep
them to hand in the designated compartment
10
in the infant carrier at all
times! The instructions must be kept with the child safety seat if the latter
is passed on to a third party.
DANGER! For the protection of your child:
• In the event of an accident with a collision speed of more than 10 km/h, the infant
carrier may be damaged without the damage becoming immediately visible. In this
case the infant carrier must be replaced. Please dispose of it properly.
• As a rule, have your infant carrier checked if it was damaged (e.g if it falls on the
ground).
• Regularly check all important parts for damage. Ensure that all mechanical parts,
inparticular, are fully functional.
• Never lubricate or oil parts of the infant carrier.
• Never leave your baby unattended in the infant carrier in the vehicle.
• Always secure your baby in the infant carrier using the seat belt.
• Never leave your baby unattended in the infant carrier on raised surfaces (e.g.
changing unit, table, sofa).
• Protect the infant carrier from intensive direct sunlight (e.g. cover with a lightweight
cloth) when it is not in use. The infant carrier can get very hot in direct sunlight.
Children's skin is sensitive and could be harmed.
• The more snugly the belt fits over your child's body, the better they will be protect
-
ed. Therefore, avoid putting thick clothes on your child under the belt.
• The infant carrier is not intended to hold your baby for long periods of time. The
semi-recumbent position in the infant carrier will always put a strain on your baby's
spine. Take your baby out of the infant carrier as often as possible – this includes
interrupting long car rides. Do not keep your baby in the infant carrier once it has
been removed from the car.
• Lock the backrests of the vehicle seats (for example, engage the latch on the folda
-
ble rear seat bench).
• Never try to secure a baby on your lap with the vehicle seat belt or by holding onto
them.
DANGER! For the protection of all vehicle occupants:
In the case of an emergency stop or an accident, unsecured persons or objects may
cause injury to other vehicle occupants. Please always check that...
• all heavy or sharp-edged objects in the vehicle (e.g. on the parcel shelf) are secured.
• all persons in the vehicle have their seatbelts fastened.
• the infant carrier is always secured when it is in the vehicle, even if no child is being
transported.
WARNING! For your protection when handling the child seat:
• To avoid damage, ensure that the infant carrier is not jammed in between hard
objects (car door, seat rails, etc.).
• Make sure that the bottom end of the belt does not get stuck anywhere (e.g. in
doors, escalators, etc.) as this could cause the infant carrier to fall.
• Keep the infant carrier in a safe place when it is not in use. Do not place any heavy
objects on the seat and do not store it directly next to sources of heat or in direct
sunlight.
CAUTION! To protect your vehicle:
• Certain car seat covers made from more sensitive materials (e.g. velour, leather,
etc.) may sustain signs of wear and tear when using child safety seats. For optimum
protection of your car seat covers, we recommend using the
BRITAX RÖMER car
seat protector from our range of accessories.
PAGE II
You can engage the handle
04
in three positions: A, B and C:
Handle positions:
A - For carrying and for transport in your car.
B - For placing your baby into the infant carrier.
C - For setting the infant carrier down safely outside the
car.
To adjust the handle:
1. Press and hold both buttons
02
on the handle
04
at the same time.
2. Pivot the handle
04
with the buttons pressed
02
until it is in the desired position.
3. Release the buttons
02
and make sure that the
handle
04
is engaged properly.
8.1 ADJUSTING THE HANDLE

Chat with your Britax Romer Baby-Safe 2 i-Size manual using AI

Get instant AI answers from your Britax Romer Baby-Safe 2 i-Size manual

Ask anything about the Britax Romer Baby-Safe 2 i-Size. Answers come from this manual, with the pages they are based on.

Baby-Safe 2 i-Size Maintenance Schedule

After every accident
Replace car seat after crash

If the car seat is involved in an accident with impact speed over 10 km/h, it must be replaced even if damage is not visible.

After drop or damage
Inspect for damage

Have the car seat checked if it has been damaged or dropped to the ground.

Regularly
Check mechanical parts

Regularly inspect all important parts for damage and ensure mechanical components function perfectly.

M: QW-35-FL

Ask a Question

0/1000

Do you recommend Baby-Safe 2 i-Size?

Yes No

Frequently Asked Questions

A

It is designed for babies measuring 40 to 83 cm, with a maximum weight of 13 kg. The headrest and shoulder harness should be adjusted as your baby grows.

Is this answer helpful?

A

Yes. It can be installed rearward-facing using an approved three-point vehicle belt. The lap belt goes through the dark blue guides and the diagonal belt goes through the light blue holder.

Is this answer helpful?

A

Yes, only if the front airbag is deactivated. Never install the carrier on a passenger seat where an active front airbag could contact it.

Is this answer helpful?

A

Set the headrest so the shoulder harness exits about 25 mm, or two finger widths, below your baby's shoulders. Tighten the harness so it is close to the body without causing discomfort.

Is this answer helpful?

A

It can be used with stroller frames approved for Britax Romer infant carriers. Apply the stroller brake, attach both sides, check for green indicators, and confirm the connection by lifting the carry handle.

Is this answer helpful?

A

Yes. Remove the canopy and cover as instructed, then follow the washing label on the cover. Remove the back section of the infant insert before washing, because it must not be washed.

Is this answer helpful?

M: gpt-5.6-terra

Advantages and Disadvantages

Advantages

  • Rearward-facing design is approved for babies from 40 to 83 cm and up to 13 kg.
  • Color-coded belt routes make three-point vehicle belt installation easier to follow.
  • Adjustable headrest and harness height help maintain a close fit as the child grows.
  • Compatible with approved Britax Romer stroller frames for travel system use.
  • Removable, washable cover and folding sun canopy support everyday convenience.
VS

Disadvantages

  • Requires a suitable three-point vehicle belt when used without a base.
  • Cannot be used with a front passenger airbag that is active.
  • Not intended for prolonged sleeping or resting outside the vehicle.
  • Only approved bases and compatible stroller frames should be used.
  • A seat involved in a significant impact should be replaced, even without visible damage.
M: gpt-5.6-terra

Product Specification

Group

i-Size

Weight class

0-28.7 lb

Age group

0-15 months

Color

black

Harness system

Five-point safety harness

Installation

rear-facing

ISOFIX

yes, compatible with ISOFIX base

Features

height- and tilt-adjustable headrest and shoulder straps, side-impact protection, infant insert (for newborns), removable/washable cover, integrated sun canopy, color indicator, Click&Go adapter, adjustable carry handle, suitable for air travel

Dimensions (W x H x D)

17.32 x 22.83 x 26.38 in

Weight

10.58 lb

M: gpt-5.6-terra

Product Description

Britax Romer Baby-Safe2 i-Size Without Base Cosmos Black 2018 Manual

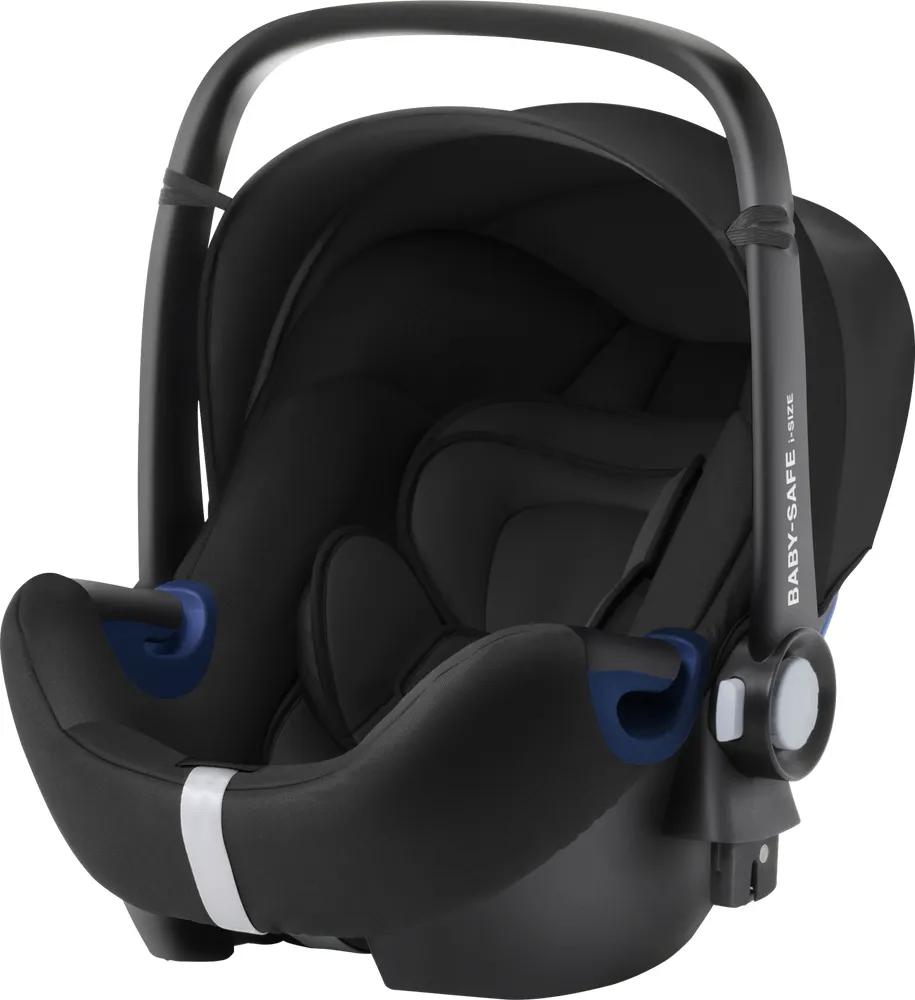
The Britax Romer Baby-Safe2 i-Size without base in Cosmos Black is an infant car seat designed to support safe, rearward-facing travel from 40 to 83 cm in height, up to 13 kg. This 2018 model combines a compact infant carrier format with practical features for everyday journeys, including a carry handle, adjustable headrest, integrated harness, sun canopy, and compatibility with approved Britax Romer stroller frames.

Safe vehicle installation

The seat is installed rearward-facing with a vehicle's approved three-point belt. Clear color coding helps guide the belt into the correct positions: the lap belt passes through dark blue guides, while the diagonal belt routes through a light blue holder behind the seat. Before every trip, check that the belt is tight, untwisted, and that the vehicle buckle does not sit in or ahead of a belt guide.

For added side-impact support, the SICT element can be extended on the side closest to the vehicle door. The carrier may be used on suitable front or rear seats, but a front passenger airbag must always be deactivated when the seat is fitted in front. Two-point belts are not suitable for installation.

Comfort as your baby grows

An adjustable headrest allows the shoulder harness height to follow your baby's growth. The harness slots should sit about two finger widths, or 25 mm, below the shoulders. For smaller babies, the included infant insert creates a more supportive fit; its foam blocks can be removed as extra space is needed.

The padded harness should lie close to the body without restricting movement, while the lap section should sit low across the groin area. Avoid thick clothing under the harness, as it can reduce the quality of the fit. A folding sun canopy helps shield your baby's head from direct sunlight during travel or stroller use.

Travel system and daily care

The carrier can connect to approved Britax Romer stroller chassis to create a travel system. Confirm that both attachment indicators show green, then lift the carry handle to verify a secure connection. Always apply the stroller brake before attaching or removing the carrier.

The removable cover can be washed according to its care label after the canopy and harness-related sections have been detached correctly. Clean plastic parts with mild soapy water only, and use original replacement covers to preserve the seat's intended function.

Notes

Keep the seat secured in the vehicle even when empty. Replace it after a significant collision or if damage is suspected. Infant carriers are intended for transport, not prolonged resting outside the vehicle.

M: gpt-5.6-terra

© Copyright 2026 Manual.ly