
Bresser 80/400 GoTo Manual
PDF manual · 36 Pages
English



Quick check
Incorrect answer, please try again.
Chat with your Bresser 80/400 GoTo manual using AI
Get instant AI answers from your Bresser 80/400 GoTo manual
Ask anything about the Bresser 80/400 GoTo. Answers come from this manual, with the pages they are based on.
80/400 GoTo Maintenance Schedule
Remove batteries if the device will not be used for an extended period to prevent damage.
Unplug the device or remove batteries before cleaning to ensure safety.
Ask a Question
Do you recommend 80/400 GoTo?
Yes NoFrequently Asked Questions
Magnification is calculated by dividing the focal length of the telescope by the focal length of the eyepiece. For example, a 400 mm telescope with a 20 mm eyepiece produces 20x magnification. Switching to different eyepieces changes the power level.
Is this answer helpful?
No. Never view the sun directly with this telescope as it can cause permanent blindness or damage to the optic. Use a specialized solar filter only if recommended by the manufacturer and never look through the lens if the sun is in the field.
Is this answer helpful?
One-star alignment uses a single bright reference point for basic positioning. Three-star alignment uses three different stars to calibrate the mount more precisely. The more stars used for alignment, the higher the accuracy of the GoTo pointing system.
Is this answer helpful?
The operating instructions and software updates are available on the manufacturer website. Look for the downloads section under automatic telescopes. Physical copies are also provided in the box for reference during setup and maintenance.
Is this answer helpful?
Yes. Once aligned, the motorized mount compensates for the Earth's rotation. This is known as tracking. It allows you to keep planets and stars centered in the eyepiece without needing to manually adjust the tube constantly.
Is this answer helpful?
Use a soft, lint-free microfiber cloth. Gently wipe the surface without applying heavy pressure to prevent scratching the glass. Clean the eyepieces and the objective lens only when necessary to maintain image quality.
Is this answer helpful?
The regular guarantee period is two years starting from the date of purchase. Registration on the official website may be required to benefit from extended voluntary guarantees. Check the terms provided with your purchase for specific details.
Is this answer helpful?
Advantages and Disadvantages
Advantages

- Automated GoTo system simplifies navigation to celestial objects without manual alignment skills
- Robust 80 mm aperture provides bright and detailed views of planets and deep sky targets
- Sturdy tripod design ensures stability during long observation sessions for clearer images
- Handbox menu includes extensive catalogs like Messier and NGC for diverse object selection
- Red light mode on the controller helps preserve user night vision during setup procedures
Disadvantages

- Requires six AA batteries for operation which adds to ongoing maintenance costs
- Optical tube does not fully correct for all aberrations when used with wide-field eyepieces
- Backlash correction must be performed manually to achieve maximum pointing accuracy
- Initial setup and alignment process requires careful entry of location and time data
- Not suitable for solar viewing without purchasing and installing an external dedicated filter
Product Specification
Type
Refractor (Lens Telescope)
Optical Design
Achromatic
Magnification
20-40x
Aperture
2.76in / 2.8"
Focal Length
15.75in, f/5.0
Resolving Power (Arcseconds)
1.7
Objective Lens
3.15in
Mount
azimuthal, motorized
Eyepiece Barrel
1.25in
Eyepieces Included
2x, f/0.39in, f/0.79in
Features
GoTo Computer Control
Weight
11.02 lbs
Product Description
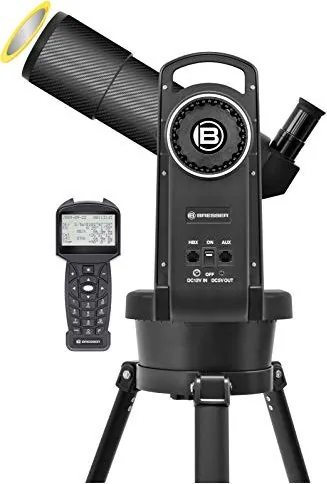
Discover the Night Sky with the Bresser 80/400 Goto Refractor Telescope
An Ultimate Journey into Astronomy
Embarking on a journey through the stars has never been as accessible as with the Bresser 80/400 Goto Refractor Telescope. This high-quality instrument is specifically designed for enthusiasts who want to explore the vast cosmos without the frustration of complex manual alignment. With a focal length of 400 mm and an 80 mm aperture, it captures impressive detail of planets, the Moon, and bright deep sky objects. The optical tube assembly features a refractor design that minimizes chromatic aberration for clearer views. It is an excellent choice for those transitioning from binoculars to serious telescopes.
Automated Observation Made Simple
The standout feature is the intelligent GoTo system integrated into the handbox. Once the initial setup is complete, users can navigate to hundreds of celestial objects effortlessly through the included database. The controller allows for one, two, or three-star alignment, ensuring accurate pointing every time you look up. Whether you are viewing Jupiter, Saturn, or the Orion Nebula, the motors compensate for Earth's rotation, keeping objects steady in the field of view for extended periods. The device includes catalogs for Messier, NGC, and IC objects, giving access to a wide array of targets.
Assembly and Essential Accessories
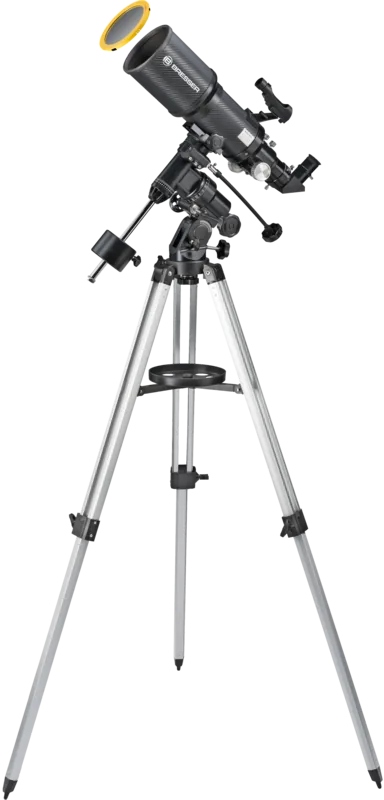
Building the telescope involves setting up the sturdy tripod, mounting the optical tube, and attaching the equatorial mount. It comes with essential eyepieces and a moon filter to reduce glare. Safety is paramount, so always avoid pointing it at the sun to prevent permanent damage to your vision. The device runs on standard AA batteries to power the handbox and motors, so keep spares handy for long nights. The handbox includes a red light mode to preserve night vision during setup. Users can also adjust the tracking rate for stars, the Sun, or the Moon.
Maintenance and Longevity
Proper care ensures long-lasting performance. Clean lenses gently with a microfiber cloth to avoid scratches. Protect the device from moisture and dust by storing it in the provided bag when not in use. Removing batteries during long storage periods prevents leakage issues. The manufacturer offers a two-year warranty on all parts and labor, providing peace of mind for new owners. Backlash correction procedures are available within the menu to enhance accuracy over time.
Final Thoughts for Stargazers
This refractor is a robust tool for beginners and intermediate astronomers who desire automated tracking. It balances performance with user-friendly automation. The tripod provides a stable platform, while the detailed navigation menus make learning the sky enjoyable. Regular maintenance keeps it running smoothly for years of exploration. Customizing your site location via GPS or city selection ensures precise targeting. The learning curve is moderate, making this a rewarding purchase for anyone wanting to see the universe clearly.
Search for 67,706 Manuals online


Type-in Brand or Model