Einschaltdauer SenderTransmitter duty cycleCiclo di lavoro del trasmettitore1%
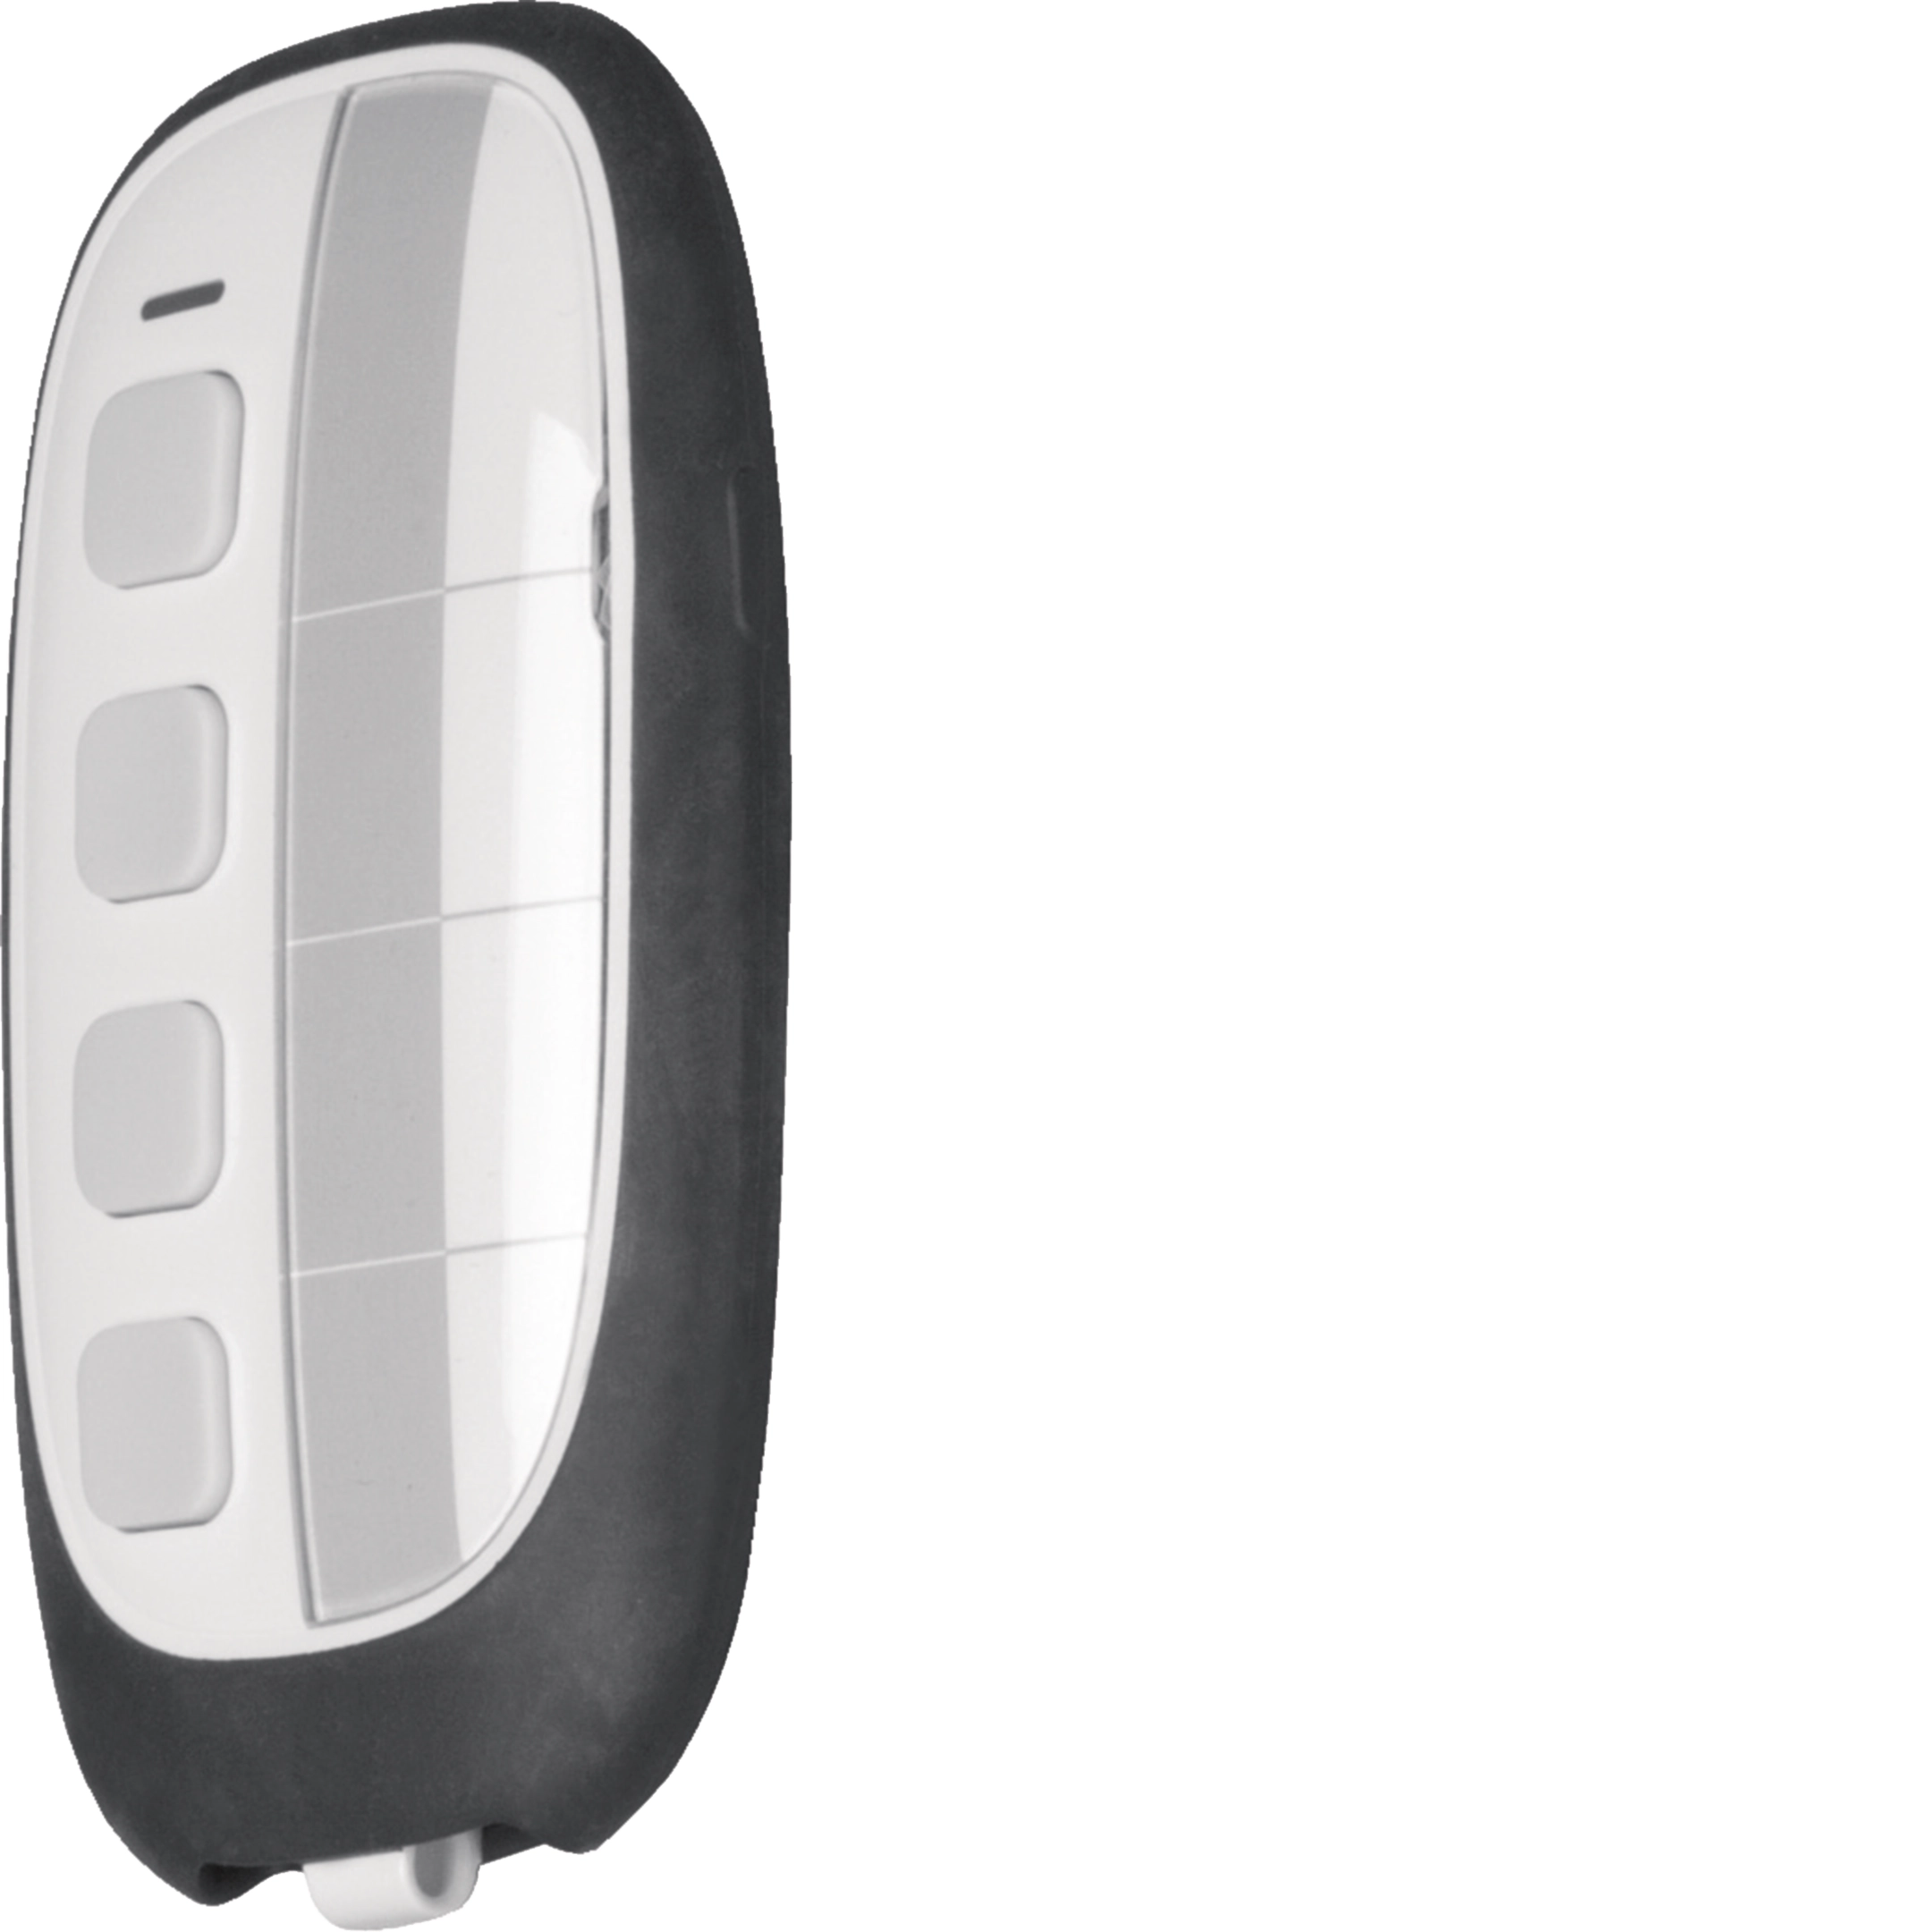
Gli apparecchi servono per il comando remoto di KNX-
Radio ricevitori. Tramite essi è possibile controllare l’illu-
minazione, le tende o le tapparelle, il riscaldamento, ...
Funzioni
• 2 o 4 canali indipendenti di comando tramite il bus KNX.
• LED di conferma di trasmissione
1
• Blocco tasti 3
• Indicazione delle funzioni tramite porta etichette
4.
Congurazione
E’ possibile congurare queste trasmettitori portatili in 3
modi diversi :
•
quicklink& : congurazione senza utensili, direttamente
sull'apparecchio attraverso il tasto
J e il LED (si veda
il
quicklink& relativo alle istruzioni di congurazione)
• tebis TX: congurazione attraverso il dispositivo di Hager
• ETS3/ETS4 attraverso KNX-Radio/TP gateway : base di
dati e descrizione del software applicativo disponibile
presso il costruttore.
Congurazione mediante ETS
Premere il tasto
J per l'indirizzamento per mezzo del
Gateway radio/KNX.
O
Per cambiare il modo di congurazione, occorre
tassativamente effettuare un “ripristino delle
congurazioni di fabbrica” del prodotto.
Blocco tasti
Con il blocco tasti attivato, dopo l'azionamento del tasto di
invio
2 non viene inviato alcun ordine di comando. Il LED di
conferma (v. tabella) si illumina brevemente di arancione.
Clonazione d’emittenti
La clonazione permette di duplicare un’emittente radio “master”
già congurata per creare rapidamente copie tutte identiche.
Come clonare un’emittente?
- Entrare in congurazione premendo il tasto J del
“master” : si illumina il LED
cfg.
- Sul prodotto da clonare ancora in modo "fabbrica", premete
a lungo > 15 s il tasto
J no al 2° livello di lampeggio (più
rapido) del LED
cfg. L’avvenuta clonazione è segnalata dallo
spegnimento del LED.
Ripetere questa tappa sugli altri prodotti da clonare.
- Uscita dal modo clonazione premendo nuovamente il tasto
J del “master”.
L’avvenuta clonazione dell’emittente è segnalata dall’accen-
sione (arancione) del LED
cfg premendo il tasto J .
O
La clonazione è possibile solo fra emittenti munite del
medesimo numero d’entrate. Impossibile modicare un
prodotto clonato compreso il "master": ripristinate le
congurazioni di fabbrica e riprogrammate il prodotto.
Ripristino impostazioni di fabbrica
Premere e mantenere il tasto J no al lampeggio del
LED cfg > 10 s poi rilasciare. La ne del ripristino delle congura-
LED di conferma 1
Azione Tasto del LED Colore del LED Signicato
Azionamento
contemporaneo
dei pulsanti di blocco
3
Acceso sso per 1 sArancio Il modo blocco tasti è attivato
Acceso sso per 1 sVerdel modo blocco tasti è disattivato
Lampeggia per circa 1 s Rosso Livello delle batterie basso
Azionamento di uno dei
tasti di invio
2
Brevemente accesoVerdeL’ordine è stato emesso
Lampeggia per circa 1 s ArancioIl pulsante azionato non è congurato
Brevemente accesoArancio Il modo blocco tasti è attivato
Lampeggia per circa 1 s Rosso Livello delle batterie basso
Spento _- Assenza batterie o livello delle batterie basso
- Non rispetto della polarità delle batterie
zioni di fabbrica è segnalata dallo spegnimento del LED cfg.
Questa operazione provoca la scomparsa totale della
congurazione del prodotto, qualunque sia il modo di
congurazione. Dopo una sostituzione delle pile o un
ripristino delle congurazioni di fabbrica, attendere
15 s prima di procedere ad una congurazione.
Cambio delle batterie
Smontare il coperchio dello scomparto batterie 6.
Rimuovere le 2 pile e inserire le nuove rispettando la
polarità (cambiare sempre le 2 pile contemporaneamente).
Rimontare lo sportello delle pile
6.
e
z
y
E E Bedienungsanleitung
Z Z User instructions
Y Y Istruzioni d’uso
Kann in ganz Europa å und in der Schweiz
Hiermit erklärt Hager Controls, dass der Funksender/-
Empfänger der 2014/53/UE Richtlinie entspricht.
Die EG-Erklärung kann auf der Website eingesehen werden:
www.hagergroup.com
Can be used throughout Europe å and in Switzerland
Hager Controls hereby declares that the radio transmitter/
receiver complies with the 2014/53/UE directive.
The EC declaration may be consulted on the website:
www.hagergroup.com
cfg
Può essere utilizzato in tutta Europa å e in Svizzera
Con la presente Hager Controls dichiara che il
ricetrasmettitore radio è conforme alla direttiva 2014/53/UE.
La dichiarazione CE può essere consultata sul sito internet:
www.hagergroup.com
Korrekte Entsorgung dieses Produkts
(Elektromüll).
(Anzuwenden in den Ländern der Europäischen Union und anderen europäischen
Ländern mit einem separaten Sammelsystem).
Die Kennzeichnung auf dem Produkt bzw. auf der dazugehörigen Literatur gibt
an, dass es nach seiner Lebensdauer nicht zusammen mit dem normalen
Hausmüll entsorgt werden darf. Entsorgen Sie dieses Gerät bitte getrennt von
anderen Abfällen, um der Umwelt bzw. Der menschlichen Gesundheit nicht
durch unkontrollierte Müllbeseitigung zu schaden. Recyceln Sie das Gerät, um
die nachhaltige Wiederverwertung von stoichen Ressourcen zu fördern.
Private Nutzer sollten den Händler, bei dem das Produkt gekaut wurde, oder die
zuständigen Behörden kontaktieren, um in Erfahrung zu bringen, wie sie das
Gerät auf umweltfreundliche Weise recyceln können.
Gewerbliche Nutzer sollten sich an ihren Lieferanten wenden und die
Bedingungen des Verkaufsvertrags konsultieren. Dieses Produkt darf nicht
zusammen mit anderem Gewerbemüll entsorgt werden.
Correct Disposal of This product
(Waste Electrical & Electronic Equipment).
(Applicable in the European Union and other European countries with separate
collection systems).
This marking shown on the product or its literature indicates that it hould not be
disposed with other household wasted at the end of its working life. To prevent
possible harm to the environment or human health from uncontrolled waste
disposal, please separate this from other types of wastes and recycle it
responsibly to promote the sustainable reuse of material resources.
Household users should contact either the retailer where they purchased this
product, or their local government oce, for details of where and how they can
take this item for environmentally safe recycling.
Business users should contact their supplier and check the terms and conditions
of the purchase contract. This product should not be mixed with other commercial
wastes of disposal.
Corretto smaltimento del prodotto
(rifiuti elettrici ed elettronici).
(Applicabile nei paesi dell’Unione Europea e in quelli con sistema di raccolta
dierenziata).
Il marchio riportato sul prodotto o sulla sua documentazione indica che il
prodotto non deve essere smaltito con altri rifiuti domestici al termine del ciclo di
vita. Per evitare eventuali danni all’ambiente o alla salute causati dall’inopportuno
smaltimento del rifiuti, si invita l’utente a separare questo prodotto da altri tipi di
rifiuti e di riciclarlo in maniera responsabile per favorire il riutilizzo sostenibile delle
risorse materiali.
Gli utenti domestici sono invitati a contattare il rivenditore presso il quale è stato
acquistato il prodotto o l’ucio locale preposto per tutte le informazioni relative
alla raccolta dierenziata e al riciclaggio per questo tipo di prodotto.
Gli utenti aziendali sono invitati a contattare il proprio fornitore e verificare i
termini e le condizioni del contratto di acquisto. Questo prodotto non deve essere
smaltito unitamente ad altri rifiuti commerciali.
02
/1
%
Quick check
I'm not a robot
Incorrect answer, please try again.
Chat with your Berker KNX Wireless Hand Transmitter 2-Channel manual using AI
Get instant AI answers from your Berker KNX Wireless Hand Transmitter 2-Channel manual
Ask anything about the Berker KNX Wireless Hand Transmitter 2-Channel. Answers come from this manual, with the pages they are based on.
Ask a Question
0/1000
Do you recommend KNX Wireless Hand Transmitter 2-Channel?
YesNo
Frequently Asked
Questions
A
It is used to remotely control KNX-RF receivers. Typical applications include lighting, blinds, rolling shutters, heating, and other compatible automation functions in smart buildings.
Is this answer helpful?
A
This version is a 2-channel handheld transmitter. The broader product family also includes a 4-channel version, but this model focuses on two independently configurable controls.
Is this answer helpful?
A
It can be configured in three ways: quicklink directly on the device, tebis TX through a Hager connection device, or ETS3/ETS4 via a KNX-RF/TP gateway.
Is this answer helpful?
A
Yes. A confirmation LED gives visual feedback when a send button is pressed, helping users verify that the command was transmitted and whether the battery or lock status needs attention.
Is this answer helpful?
A
Cloning lets you copy a configured master transmitter to other units with the same number of inputs. This is useful when you want multiple identical remotes without programming each one manually.
Is this answer helpful?
A
The transmitter uses two CR2430 batteries. Both batteries should be replaced at the same time, and the polarity must be correct. After replacement or a factory reset, wait 15 seconds before reconfiguring.
Is this answer helpful?
M: OA-GPT-54-NAN
Advantagesand
Disadvantages
Advantages
Two configurable send buttons support flexible control of lights, blinds, shutters, and heating.
Multiple setup methods make it suitable for quick installations and professional KNX projects.
Confirmation LED and key lock improve usability and help prevent accidental commands.
Cloning support can speed up deployment when several identical transmitters are needed.
VS
Disadvantages
Changing configuration mode requires a factory reset, which can interrupt setup.
Cloned transmitters cannot be reprogrammed without resetting and starting over.
Battery replacement must be done carefully, with both CR2430 cells changed together.
Wireless range can be reduced indoors compared with the 100 m open-field specification.
M: OA-GPT-54-NAN
Product
Specification
Type
Remote Control
Standard
Radio Bus (868MHz)
Function
Control
Topology
Bus, Tree
Dimensions
3.27x1.85x0.63in
Special Features
IP50, battery-powered (2x CR2430)
M: OA-GPT-54-NAN
Product
Description
Berker KNX Wireless Hand Transmitter 2 Channel
The Berker KNX Wireless Hand Transmitter 2 Channel is a compact wireless remote designed for everyday KNX-RF control. It brings simple button-based operation to lighting, blinds, rolling shutters, heating, and other compatible home automation functions. For users who want fast control without reaching for a wall panel or app, this handheld transmitter offers a practical and dependable solution.
Smooth control for smart spaces
Its two independently configurable send buttons make it easy to assign different actions to different zones or devices. That means one press can trigger a light scene, another can lower blinds, or the same transmitter can be tailored to match a room’s routine. A confirmation LED provides visible feedback, so you know a command has been sent.
Flexible setup options
One of the strongest points of this transmitter is its broad configuration support. It can be set up with quicklink directly on the device, through tebis TX, or via ETS3/ETS4 using a KNX-RF/TP gateway. This makes it suitable for both straightforward installations and more advanced KNX projects. A key lock also helps prevent accidental presses, which is useful in shared areas or when the device is carried in a bag or pocket.
Built for practical use
The unit is designed for handheld convenience and runs on two CR2430 batteries. With an open-field transmission range of up to 100 meters, it offers solid wireless coverage for many residential and light commercial settings. The transmitter also supports cloning, allowing an already configured master unit to be duplicated onto matching devices, saving time during rollout.
What makes it especially useful
Beyond simple control, the device is meant to fit into real installation workflows. The factory reset function, battery replacement guidance, and clear LED behavior all point to a product designed for reliable operation and manageable maintenance. It is a good match for users who value KNX flexibility but still want a portable, easy-to-use interface.
Notes
After a battery change or factory reset, wait 15 seconds before reconfiguring.
Cloning is only possible between transmitters with the same number of inputs.
Both batteries should always be replaced at the same time.
The transmitter is best suited to KNX-RF environments where wireless convenience matters.