
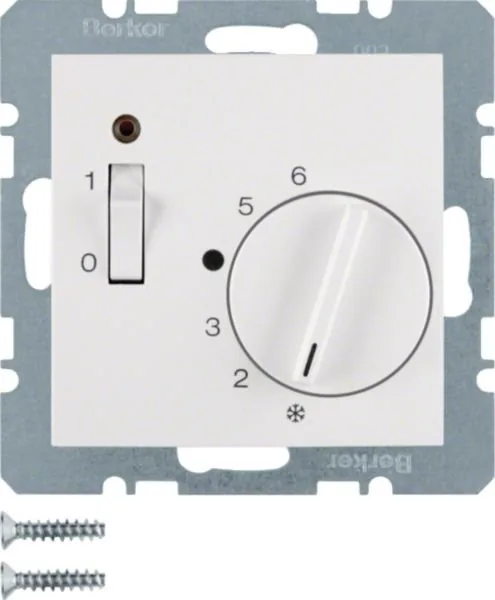


Berker B.1/B.7/S.1 Manual
PDF manual · 1 Pages
English


Quick check
Incorrect answer, please try again.
Chat with your Berker B.1/B.7/S.1 manual using AI
Get instant AI answers from your Berker B.1/B.7/S.1 manual
Ask anything about the Berker B.1/B.7/S.1. Answers come from this manual, with the pages they are based on.
Ask a Question
Do you recommend B.1/B.7/S.1?
Yes NoFrequently Asked Questions
The controller is designed for dry, enclosed rooms under normal ambient conditions such as apartments, offices, schools, halls, and workshops. It must not be used where condensation or excessive moisture occurs.
Is this answer helpful?
Mount it about 1.5 m above the floor on an interior wall, preferably opposite the main heat source. Avoid outside walls, drafts from windows/doors, direct sunlight, and placement behind curtains or shelves so normal convection can reach the sensor.
Is this answer helpful?
Pull off the adjustment knob, set the red ring to the desired maximum and the blue ring to the desired minimum using the holes provided, then replace the knob. The factory range is 5–30 °C but can be limited (e.g., 8–23 °C).
Is this answer helpful?
Connect exactly per the circuit diagram. Ensure the neutral conductor is connected to terminal N. The device supports conductor cross-sections 1–2.5 mm². No earth terminal is required because the device is double-insulated.
Is this answer helpful?
The thermo-bimetal requires approximately 1–2 hours of operation to adapt to room temperature. Initially the switching point may deviate; raising the setpoint briefly can speed the warm-up phase.
Is this answer helpful?
Models include 250 V AC versions (with NC or changeover contacts) and a 24 V DC version. Choose the order number matching your supply voltage and required contact type: e.g., 2030.. for 250 V NC, 2031.. for 24 V.
Is this answer helpful?
Products are covered under statutory warranty provisions; contact the point of sale or regional representative for claims. Do not dispose in household waste—use local electronic waste recycling facilities.
Is this answer helpful?
Advantages and Disadvantages
Advantages

- Simple, reliable electromechanical control with minimal electronics to fail.
- Polar White Glossy finish integrates smoothly into modern interiors.
- Adjustable range limiting with ring gauges for precise user limits.
- Compact standard mounting on 58 mm flush boxes for easy installation.
- Low switching differential (~0.5 K) for stable room temperature control.
Disadvantages

- Requires correct placement away from heat sources and drafts for accuracy.
- Bimetal sensor needs 1–2 hours to stabilize after installation.
- Limited to dry, enclosed rooms; not suitable for high-condensation areas.
- Some models have limited cooling switching capacity compared to heating.
- Installation and wiring must be done by a qualified electrician.
Product Specification
Standard
open strand
Function
Temperature
Product Description
Berker Room Temperature Controller — Precision and Simplicity
The Berker Room Temperature Controller with Normally Open Contact and Rocker Switch (Series B.1/B.7/S.1) in Polar White Glossy combines classic mechanical reliability with user-friendly operation. Designed for dry, enclosed rooms, this electromechanical thermostat regulates indoor climate with a simple rocker switch and a bimetal temperature sensor. It meets EN 60730 and is intended for controlling heating (and some models cooling) loads at common mains voltages, offering dependable on/off temperature control with a small switching differential for comfortable, stable rooms.
Design and features
Housed in a glossy polar white finish to match contemporary interiors, the controller mounts on a standard 58 mm flush box and is installed about 1.5 m above the floor for accurate ambient measurement. It features a removable knob with dual ring gauges to limit the adjustable temperature range (factory range 5–30 °C), a clear day/night set-back option, and versions with 250 V or 24 V ratings. The device includes an LED indicator on specific models to show active status and provides Normally Open or changeover contact configurations depending on model number.
Practical use and installation tips
Install opposite the heat source on an interior wall, away from drafts, direct sunlight, appliances, or lamps that produce heat. Ensure normal room convection reaches the controller and avoid covering it with shelves or curtains. Electrical wiring must follow the device’s circuit diagram precisely, with neutral connected to the N terminal to ensure correct operation. The controller requires a brief adaptation period (about 1–2 hours) after installation to reach switching accuracy; temporarily setting a higher temperature can speed initial warm-up.
Technical highlights
Typical switching differential is approximately 0.5 K, with night set-back around 4 K. Rated currents and switching capacities depend on the model: common types handle 10 A heating loads at 250 V AC, with a lower cooling capacity where applicable. The controller is double-insulated (no protective-earth terminal) and supports conductor cross-sections of 1–2.5 mm2. It tolerates relative humidity up to 95% without condensation and is designed for pollution degree 2 environments.
Final thoughts
For straightforward temperature regulation in homes, offices, schools, and workshops, the Berker Room Temperature Controller offers a robust, low-complexity solution. Its mechanical bimetal sensing and clear mechanical adjustments make it easy to set, reliable over long periods, and visually unobtrusive in polar white gloss.
Notes:
- Allow 1–2 hours for the bimetal sensor to stabilize after installation.
- Avoid installation near heat sources or in obstructed convection paths.
- Follow the circuit diagram and connect neutral to N to ensure correct operation.
Search for 67,706 Manuals online


Type-in Brand or Model