Manual.ly Logo

be quiet! Shadow Rock LP Manual

4.5 · 112 Ratings

PDF manual · 2 Pages

English

M: OA-GPT-54-NAN
page

/ 2

Loading...
615aee33ece8a5726eef24e4785a44b4a9ad page 1
Mounting the CPU cooler
The protective covering on the under-
neath of the cooler must be removed
prior to installation against the CPU.
Montage des CPU-Kühlers
Vor der Montage muss zunächst die
Schutzkappe von der Unterseite des
CPU-Kühlers entfernt werden.
Position the cooler mounting bridge
(6) centrally on the cooler (1). Insert the
mounting bridge fastening screws (11)
from above into the cooler mounting
bridge and then screw these alternately
tight. You can use any cross-tip
screwdriver for this.
Platzieren Sie die Kühler-Montagebrücke
(6) mittig auf den Kühler (1). Stecken Sie
die Intel/AMD Befestigungsschrauben
der Montagebrücke (11) von oben in die
Kühler-Montagebrücke (6). Positionieren
Sie anschließend den Kühler auf der
CPU. Schrauben Sie nun die Intel/AMD
Befestigungsschrauben der Montage-
brücke (11) abwechselnd fest. Hierzu
können Sie einen beliebigen Kreuzschlitz-
Schraubendreher nutzen.
Intel: LGA 2011 square ILM
Einleitung: Vielen Dank, dass Sie sich für ein be quiet!
Produkt entschieden haben. Diese Anleitung wird Ihnen beim
Installationsprozess behilfl ich sein. Sollten bei der Installation
Schwierigkeiten auftreten, kontaktieren Sie bitte unseren
Kundenservice unter [email protected]. be quiet! kann
keinerlei Haftung für durch Kompatibilitätsprobleme bedingte
Schäden übernehmen.
Garantie:
• 3 Jahre Herstellergarantie für Endkonsumenten (nur Erst-
erwerb vom autorisierten be quiet! Händler), ab Datum des
Kaufbelegs
• Eine Garantieabwicklung ist nur in Verbindung mit einer
beigefügten Kopie des Kaufbeleges eines autorisierten
be quiet! Händlers möglich
• Manipulationen und bauliche Veränderungen jeglicher
Art, sowie Beschädigungen durch äußere mechanische
Einwirkungen führen zum totalen Garantieverlust
• Es gelten unsere allgemeinen Garantiebestimmungen, die
Sie unter www.bequiet.com im Internet abrufen können
Listan GmbH
.
Wilhelm-Bergner-Straße 11c
.
21509 Glinde
Deutschland
Für weitere Unterstützung erreichen Sie uns via E-Mail:
Für die Montage des Kühlers empfehlen wir die Installation
außerhalb des Gehäuses. Für einen Transport sollte der Kühler
ausgebaut werden.
!
Assembly of the cooler mounting
frame
First screw the Intel spacer nut A (7) onto
the threads of the socket frame. Place
the Intel mounting brackets (4) over the
Intel spacer nuts and screw these tight
with the mounting bracket fastening
screws (10). You can use any cross-tip
screwdriver for this.
Aufbau des
Kühlerbefestigungsrahmens
Schrauben Sie zuerst die Intel Gewinde-
bolzen A (7) in die Gewinde des Sockel-
rahmens. Platzieren Sie die beiden
Intel Montagebrücken (4) auf den Intel
Gewindebolzen und schrauben Sie
diese mit den Befestigungsschrauben
für die Intel Montagebrücken (10)
fest. Hierfür kön-nen Sie einen Kreuz-
schraubenzieher verwenden.
Introduction: Thank you for deciding to purchase a be quiet!
product. The following instructions will guide you through the
installation process. If you do encounter installation problems,
please don't hesitate to contact our customer services by
mailing [email protected]. Please note that be quiet!
cannot accept liability for damage caused by compatibility
problems.
Warranty:
• 3-year manufacturer guarantee for consumers (original
purchase from authorized be quiet! dealers only)
• Guarantee work can only be processed with a copy
included of the purchase receipt from an authorized be
quiet! dealer
• Manipulation and structural changes of any kind, including
any damage caused by external mechanical force, will lead
• to a complete voiding of the guarantee
• Our General Warranty Conditions apply, which can be
viewed on bequiet.com
Listan GmbH
.
Wilhelm-Bergner-Straße 11c
.
21509
GlindeGermany
For further information contact us via e-mail:
We recommend preparatory mounting of the cooler outside
the PC case for subsequent installation. The cooler should be
removed prior to transportation as well.
!
SCOPE OF DELIVERY / LIEFERUMFANG
Part name Quantity
be quiet! Shadow Rock LP
CPU cooler
be quiet! Shadow Rock LP
CPU-Kühler
1
120mm fan
120mm Lüfter
1
Intel backplate
Intel Backplate
1
Intel mounting brackets
Intel Montagebrücken
2
Short AMD mounting brackets
Kurze AMD Montagebrücken
2
Cooler mounting bridge
Kühler-Montagebrücke
1
Intel spacer nut A
Intel Gewindebolzen A
4
2
3
4
6
7
Part name Quantity
Intel spacer nut B
Intel Gewindebolzen B
4
AMD spacer nuts
AMD Abstandsbolzen
4
Mounting bracket fastening
screws
Befestigungsschrauben für
die Montagebrücke
4
Mounting bridge fastening
screws
Schrauben für die Kühler-
Montagebrücke
2
Intel backplate screws
Intel Backplate-Schrauben
4
AMD backplate screws
AMD Backplate-Schrauben
4
O-rings
O-Ringe
4
Fan clips
Lüfterklammern
2
AM3 washers
AM3 Unterlegscheiben
4
8
9
10
11
12
13
14
15
16
The following parts are needed for this:
1x Shadow Rock LP CPU cooler (1), 1x 120mm fan (2), 2x Intel mounting brackets (4), 1x cooler mounting bridge (6), 4x Intel
spacer nut A (7), 4x mounting bracket fastening screws (10), 2x mounting bridge fastening screws (11), 2x fan clips (15)
Es werden folgende Bauteile benötigt:
1x Shadow Rock LP CPU-Kühler (1), 1x 120mm Lüfter (2), 2x Intel Montagebrücken (4),1x Kühler-Montagebrücke (6), 4x Intel
Gewindebolzen A (7), 4x Befestigungsschrauben für die Montagebrücke (10), 2x Schrauben für die Kühler-Montagebrücke (11),
2x Lüfter-klammern (15)
Fasten the 120mm fan (2) onto the cooler
unit (1) using fan clips (15). Connect the
fan to the motherboard’s PWM signal.
When dismantling the fan (2), push the
notches of the fan clips (15) away from
the fan.
Befestigen Sie den 120mm Lüfter (2)
mit Hilfe der Lüfterklammern (15) am
Kühler (1). Anschließend verbinden Sie
den Lüfter mit dem CPU-Lüfteranschluss
des Mainboards.
Zur Demontage des 120mm Lüfters
(2) drücken Sie die Kerben der Lüfter-
klammern (15) vom Lüfter weg.
www.bequiet.com/bk002
» Product information for this CPU cooler
» Produktinformationen zu diesem CPU-Kühler
» Informations produit pour ce système de refroidissement
» Información del producto para este refrigerador de CPU
» Informacje produktowe dla tego coolera CPU
» Engelstalige productinformatie voor deze processorkoeler
» Produktinformation för den här processorkylaren, på engelska
» Подробная информация о данном кулере для процессора
» 此CPU散熱器的產品資訊
» 此CPU散热器的产品信息
» 製品情報(クーラー)
NL
SE
09/2020
5
5

Chat with your be quiet! Shadow Rock LP manual using AI

Get instant AI answers from your be quiet! Shadow Rock LP manual

Ask anything about the be quiet! Shadow Rock LP. Answers come from this manual, with the pages they are based on.

Ask a Question

0/1000

Do you recommend Shadow Rock LP?

Yes No
0
User Pic

Sarah Nguyen

9 months ago

I want to use the be quiet Shadow Rock LP in a small ITX/HTPC case. Is it difficult to install on AMD/AM4, and does it block RAM or other connectors (like USB3 headers)?

0
User Pic

Manual.ly

9 months ago

In most small builds, the main challenge is mounting clearance rather than cooling performance. Many users find the AM4/AM3+ installation a bit fiddly because you have to fit the backplate, align brackets, and secure the mount carefully. For ITX, plan orientation before tightening: the cooler can cover RAM slots, and it may collide with higher RAM heatsinks or nearby headers depending on board layout. Using low-profile (LP) RAM is usually recommended. Also make sure your case has a ventilation path for the top exhaust area. If you cannot reach the screws comfortably, removing the motherboard first can make installation much easier.

M: OA-GPT-5-NAN
M: OA-GPT-5-NAN

Frequently Asked Questions

A

It is a low-profile CPU cooler made to provide effective cooling in smaller or space-sensitive builds while keeping noise levels controlled through a 120mm fan and PWM support.

Is this answer helpful?

A

The cooler supports a wide range of Intel and AMD sockets, including several common desktop platforms. The exact mounting parts depend on the socket type being used.

Is this answer helpful?

A

Yes. The protective covering on the underside of the cooler must be removed before mounting it onto the CPU. This ensures proper contact with the processor.

Is this answer helpful?

A

The instructions recommend assembling and mounting the cooler outside the case when possible. That can make alignment easier and reduce installation stress.

Is this answer helpful?

A

The 120mm fan is attached with fan clips and then connected to the motherboard’s CPU fan or PWM header. This allows automatic fan-speed control.

Is this answer helpful?

A

It is recommended to remove the cooler before transportation. Doing so helps protect the motherboard and reduces strain on the mounting system.

Is this answer helpful?

A

The product includes a three-year manufacturer warranty for end consumers when purchased from an authorized be quiet! dealer. Modifications or physical damage can void coverage.

Is this answer helpful?

M: OA-GPT-54-NAN

Advantages and Disadvantages

Advantages

  • Low-profile design fits compact PC builds while still using a 120mm fan.
  • Supports multiple Intel and AMD sockets for broad platform compatibility.
  • PWM fan connection helps balance cooling performance and noise.
  • Clear mounting parts and socket-specific hardware simplify secure installation.
VS

Disadvantages

  • Installation includes many small parts, so setup can feel detailed.
  • Different socket layouts require close attention to the correct brackets and spacers.
  • The cooler should be removed before transport, adding an extra step.
  • Warranty coverage is limited if the cooler is modified or installed incorrectly.
M: OA-GPT-54-NAN

Product Specification

Type

Top-blow cooler

Dimensions with fan

4.80x2.97x5.28 in (WxHxD)

Dimensions without fan

4.80x1.98x5.28 in (WxHxD)

Fan

1x 4.72x4.72x0.98 in, 1500rpm, 51.40 CFM, 51.4 CFM, 14.8-25.1dB(A), 0.05 inH2O, simple sleeve bearing (Rifle)

Weight with fan

0.87 lb

Connector

4-Pin PWM

AMD Socket

AM5, AM4

Intel Socket

2011-3/2066 (without 2011-0/2011-1), 1700 (see note), 1356/1366, 1150/1151/1155/1156/1200

Intel Socket Note

Socket-1700 mounting kit may not yet be included, Socket-1700 mounting kit available via manufacturer

TDP Classification

130W

Special features

4 Heatpipes

Manufacturer warranty

3 years

M: OA-GPT-54-NAN

Product Description

be quiet! Shadow Rock LP: Quiet Cooling for Compact Builds

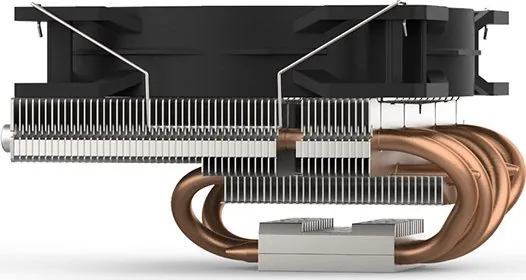
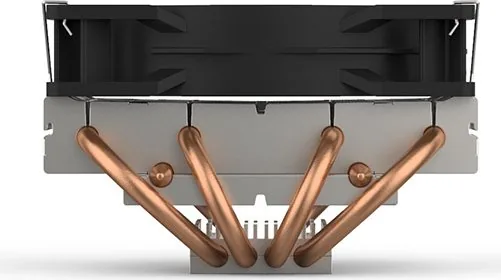
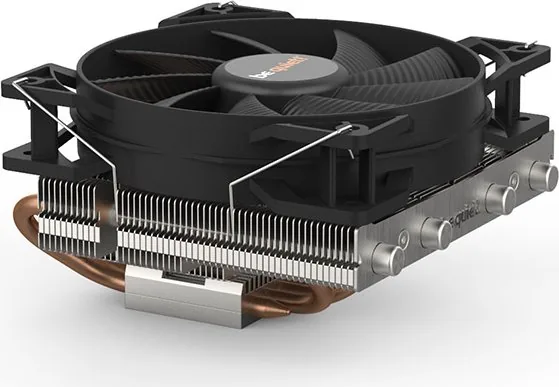
The be quiet! Shadow Rock LP is designed for builders who want dependable CPU cooling without giving up space inside the case. Its low-profile form factor makes it a smart match for smaller systems, yet it still pairs a solid heatsink with a 120mm fan to keep temperatures under control. In practice, that means a cooler that aims to balance size, airflow, and the quiet character the brand is known for.

A standout detail in the be quiet! Shadow Rock LP Manual is the flexible mounting approach. The cooler supports a wide range of Intel and AMD platforms, including several common desktop sockets. The installation process uses socket-specific backplates, spacer nuts, mounting brackets, and a central cooler bridge, giving the assembly a secure feel once everything is tightened in place. The fan is attached with clips, and the motherboard’s PWM connector helps the system adjust fan speed more intelligently.

The setup instructions also reflect a careful, user-focused design. Before mounting, the protective cover on the underside of the cooler should be removed. For easier handling, installation outside the case is recommended, which can make alignment and fastening simpler, especially for first-time builders. The text also notes that the cooler should be removed before transport, a useful reminder for protecting both the motherboard and the heatsink during movement.

Beyond the hardware itself, the product presentation emphasizes support and reliability. A three-year manufacturer warranty for end consumers adds confidence, while the service contact details and compatibility warnings show that be quiet! expects users to install the cooler thoughtfully. It is a practical choice for anyone building a quiet PC, a compact workstation, or a modest gaming system where airflow and clear instructions matter.

Notes

  • Check socket compatibility before starting the build.
  • Assemble the cooler carefully and tighten screws alternately for even pressure.
  • Keep the fan connected to the CPU PWM header for proper speed control.
  • Remove the cooler before transporting the system.
M: OA-GPT-54-NAN

© Copyright 2026 Manual.ly