l'allumer. Une fois qu’il est allumé, vous pouvez mettre les serveurs sous
tension.
Fixation des câbles
Pour plus de sécurité, utilisez des supports de câble Lok-U-Plug ATEN pour fi xer
les câbles. Fixez les supports de câble en utilisant les orifi ces prévus à cet effet
autour des différentes prises d‘alimentation. (Plus plus de détails, consultez
le manuel d’utilisation des commutateurs KN1132V/KN2116VA/KN2132VA/
KN4116VA/KN4132VA/KN4164V/KN8132V/KN8164V.)
Hardwareübersicht
A
Vorderseitige Ansicht
1. LED-Betriebsanzeigen
2. Port-LEDs
3. LAN-LED-Anzeigen
4. Laptop-USB-Konsolport (LUC)
5. USB-Ports
6. Schalter zum Zurücksetzen
7. Audioports
8. Portumschalter-Tasten
Rückseitige Ansicht
1. Netzeingangsbuchsen (mit Löchern für die Lok-U-Plug-Kabelhalter)
2. Netzschalter
3. Zweiter LAN-Port
4. PON-Anschluss
5. Erster LAN-Port
6. Serieller Port
7. Lokale Konsolports
8. KVM-Ports
9. Erdungsanschluss
10. Reserviert für Konsolport der Gegenstelle
Presentación del hardware
A
Vista frontal
1. Indicadores de alimentación
2. Indicadores LED de los puertos
3. Indicadores LAN
4. Puerto de consola de computadora portátil (LUC)
5. Puertos USB
6. Interruptor de reseteo
7. Puertos de audio
8. Botones de conmutación entre puertos
Vista posterior
1. Entradas de alimentación (con agujeros para sujetadores de cables Lok-U-
Plug)
2. Interruptores de alimentación
3. Puerto LAN secundario
4. Puerto PON
5. Puerto LAN primario
6. Puerto serie
7. Puertos de consola local
8. Puertos KVM
9. Toma de tierra
10. Reservado para puerto de consola remota
Hardware
A
Vista anteriore
1. LED d’alimentazione
2. LED delle
po
rte
3. LED LAN
4. Porta USB di collegamento alla console laptop (LUC)
5. Porte USB
6. Interruttore di ripristino
7. Porte audio
8. Pulsanti del cambiamento di porta
Vista posteriore
1. Prese d’alimentazione (con fori per i fermacavi Lok-U-Plug)
2. Interruttori di alimentazione
3. Porta LAN secondaria
4. Porta PON
5. Porta LAN primaria
6. Porta seriale
7. Porte console locale
8. Porte KVM
9. Terminale di messa a terra
10. Riservata per la porta della console remota
Hardware installieren
B
Rack-Montage
Um das Gerät vorne im Rack einzubauen, gehen Sie folgendermaßen vor:
1. Lösen und entfernen Sie die Schrauben von der Vorderseite.
2. Schrauben Sie die Montagehalterungen an die Vorderseiten des
Gerätegehäuses.
3. Schieben Sie das Gerät von vorne in das Rack und schrauben es fest.
Installation
1. Verbinden Sie die Stecker der USB-Tastatur und -Maus sowie den DVI- bzw.
VGA-Stecker der lokalen Konsole mit den Konsolports des Gerätes. Jede
Buchse ist durch ein entsprechendes Symbol sowie farblich gekennzeichnet.
Hinweis: 1. USB-Tastaturen und –Mäuse können bequem an die USB-
Anschlüsse der Vorderseite angeschlossen wenden, aber bei
Bedarf auch an die des Konsolportabschnitts.
2. Die maximale Entfernung zwischen dem KVM over IP-Switch
und dem lokalen Monitor beträgt 20 m.
2. Verbinden Sie einen beliebigen KVM-Port mit einem KVM-Adapterkabel, das
für den anzuschließenden Server geeignet ist. Verwenden Sie dazu ein Kat.
5e/6-Kabel.
Hinweis: Die maximale Entfernung zwischen dem KVM over IP-Switch und
dem KVM-Adapterkabel darf die maximal zulässige für das KVM-
Adapterkabel angegebene Entfernung nicht überschreiten.
Instalar el hardware
B
Montaje en rack
Para montar la unidad en la parte frontal del rack, haga lo siguiente:
1. Retire los tornillos de la parte frontal de la unidad.
2. Atornille las escuadras de montaje en los laterales delanteros de la unidad.
3. Deslice la unidad en la parte frontal del rack y fíjela al rack.
Instalación
1. Conecte los cables del teclado y mouse USB así como DVI o VGA locales a
los puertos de consola local de la unidad. Cada puerto lleva el código de
color estándar, además de un icono para su identifi cación.
Nota: 1. Los teclados y mouses USB se pueden conectar a los puertos USB
situados en el panel frontal de la unidad así como a los puertos de
la sección de consola local situados en el panel posterior.
2. La distancia máxima entre el conmutador KVM sobre IP y el
monitor local no debe exceder los 20 m.
2. Conecte cualquier puerto KVM disponible al cable adaptador KVM
adecuado para el servidor que vaya a instalar. Para ello, use un cable de
categoría 5e/6.
Nota: La distancia entre el conmutador KVM sobre IP y el cable adaptador
KVM no debe exceder la distancia máxima especifi cada para el cable
adaptador KVM que esté empleando.
3. Enchufe los conectores del cable adaptador KVM a los puertos
correspondientes del servidor que quiera instalar.
Installazione dell'hardwaree
B
Montaggio in rack
Per montare il dispositivo nel lato anteriore del rack, procedere come segue:
1. Rimuovere le due viti poste sul davanti dell’unità.
2. Avvitare le staffe per il montaggio sul lati anteriori dell’unità.
3. Far scivolare il dispositivo nella parte anteriore del rack e fi ssarlo ad esso.
Installazione
1. Collegare mouse e tastiera USB e i connettori DVI o VGA della console locale
alle rispettive porte dell’unità. Ogni porta è contrassegnata da un colore e
da un’icona appropriata.
Nota: 1. È possibile inserire mouse e tastiere USB nelle porte USB sul lato
anteriore oppure nelle porte della sezione console.
2. La distanza tra lo switch KVM over IP e il monitor locale non deve
superare i 20 metri.
2. Utilizzare un cavo Cat 5e/6 per collegare qualsiasi porta KVM disponibile a
un cavo adattatore KVM adeguato al server che si sta confi gurando.
Nota: la distanza tra lo switch KVM over IP e il cavo adattatore KVM non
deve superare la distanza massima specifi cata per il cavo adattatore
KVM utilizzato.
3. Inserire i connettori del cavo dell’adattatore KVM nelle porte corrispondenti
del server che si sta confi gurando.
4. Collegare la LAN alla porta LAN primaria degli switch KVM over IP mediante
un cavo Ethernet.
3. Verbinden Sie den Stecker des KVM-Adapterkabels mit den betreffenden
Ports des anzuschließenden Servers.
4. Verbinden Sie ein Ethernet-Kabel von Ihrem lokalen Netzwerk mit dem
ersten LAN-Port des KVM over IP-Switches.
5. (Optional) Verbinden Sie ein weiteres Ethernet-Kabel von Ihrem lokalen
Netzwerk mit dem zweiten LAN-Port des KVM over IP-Switches.
6. (Optional) Verbinden Sie den PON-Port des KVM over IP-Switches mit dem
PON-Port eines SA0142-Adapters. Verwenden Sie dazu ein Kat. 5e/6-Kabel.
Verbinden Sie anschließend den Adapter mit dem Port PON IN eines PN0108
Power Over the NET™-Gerätes.
7. (Optional) Verbinden Sie den PON-Port des KVM over IP-Switches mit dem
seriellen Port eines SA0142-Adapters. Verwenden Sie dazu ein Kat. 5e/6-
Kabel. Verbinden Sie anschließend den seriellen Anschluss des Adapters mit
dem DB-9-Anschluss eines Modems.
8. (Optional) Erden Sie die Einheit mithilfe eines Erdleiters. Verbinden Sie dazu
das eine Ende des Leiters mit der Erdungsschelle und das andere Ende mit
einem geerdeten Gegenstand.
9. Verbinden Sie das bzw. die mitgelieferte(n) Netzkabel mit der
Stromeingangsbuchse am Switch und dem Stromnetz. Wenn Sie eine
einzige Netzeingangsbuchse anschließen, achten Sie darauf, dass Sie den
richtigen Netzschalter einschalten. Bei Verwendung beider Netzeingänge
können Sie einen beliebigen Netzschalter verwenden, um den KVM-
Switch einzuschalten. Oder schalten Sie sie beide ein, um eine duale
Stromversorgung zu gewährleisten.
4. Conecte un cable Ethernet de la red local al puerto LAN primario del
conmutador KVM sobre IP.
5. (Opcional) Conecte otro cable Ethernet de la red local al puerto LAN
secundario del conmutador KVM sobre IP.
6. (Opcional) Conecte el puerto PON del conmutador KVM sobre IP a un
adaptador SA0142. Para ello, emplee un cable de Cat. 5e/6. Conecte el
adaptador al puerto de entrada PON de una unidad PN0108 Power Over the
NET™.
7. (Opcional) Conecte el puerto serie del conmutador KVM sobre IP a un
adaptador SA0142. Para ello, emplee un cable de Cat. 5e/6. Enchufe el
conector serie del adaptador al puerto DB-9 de un módem.
8. (Opcional) Emplee un conductor de tierra para conectar la unidad a tierra.
Para ello, conecte un extremo del conductor al terminal de tierra del equipo
y el otro extremo a un objeto ya puesto a tierra.
9. Conecte el/los cable(s) de alimentación incluido(s) a la entrada de
alimentación del conmutador y luego a una toma eléctrica. Si solo quiere
conectar una toma eléctrica, deberá encender el equipo con el interruptor
de alimentación adecuado. Si lo conecta a dos tomas, cualquiera de los
interruptores de alimentación servirá para encender el conmutador KVM. O
encienda los dos para obtener una alimentación doble.
10. Una vez conectado el conmutador KN1132V/KN2116VA/KN2132VA/
KN4116VA/KN4132VA/KN4164V/KN8132V/KN8164V, puede encenderlo.
A continuación, encienda los servidores.
5. (Opzionale) Collegare la LAN alla porta LAN secondaria degli switch KVM
over IP mediante un cavo Ethernet.
6. (Opzionale) Utilizzare un cavo Cat 5e/6 per connettere la porta PON degli
switch KVM over IP ad un adattatore SA0142. Connettere l’adattatore alla
porta PON IN di un’unità PN0108 Power over the Net™.
7. (Opzionale) Utilizzare un cavo Cat 5e/6 per connettere la porta seriale degli
switch KVM over IP ad un adattatore SA0142. Collegare il connettore seriale
dell’adattatore alla porta DB-9 del modem.
8. (Opzionale) Utilizzare un fi lo apposito per mettere a terra l’unità collegando
un’estremità del fi lo a terminale di messa a terra e l’altra estremità a un
oggetto dotato di adeguata messa a terra.
9. Collegare i(l) cavo/i di alimentazione fornito/i insieme a questa confezione
nella/e presa/e di alimentazione dello switch e quindi all’alimentazione
CA. Se si utilizza un'unica presa d'alimentazione, assicurarsi di accendere
l'interruttore corretto. Se si utilizzano entrambe le prese, è possibile
utilizzare uno qualsiasi degli interruttori per accendere lo switch KVM
oppure entrambi per attivare la doppia alimentazione.
10. Una volta collegato il KN1132V/KN2116VA/KN2132VA/KN4116VA/
KN4132VA/KN4164V/KN8132V/KN8164V, accendere l’alimentazione. Una
volta acceso il dispositivo è possibile accendere i server.
Support and Documentation Notice
All information, documentation, fi rmware,
software utilities, and specifi cations
contained in this package are subject to
change without prior notifi cation by
the manufacturer.
To reduce the environmental impact of our
products, ATEN documentation and software
can be found online at
http://www.aten.com/download/
Technical Support
www.aten.com/support
이 기기는 업무용(A급) 전자파적합기기로서 판매자 또는 사용
자는 이 점을 주의하시기 바라며, 가정외의 지역에서 사용하
는 것을 목적으로 합니다.
EMC Information
FEDERAL COMMUNICATIONS COMMISSION INTERFERENCE
STATEMENT:
This equipment has been tested and found to comply with the limits
for a Class A digital device, pursuant to Part 15 of the FCC Rules.
These limits are designed to provide reasonable protection against
harmful interference when the equipment is operated in a commercial
environment. This equipment generates, uses, and can radiate radio
frequency energy and, if not installed and used in accordance with
the instruction manual, may cause harmful interference to radio
communications. Operation of this equipment in a residential area
is likely to cause harmful interference in which case the user will be
required to correct the interference at his own expense.
FCC Caution: Any changes or modifi cations not expressly approved by
the party responsible for compliance could void the user's authority to
operate this equipment.
Warning: Operation of this equipment in a residential environment
could cause radio interference.
Warning: This equipment is compliant with Class A of CISPR 32. In a
residential environment this equipment may cause radio interference.
Suggestion: Shielded twisted pair (STP) cables must be used with the
unit to ensure compliance with FCC & CE standards.
This device complies with Part 15 of the FCC Rules. Operation is subject
to the following two conditions:(1) this device mat not cause harmful
interference, and(2) this device must accept any interference received,
including interference that may cause undesired operation.
Scan for
more information
A
Hardware Review
/2
%
Quick check
I'm not a robot
Incorrect answer, please try again.
Chat with your ATEN KN1132V manual using AI
Get instant AI answers from your ATEN KN1132V manual
Ask anything about the ATEN KN1132V. Answers come from this manual, with the pages they are based on.
Ask a Question
0/1000
Do you recommend KN1132V?
YesNo
Frequently Asked
Questions
A
Connect a USB keyboard and mouse to the console ports, and attach a DVI or VGA connector for the local monitor. The ports are color-coded and marked with icons. You can also use USB connections on the front panel where available, depending on your setup.
Is this answer helpful?
A
The local monitor should not exceed 20 meters from the KVM over IP switch. This limit is intended to keep local video and console behavior stable, so plan rack placement and cabling accordingly.
Is this answer helpful?
A
Use Cat 5e/6 cabling to link each available KVM port to the appropriate KVM adapter cable for the server you are installing. Also ensure the distance between the KN1132V and the KVM adapter cable does not exceed the maximum distance specified for the adapter cable.
Is this answer helpful?
A
Use the Primary LAN port to connect Ethernet from your LAN. A Secondary LAN port is optional for additional network redundancy, depending on how your environment is designed.
Is this answer helpful?
A
Yes. The switch supports one or two power sockets. For dual power, you can enable redundancy by turning on both power switches. When using one socket, turn on the correct power switch for that socket.
Is this answer helpful?
A
Use ATEN Lok-U-Plug cable holders to fix the power cord. Secure the holders by using the specially designed holes around each power outlet. This reduces strain on the power connection and improves safety during operation.
Is this answer helpful?
M: OA-GPT-54-NAN
Advantagesand
Disadvantages
Advantages
Front-panel status LEDs and laptop USB console (LUC) help operators verify connectivity quickly.
Local console support via USB keyboard/mouse plus DVI or VGA for immediate access during setup.
Supports Cat 5e/6 server cabling with specified distance constraints for reliable KVM adapter links.
Dual power capability supports redundancy for rack stability.
ATEN Lok-U-Plug cable holders enable safer, cleaner power cord management.
VS
Disadvantages
Local monitor distance is limited to 20 m from the KVM over IP switch.
Installation depends on correct KVM adapter cables and Cat 5e/6 wiring with strict maximum distances.
Optional features (such as PON or serial scenarios) require additional compatible adapters and equipment.
Startup sequence matters: power on the switch first, then the servers.
M: OA-GPT-54-NAN
Product
Specification
Type
IP-Switch
Ports
32
Monitor
DVI, VGA
Keyboard/Mouse
PS/2 & USB
Audio
2x Jack
LAN
1000Base-T
Resolution
1920x1200
M: GO-GEM-FL-25
Product
Description
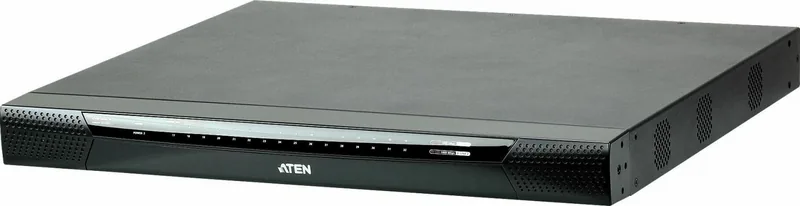
ATEN KN1132V KVM over IP Switch: Reliable Local Control for Remote Server Management
The ATEN KN1132V is a KVM over IP switch designed to bring local console control (USB keyboard and mouse plus DVI or VGA) into a centralized, network-based workflow. With front-panel status LEDs, a laptop console (LUC) USB port, and dedicated port switching controls, it is built for administrators who need quick, clear visibility while connecting multiple servers.
Once the unit is mounted, the hardware setup follows a straightforward approach: connect the local console to the console ports, link each server through appropriate KVM adapter cables, and then bring the network online using the Primary LAN port (with an optional Secondary LAN for redundancy). The switch is intended for clean, repeatable deployments in server rooms where cable organization and consistent installation practices matter.
A key detail is the distance guidance for local operation. The local monitor distance from the KVM over IP switch should not exceed 20 meters, helping you plan the physical layout confidently. For server cabling, use Cat 5e/6 and ensure the distance between the KVM over IP switch and the KVM adapter cable stays within the maximum specified for the adapter cable you are using.
For power and resilience, the KN1132V includes power sockets and switches that support single or dual power operation. After cabling, you power on the switch first, then power on the servers, ensuring a predictable startup sequence. For added safety, power cable management is supported with ATEN Lok-U-Plug cable holders, which fasten the power cord using specially designed holes around each power outlet.
Depending on your environment, optional integration points can expand your system. The unit includes a PON port and a serial port (and keeps a reserved remote console port), making it compatible with scenarios that call for additional infrastructure such as Power over the NET components. If you are following an installation plan, the ATEN KN1132V Manual is a helpful reference for exact connection options and limits.
Key results
Clear front-panel and port indicators (Power, Port, LAN, LUC USB) make system status easy to verify.
Supports local console setup with USB keyboard/mouse and DVI or VGA connections.
Cable installation uses Cat 5e/6 with distance rules for stable KVM adapter performance.
Dual power enablement supports redundancy for uninterrupted rack operations.
Notes
Plan for local monitor distance up to 20 m.
Secure power cables using Lok-U-Plug holders to improve safety and strain relief.
When using dual power, you can enable dual power by turning on both power switches.