
Asustor AS11 Drivestor Manual
PDF manual · 26 Pages
English



Quick check
Incorrect answer, please try again.
Chat with your Asustor AS11 Drivestor manual using AI
Get instant AI answers from your Asustor AS11 Drivestor manual
Ask anything about the Asustor AS11 Drivestor. Answers come from this manual, with the pages they are based on.
Ask a Question
Do you recommend AS11 Drivestor?
Yes NoFrequently Asked Questions
Power off and remove the cover, slide compatible 3.5" SATA drives into designated bays until seated, secure each drive with the provided screws, replace the cover, fasten rear screws, connect power and Ethernet, then power on. Back up data before initializing.
Is this answer helpful?
You can use ASUSTOR Control Center on Windows or Mac for network discovery, initialize via a web browser using the NAS IP and port, use the AiMaster mobile app for guided mobile setup, or follow direct-connection troubleshooting steps if discovery fails.
Is this answer helpful?
Check LAN connections and that both devices are on the same network, disable local firewalls, try another Ethernet cable or port, or connect directly and set your PC to IP 169.254.1.1 with subnet 255.255.0.0, then rescan. Contact Asustor support if unresolved.
Is this answer helpful?
Power and status LEDs provide feedback: steady green for power and ready states, flashing during boot, orange for LED night mode, and red steady for system/hard disk anomalies. A beep sounds when initialization completes.
Is this answer helpful?
While supported, using drives of differing capacities may reduce usable RAID capacity. For full utilization and optimal RAID performance, Asustor recommends drives of the same capacity.
Is this answer helpful?
Use the supplied power adapter, operate between 0–40°C, keep vents clear, avoid liquids and wet locations, and do not attempt self-repair. Dispose of the unit according to local electronic-waste regulations.
Is this answer helpful?
Advantages and Disadvantages
Advantages

- Simple hardware installation with tool-assisted drive mounting and included screws.
- Multiple setup methods: desktop Control Center, web GUI, AiMaster mobile app, or direct connection.
- Compact design with USB 3.x port, Ethernet, and Kensington lock for physical security.
- Clear LED indicators and audible beep to confirm power and system status.
- Comprehensive safety and troubleshooting guidance, plus Asustor support resources.
Disadvantages

- All data on installed drives will be erased during initialization—requires prior backup.
- Recommended to use same-capacity drives for RAID, limiting mixed-drive flexibility.
- No bundled wireless connectivity—requires wired Ethernet and network infrastructure.
- Fan and thermal management require unobstructed ventilation and proper ambient temps.
- Some troubleshooting steps require temporarily changing PC network settings.
Product Specification
Hard Drive
N/A
External
1x 2.5GBase-T
Additional Ports
2x USB-A 3.0 (Host)
CPU
Realtek RTD1296, 4x 1.40GHz (ARM Cortex-A53)
RAM
1GB DDR4, 8GB Flash
Special Features
iSCSI, 256bit AES-Encryption, FTP-Server, iTunes-Server, BitTorrent-Client, WebDAV, 4K-Transcoding, Anti-theft protection (Kensington Lock)
Warranty
36 Months
USB Notation
Link
Product Description
Asustor AS11 Drivestor NAS Manual: Overview and Highlights
The Asustor AS11 Drivestor NAS is a compact, user-friendly network-attached storage device designed for home and small office users who need reliable local storage, media streaming, and simple backup solutions. Built with straightforward hardware and a guided installation flow, the Drivestor series emphasizes easy setup, efficient file access, and broad device compatibility for everyday data protection.
Design and Hardware
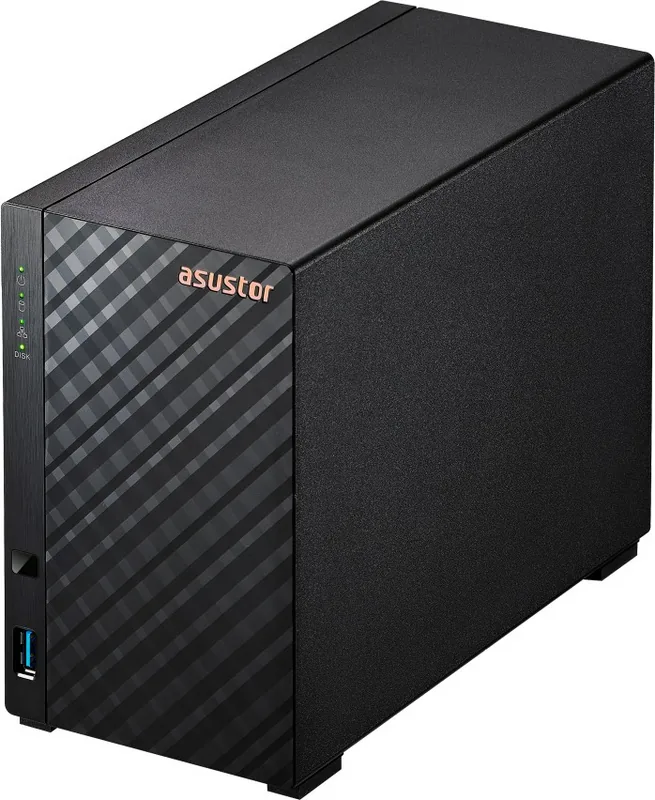
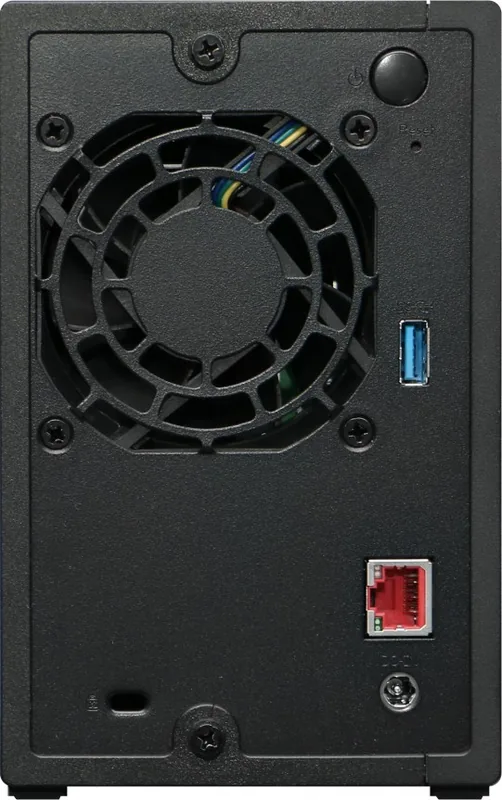
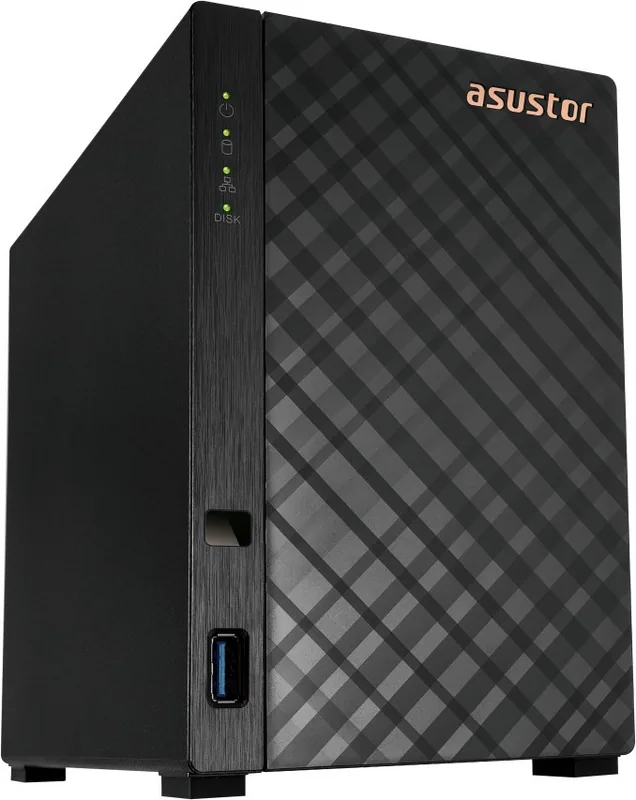
The AS11 Drivestor features a small-footprint chassis that accepts 3.5" SATA drives, tool-assisted mounting, and a removable cover for quick drive access. Key external elements include a power button, status and network LEDs, a USB 3.x port for external backups, Ethernet port, system fan and a Kensington lock slot for physical security. The unit provides a secured power cord bracket to prevent accidental disconnection and supports proper ventilation to maintain operating temperatures.
Installation and Setup
Hardware installation is straightforward: slide in compatible 3.5" SATA drives, fasten with included screws, secure the power cord bracket if desired, then connect power and Ethernet. The NAS boots with simple LED feedback and a beep when ready. Software setup offers multiple methods: a desktop Control Center app for Windows and Mac, web-based initialization via the NAS IP address, a mobile setup through the AiMaster app, or direct-connection troubleshooting procedures. The included steps guide users through discovery, initialization, and ADM configuration.
Software and Management
The AS11 runs Asustor’s ADM platform which provides network discovery, disk initialization, RAID configuration recommendations (use same-capacity drives for RAID), and power-button behavior settings including shutdown or sleep modes. ADM supports over-the-network management, LED and power settings, and an app ecosystem for media, backup, and remote access features. Firmware and utilities are available from Asustor’s download site to keep the system updated.
Safety, Compliance, and Support
The device complies with major regulatory standards for electromagnetic compatibility and safety. Users are advised to use the bundled power adapter, keep the unit dry, avoid blocking vents, and operate within recommended temperatures. The manual stresses backing up data before initializing drives and recommends contacting Asustor support or the vendor if issues persist. Troubleshooting guidance covers network discovery, firewall interference, direct-connection IP configuration, and basic checks for LED and connection states.
Notes
- Always back up important data before initializing or changing RAID configurations.
- Use matching-drive capacities for RAID to maximize usable space.
- Keep firmware and ADM apps up to date via Asustor’s download center.
- Ensure adequate ventilation and do not place the unit in wet locations.
- Use the provided power adapter to avoid damage.
Search for 67,706 Manuals online


Type-in Brand or Model