
ASRock Jupiter H610 Manual
PDF manual · 67 Pages
English



Quick check
Incorrect answer, please try again.
Chat with your ASRock Jupiter H610 manual using AI
Get instant AI answers from your ASRock Jupiter H610 manual
Ask anything about the ASRock Jupiter H610. Answers come from this manual, with the pages they are based on.
Ask a Question
Do you recommend Jupiter H610?
Yes NoFrequently Asked Questions
You must use a 120W power adapter for the 65W CPU configuration. Using an incorrect adapter like a 90W unit may lead to insufficient power delivery. Ensure the DC Jack accepts 19V with appropriate polarity to prevent component damage during operation.
Is this answer helpful?
Press F2 or Delete immediately after powering on the computer. If the system is already running, restart by pressing the reset button or pressing Ctrl plus Alt plus Delete. You can also shut down and turn the power back on after ensuring hardware connections are secure.
Is this answer helpful?
The system supports dual channel DDR4 SO-DIMM slots for memory. It is compatible with non-ECC un-buffered memory up to 3200MHz. XMP 2.0 profiles are supported for enhanced memory overclocking capabilities.
Is this answer helpful?
Yes, static electricity can damage motherboard components. Never place the board on a carpet. Use a grounded wrist strap or touch a grounded object before handling components to prevent static discharge damage.
Is this answer helpful?
Yes, you can clear CMOS using the CLRMOS1 jumper. Unplug the power cord, short the pins for three seconds, then restore power. This resets BIOS passwords and system parameters to default settings.
Is this answer helpful?
The board includes one SATA3 connector and two M.2 sockets. One M.2 socket supports Hyper Gen4x4 mode while the other supports Ultra Gen3x4 mode. Both support NVMe boot disks for high-speed data access.
Is this answer helpful?
The motherboard supports CASE open detection via a chassis intrusion header. This requires a chassis with detection design. This feature can be configured in the BIOS to monitor physical access to the system unit.
Is this answer helpful?
Advantages and Disadvantages
Advantages

- Dual channel DDR4 memory technology supports up to 64GB total system memory.
- Two M.2 sockets allow for fast NVMe SSD expansion and high bandwidth.
- UEFI interface includes EZ and Advanced modes for flexible configuration.
- Integrated Intel Hybrid Technology optimizes efficiency and performance.
- Comprehensive safety features including Lightning and ESD protection.
Disadvantages

- Specific DC Jack power adapter requirements must be met strictly.
- Integrated graphics depend on processor GPU capabilities for display.
- Limited RAM type restricts users to DDR4 SO-DIMM modules only.
- No listed PCIe x16 expansion slot for dedicated graphics cards.
- Overclocking carries potential stability risks and damage liability.
Product Specification
Type
Mini-PC
Chipset
Intel H610
Socket
Socket 1700
CPU Support
No (max. 65W TDP)
CPU Compatibility
Core i-14000, Core i-13000, Core i-12000, Pentium Gold G7000, Celeron G6000, TDP Limit: 65W (Manufacturer List)
RAM
2x DDR4 SO-DIMM, dual PC4-25600S/DDR4-3200, max. 64GB (UDIMM)
Storage
1x SATA 6Gb/s, 1x M.2 M-Key (PCIe 4.0 x4, 2280), 1x M.2 M-Key (PCIe 3.0 x4, 2280)
External Bays
N/A
Internal Bays
1x 2.5 inch
Graphics
CPU (iGPU)
Rear I/O
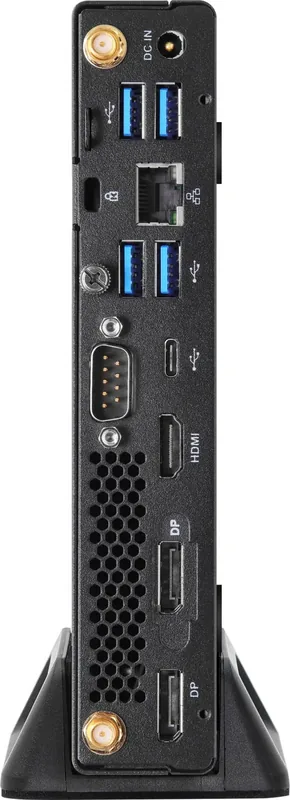
1x HDMI 2.1, 1x DisplayPort 1.4, 1x DisplayPort 1.2, 1x USB-C 3.0 (5Gb/s), 4x USB-A 3.0 (5Gb/s), 1x RJ-45 1Gb LAN (Intel I219-V), 1x Serial, 1x Barrel Jack (Power)
Front/Side I/O
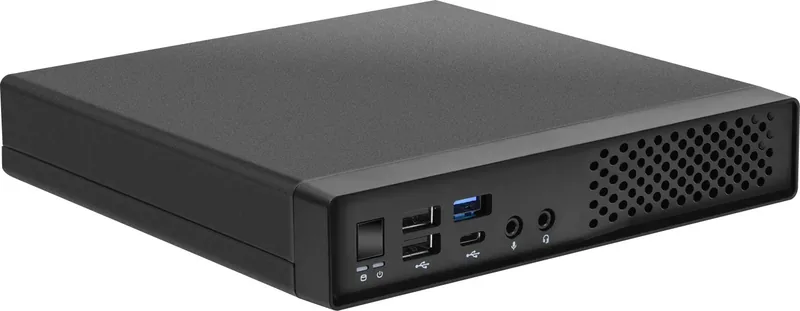
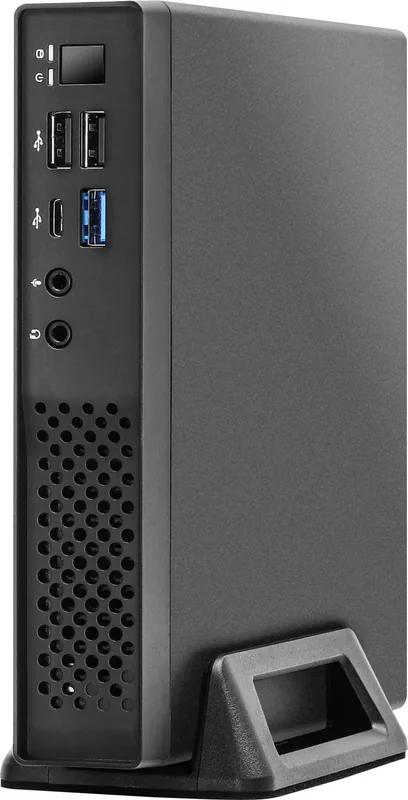
1x USB-A 3.0 (5Gb/s), 1x USB-C 3.0 (5Gb/s), 2x USB-A 2.0 (480Mb/s), 2x 3.5mm Jack (Realtek ALC269)
Expansion Slots
1x M.2 E-Key (PCIe, 2230, equipped with WiFi+BT module)
Wireless
Wi-Fi 5 (WLAN 802.11a/b/g/n/ac, 1x1, Intel 3168), Bluetooth 4.2
Audio
2.0 (Realtek ALC269)
Card Reader
N/A
Power Supply
External, 1x Barrel Jack (120W/19V)
VESA Mount
75x75/100x100
Dimensions (WxHxD)
7.01 x 1.34 x 7.01 in
Volume
67.13 cu in
CPU Cooler
Included
Features
Security Lock (Kensington), TPM 2.0
USB Naming
Link
Product Description
ASRock Jupiter H610 (65W) Product Overview
The motherboard market offers various options for budget-friendly builds. The ASRock Jupiter H610 (65W) aligns well with the requirements set in ASRock Jupiter H610 (65W) Manual standards. Designed for Intel processors, this platform utilizes the H610 chipset to ensure stable performance for everyday tasks and light gaming. It supports 13th and 12th Gen Intel Core processors through the LGA1700 socket. This design incorporates a solid capacitor design to ensure longevity and stable power delivery. The system integrates Intel Hybrid Technology and Turbo Boost Max 3.0 Technology for efficiency. The chipset supports PCIe lane configurations for expansion needs without bottlenecks.
Memory and Storage Expansion
Users can take advantage of dual channel DDR4 memory technology. There are two SO-DIMM slots available that support up to 64GB of total system memory. XMP 2.0 is supported for enhanced speed and performance tuning. For storage, the board features one SATA3 port and two M.2 sockets. One is Hyper M.2 supporting PCIe Gen4x4 mode with up to 64 Gb/s bandwidth. The other is Ultra M.2 supporting PCIe Gen3x4 mode. This allows for fast NVMe SSD boot disks and ample expandability for data needs. Graphics capabilities are integrated within the CPU for many configurations but HDMI 2.1 and DisplayPort 1.4 options exist for triple monitor support. DisplayPort supports DSC for higher resolution streams up to 8K.
Connectivity and Power Management
Graphics output includes HDMI and DisplayPort options. The rear panel offers one HDMI Port and two DisplayPort connectors. Four USB 3.2 Gen1 Type-A Ports and one Type-C Port are available. Audio is handled by a Realtek ALC269 codec. Power requirements are specific and critical. Power delivery is specific, requiring a DC Jack adapter. The official guidelines specify using a 90W adapter for 35W CPUs and a 120W adapter for 65W CPUs. Using the wrong power supply can damage components. The board supports Wake-On-LAN and Lightning protection. LAN connection uses the Intel I219V PHY for reliable gigabit speeds. Front panel connectors include power, USB 3.2 Gen1 Type-C, and audio.
Installation and BIOS Features
BIOS setup uses the UEFI interface with EZ Mode for quick adjustments. Advanced Mode offers deeper control over overclocking and hardware monitoring. The OC Tweaker screen allows setting CPU P-Core ratio and Base Frequency. The Main Screen displays system time and date information. Fans are controlled via headers with tachometer support for temperature readings. Security features include Trusted Computing and TPM integration for business environments. The motherboard layout includes various connectors for COM ports and front panel I/O. Installation requires careful handling to avoid static damage. Do not touch ICs directly and use grounded equipment. Overclocking carries risk and should be done at own expense. UEFI Tech Service is available for assistance.
Safety and Compliance
The device complies with Part 15 of the FCC Rules. Lithium battery adoption contains Perchlorate for California compliance. Australian Consumer Law guarantees apply for goods replacement. Ensure proper grounding during assembly to prevent static electricity damage. Do not force components into slots to avoid permanent damage. Always check the motherboard layout against your chassis size before installation. Clear CMOS is available for system reset if settings cause boot failure. Static avoidance pads are recommended when uninstalling components.
Search for 67,706 Manuals online


Type-in Brand or Model