
AeroCool Splinter Duo Manual
PDF manual · 2 Pages
English



Quick check
Incorrect answer, please try again.
Chat with your AeroCool Splinter Duo manual using AI
Get instant AI answers from your AeroCool Splinter Duo manual
Ask anything about the AeroCool Splinter Duo. Answers come from this manual, with the pages they are based on.
Ask a Question
Do you recommend Splinter Duo?
Yes NoFrequently Asked Questions
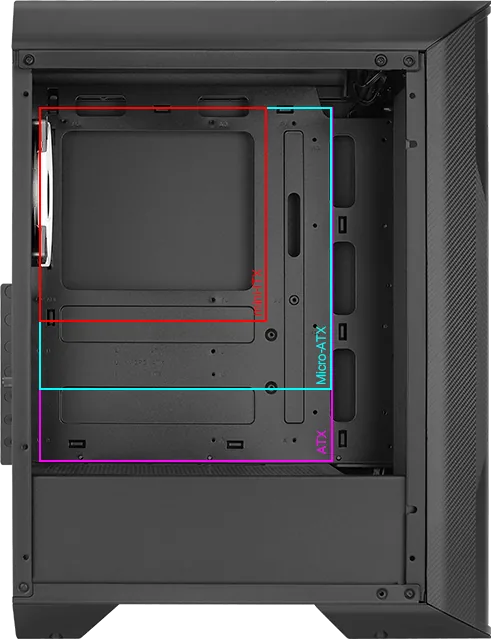
The Splinter Duo supports ATX, micro-ATX, and mini-ITX motherboards, offering flexible mounting points and standoffs included in the accessory bag.
Is this answer helpful?
Lighting can be controlled via the included ARGB fan hub (H66C) which connects to the motherboard for synchronized effects, or via the reset/LED button: hold 3 seconds to toggle control modes, hold 6 seconds to turn LEDs off, press once to turn them back on.
Is this answer helpful?
The case supports multiple fan configurations including 120mm and 140mm sizes, with radiator support commonly up to 360mm on top or 240mm in the front depending on drive and component placement—verify your preferred layout before installation.
Is this answer helpful?
Yes. The Splinter Duo provides mounts for 3.5" HDDs and multiple 2.5" SSDs. The accessory bag typically includes screws for HDD, SSD, PSU, and PCI mounts plus standoffs for motherboard installation.
Is this answer helpful?
A tempered glass side panel primarily affects aesthetics and does not significantly impact airflow if fans and radiators are configured correctly. Ensure proper intake and exhaust fan placement to maintain effective cooling.
Is this answer helpful?
The front I/O panel includes HD audio (mic/headphone), USB 3.0, and power/reset controls. The reset button also functions as an LED control when connected to the ARGB hub.
Is this answer helpful?
Refer to Aerocool’s product page at aerocool.io for detailed ARGB connection guides and region-specific manuals; accessory contents and exact specs can vary by region, so check with your local retailer if unsure.
Is this answer helpful?
Advantages and Disadvantages
Advantages

- Tempered glass window showcases internal components and ARGB lighting.
- ARGB fan hub centralizes lighting control for cleaner cable management.
- Supports multiple radiator and fan configurations for flexible cooling.
- Includes mounting hardware and clear internal layout for easier builds.
- Front I/O with USB3.0 and audio for everyday accessibility.
Disadvantages

- ARBG hub and lighting may require additional cable routing for some motherboards.
- Space for large air coolers or very long GPUs could be limited in some configurations.
- Regional variations in included accessories and specs may affect expectations.
- Tempered glass increases weight and requires careful handling.
- Manual lighting control via reset button can be unintuitive without reading instructions.
Product Specification
External
N/A
Internal
1x 3.5" (transverse, drive rails), 1x 2.5"/3.5", 2x 2.5"
Ports
2x USB-A 3.0 (5Gb/s), 1x USB-A 2.0 (480Mb/s), 1x 3.5mm jack (Line-Out), 1x 3.5mm jack (Line-In)
PCI Slots
7
Fans (front)
3x 4.72in (optional) or 2x 5.51in (optional)
Fans (rear)
1x 4.72in (RGB illuminated)
Fans (left)
N/A
Fans (right)
N/A
Fans (top)
2x 4.72in (RGB illuminated)
Fans (bottom)
N/A
Fans (misc)
2x 4.72in (optional)
Radiator sizes
4.72/9.45/14.17in front, 4.72/9.45in top, 4.72in rear
Motherboard
up to ATX
Supported Motherboards
Mini-ITX (6.7"x6.7")/Micro-ATX (9.6"x9.6")/ATX (12"x9.6")
Power supply
ATX (max. 6.53in deep)
PSU position
bottom
CPU cooler
max. 6.34in height
Graphics cards
max. 12.83in (without front fans)
Color
black, interior black
Lighting
RGB-Header 3-Pin ARGB (+5V/DATA/GND), integrated LED control, integrated RGB LED lighting, illuminated fans
Dimensions (WxHxD)
8.27x20.43x15.91in
Volume
11.63 gal
Case type
Midi-Tower
Front
partially closed, partially mesh
Top
partially closed, mostly fan grill, dust filter outside
Bottom
partially closed, rear fan grill, dust filter outside
Left
closed, glass
Right
closed
Rear
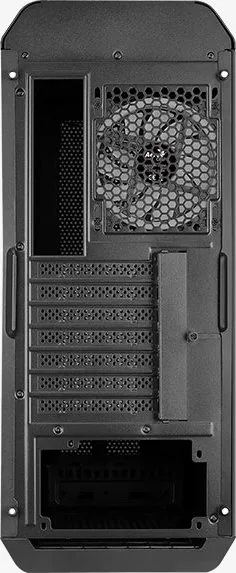
partially closed, top right fan grill, PCI slots (7x horizontal)
Front I/O Position
Case side: top, Height: center, Position: center
Special features
Cable management, dust filter, glass side panel
USB designation
Link
Product Description
AeroCool Splinter Duo, Glass Window Manual
The AeroCool Splinter Duo with Glass Window blends striking aesthetics and practical functionality for PC builders who want a mid-tower case that looks as good as it performs. This model emphasizes customizable ARGB lighting, tempered glass side-panel viewing, and flexible cooling and storage options that suit both novice and experienced builders. The Splinter Duo is designed for straightforward assembly with clear mounting points for motherboards, PSUs, drives, fans, and radiators, and includes an ARGB fan hub for simplified lighting control.
Design and Features
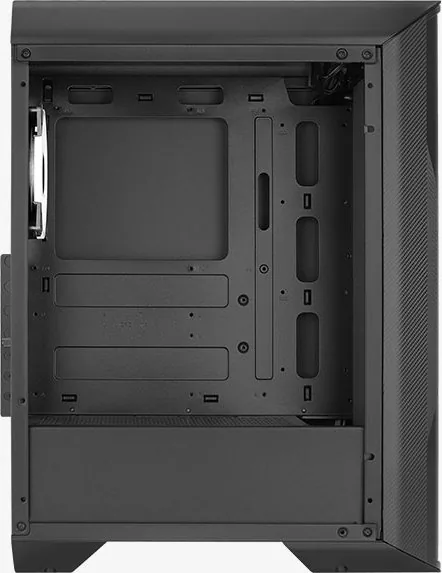
Visually, the Splinter Duo stands out with a tempered glass side window that showcases internal components and ARGB illumination. The front and top panels support multiple fan and radiator configurations (120mm, 140mm, up to 360mm top or 240mm front depending on layout), enabling strong airflow or liquid cooling setups. The front I/O offers HD audio, USB3.0, a reset/LED control button, and power controls accessible for daily use.
Internally, the case supports both 3.5" HDD and multiple 2.5" SSD mounts, with included screws, standoffs, and cable ties to aid a tidy build. Standard ATX, micro-ATX, and mini-ITX motherboards are supported, along with multiple PCI expansion slots. A dedicated ARGB fan hub (H66C) centralizes lighting connections, allowing either motherboard-synced control or manual button control via the reset/LED button.
Installation and Usability
Aimed at easing the build process, the Splinter Duo includes labelled screw kits and standoffs, and stepwise mounting areas for the motherboard, PSU, add-on cards, and drives. Fan and radiator installation points are clearly indicated, and the ARGB hub simplifies cable management by reducing multiple header runs to the motherboard. The reset button doubles as a lighting control: hold for 3 seconds to toggle control modes, 6 seconds to turn LEDs off, and press once to restore them.
Who It's For
This case is ideal for builders prioritizing style and lighting customization without sacrificing thermal performance. Gamers, creatives, and hobbyists who want a compact mid-tower with a glass window and ARGB integration will find the Splinter Duo a balanced choice between price and functionality.
Notes
- Specifications and accessory contents may vary by region—check local retailer details for exact configurations.
- Visit aerocool.io for detailed ARGB connection guides and product support.
- Included accessory bag typically contains SSD/HDD/PSU/PCI screws, motherboard standoffs, fan screws, and cable ties.
Search for 67,706 Manuals online


Type-in Brand or Model
Lukas Schmitz
10 months ago
My standoffs came with several screw types, but two of them make the screws loosen over time. Also, the drive cage is very hard to slide in and out because PSU cables are too close. Which screws should I use, and can I remove the cage if I only use NVMe?
Manual.ly
10 months ago
Use only the screw sizes intended for the case standoffs. If you use the wrong ones, the standoff can fail to tighten correctly and may even come out when you remove the screw. Double-check the standoff hardware listed in the manual for the correct length/thread, and test-fit before fully tightening. For the drive cage: if you experience resistance, do not force it. Route the PSU cable bundle cleanly so it does not catch between the cage and the PSU area, and loosen/reposition cables if needed. If you only install NVMe drives (no 2.5-inch SATA/other drives that mount in the cage), removing the drive cage is generally the simplest option and reduces the need to handle tight cable space.