
AeroCool Python Manual
PDF manual · 2 Pages
English



Quick check
Incorrect answer, please try again.
Chat with your AeroCool Python manual using AI
Get instant AI answers from your AeroCool Python manual
Ask anything about the AeroCool Python. Answers come from this manual, with the pages they are based on.
Ask a Question
Do you recommend Python?
Yes NoFrequently Asked Questions
Use the front panel connector labels and match them to your motherboard headers. The manual-style guidance specifically recommends referring to the motherboard manual for further pinout instructions. Once aligned, connect USB and HD Audio to the correct motherboard ports and ensure POWER SW and RESET SW are in the right positions.
Is this answer helpful?
Connect the hub to your PSU using the Molex connector as described in the guide. This powers the RGB hub directly, letting you focus on the control connection (addressable 3-pin or non-addressable 2-pin LED/RGB SW). Always check that the Molex connection is seated firmly.
Is this answer helpful?
Yes. For addressable RGB, connect the hub using the motherboard 3-pin addressable RGB header. The guide notes compatibility with common addressable RGB ecosystems by using the appropriate connector side. After connecting, plug the RGB fans into the 5V RGB fan ports on the hub.
Is this answer helpful?
If your motherboard does not support addressable RGB, use the 2-pin LED/RGB SW connector approach shown in the guide. In this case, connect the hub using the hub's LED/RGB SW input and wire the fans through the hub using the 5V RGB fan connectors.
Is this answer helpful?
The installation steps reference installing 3.5-inch HDDs (x2) and 2.5-inch SSDs (up to x3). Final compatibility can depend on your exact case configuration and drive sizes, but these are the capacities highlighted in the provided instructions.
Is this answer helpful?
Yes. The guidance includes instructions for installing fans and radiator mounting, including front and top radiator options. Plan airflow first, then mount the radiator and fans based on your preferred cooling layout, following the same connection approach for fan power and RGB where applicable.
Is this answer helpful?
Because header pin layouts and naming conventions differ by motherboard model. The guide mentions using the motherboard manual for connector details, especially for the front panel connector and RGB header type. Verifying pinouts helps prevent miswiring before powering on.
Is this answer helpful?
Advantages and Disadvantages
Advantages

- Hub-based RGB wiring supports both addressable RGB (3-pin) and non-addressable RGB (2-pin) setups.
- Lighting system includes LED/RGB control features and up to 60 lighting modes.
- Clear front I/O guidance for USB, HD Audio, power, and reset switch connections.
- Build-friendly support for fans, radiator mounting, and flexible cooling placement.
- Storage support includes installs for 3.5-inch HDDs and multiple 2.5-inch SSDs, plus cable management help.
Disadvantages

- Exact connector behavior depends on your motherboard, so the motherboard manual must be used for pin verification.
- RGB compatibility requires matching the correct header type (addressable vs non-addressable).
- Assembly involves many stages (motherboard, PSU, expansion, storage, fans), which takes time.
- Some details and included configurations can vary depending on your region.
Product Specification
External
N/A
Internal
1x 3.5", 1x 2.5"/3.5", 2x 2.5"
Ports
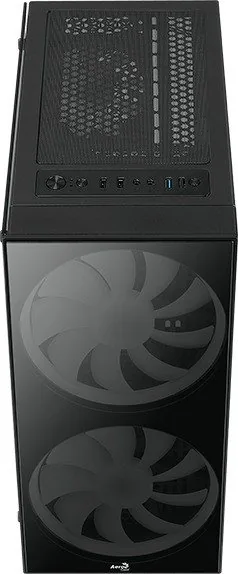
1x USB-A 3.0 (5Gb/s), 2x USB-A 2.0 (480Mb/s), 1x 0.14in jack (Line-Out), 1x 0.14in jack (Line-In)
PCI slots
7
Fans (front)
2x 7.87in (RGB illuminated) or 2x 5.51in (optional) or 3x 4.72in (optional)
Fans (rear)
1x 4.72in (RGB illuminated)
Fans (left)
N/A
Fans (right)
N/A
Fans (top)
2x 4.72in (optional)
Fans (bottom)
N/A
Fans (other)
N/A
Radiator sizes
4.72/5.51/9.45in front, 4.72/9.45in top, 4.72in rear
Motherboard
up to ATX
Supported motherboards
Mini-ITX (6.7"x6.7")/mATX (9.6"x9.6")/ATX (12"x9.6")
Power supply
ATX
Power supply position
bottom
CPU cooler
max. 6.46in height
Graphics cards
max. 12.80in
Color
black, interior black
Lighting
RGB header 3-pin ARGB (+5V/DATA/GND), integrated LED control, integrated RGB LED lighting, illuminated fans
Dimensions (WxHxD)
8.39x17.56x15.24in
Volume
9.71gal
Weight
12.81lb
Case type
Midi-Tower
Front
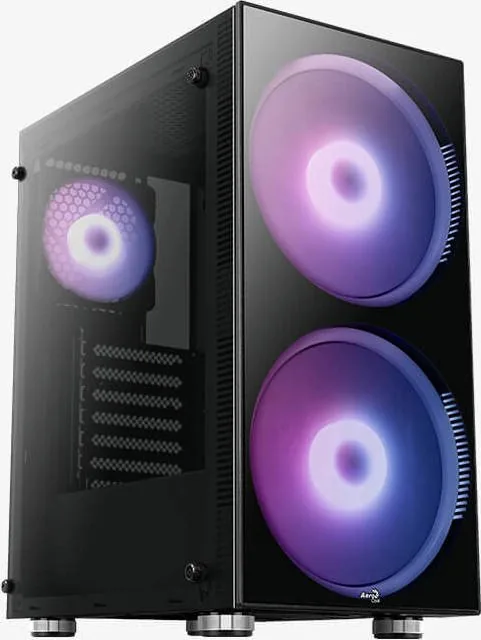
closed, glass, side ventilation slots
Top
partially closed, mostly fan grille, external dust filter
Bottom
partially closed, rear fan grille, external dust filter
Left
closed, glass
Right
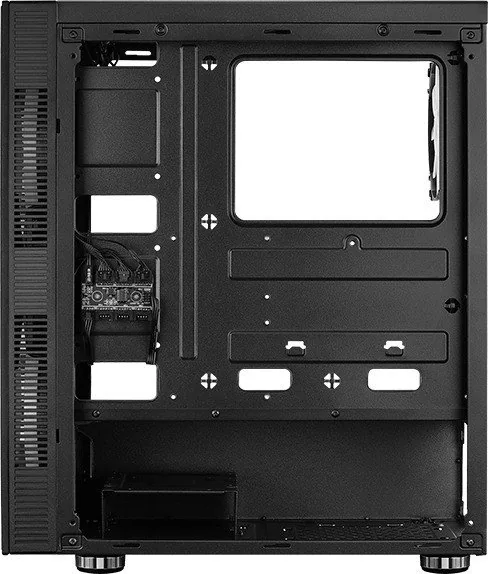
closed
Rear
partially closed, top right fan grille, PCI slots (7x horizontal)
Front I/O position
Case side: top, Height: central, Position: central
Features
integrated fan control, cable management, dust filter, glass side panel
USB notation
Link
Product Description
AeroCool Python Glass Window - Build Guide and Manual Highlights
The AeroCool Python Glass window combines a clean, show-your-build design with practical guidance for getting everything up and running. If you are using the AeroCool Python Glass window Manual, the experience is centered on clear, step-by-step assembly and straightforward wiring for core components and front-panel controls.
Start with the essentials: the front I/O panel connections, power, and reset switch headers. The manual-style instructions encourage you to match the front panel connector to your motherboard using the motherboard documentation as the final reference. This helps ensure stable power behavior and correct operation of USB, HD Audio, and the reset functions.
For storage and expansion, the layout supports installing a pair of 3.5-inch HDDs, plus multiple 2.5-inch SSDs. You will also be able to mount expansion cards after fitting the motherboard, PSU, and major standoff hardware. To keep the build neat, the package guidance includes simple cable management support, such as using a cable tie for tidier routing.
Cooling and aesthetics are where the system shines. The guide covers attaching fans and, if you plan a stronger thermal setup, mounting a radiator and configuring fan placement for improved airflow. It also includes front and top radiator installation options, depending on the build layout you choose.
RGB and fan hub setup (60 lighting modes)
A major highlight is the RGB fan hub and controller wiring. The hub can be powered via a Molex connector from the PSU, and lighting control can be handled in two common ways:
- Addressable RGB: connect using the motherboard 3-pin addressable header, with compatible connector options for popular RGB ecosystems.
- Non-addressable RGB: connect the 2-pin LED/RGB SW header when addressable headers are not available.
Once connected, the RGB lighting system supports LED lighting mode switching and a wide range of effects (60 modes). For the best results, connect the correct fan connectors to the 5V RGB fan ports on the hub.
Key takeaways
- Molex hub power makes RGB wiring more straightforward and independent of the motherboard.
- Addressable RGB uses the motherboard 3-pin header; non-addressable uses the 2-pin LED/RGB SW header.
- Front panel wiring should be confirmed against your motherboard manual for pin accuracy.
- The layout supports 3.5-inch HDDs and multiple 2.5-inch SSDs plus flexible cooling installs.
- Use cable management aids to keep airflow paths clear.
Notes
- Specifications and included options may vary by region.
- Always verify connector pinouts with your motherboard documentation before powering on.
Search for 67,706 Manuals online


Type-in Brand or Model
Marius Köhler
8 months ago
Does the front and side glass block the airflow, and can I control the fan speed and RGB (not just full speed) in this case?
Manual.ly
7 months ago
Many users report reduced airflow because the front and/or side glass panels sit directly in front of the front intake area. In practice, the front fans may draw air from one side only, so CPU/GPU temperatures can be higher than in a mesh-front case. To improve cooling, mount additional fans on the top (and ensure proper cable routing), and if needed consider replacing or modifying the front airflow area with a grill/mesh. On fan control, reviews indicate the included case fans are often not controllable via software for speed and sometimes only run at full load (especially when connected via the limited power connector). RGB can also be limited depending on your motherboard. If you want true software control, you may need a compatible hub/controller and correct wiring for your setup.