
AeroCool Dryft Manual
PDF manual · 2 Pages
English



Quick check
Incorrect answer, please try again.
Chat with your AeroCool Dryft manual using AI
Get instant AI answers from your AeroCool Dryft manual
Ask anything about the AeroCool Dryft. Answers come from this manual, with the pages they are based on.
Ask a Question
Do you recommend Dryft?
Yes NoFrequently Asked Questions
Connect the RGB hub to your motherboard's ARGB or PWM socket. Use software like Aura Sync for synchronization. For non-addressable boards, connect the 2-pin LED connector to the hub manually using the included wires.
Is this answer helpful?
The case supports radiators up to 360mm on the top and side mounts. Bottom mounts accommodate 240mm to 280mm radiators. Always check compatibility with your specific water cooling kit before installation.
Is this answer helpful?
Yes, you can use non-addressable RGB fans. Connect them using the 2-pin LED connector on the RGB hub. This allows basic color control without addressing individual LEDs.
Is this answer helpful?
Fan mounts are available on the top, bottom, rear, and side panels. You can install various combinations to optimize airflow. Check the manual for specific screw hole placements for each mount type.
Is this answer helpful?
Hold the control button for three seconds to switch modes. Hold for six seconds to turn off LEDs. Press once to turn them back on after the reset period. This restores default settings.
Is this answer helpful?
The package includes USB 3.0 cables, front I/O connectors, and SATA power cables for the hub. Accessory bags also contain all necessary screws for drives and motherboard mounting.
Is this answer helpful?
Yes, multiple radiator mounts support water cooling setups. You can install standard AIO kits or custom loops. Ensure you have enough clearance for tubes and reservoirs in your specific layout.
Is this answer helpful?
Advantages and Disadvantages
Advantages

- Supports ARGB and PWM synchronization with major motherboard brands.
- Includes multiple fan positions for top, bottom, rear, and side configurations.
- Front panel features USB 3.0 and HD audio for convenient access.
- Comprehensive accessory kit includes screws for SSD, HDD, and motherboard.
- Hub allows easy control of RGB effects via physical button interface.
Disadvantages

- Limited space for large graphics cards in certain configurations.
- Fan speed control relies heavily on motherboard integration.
- Cable management can be tight with heavy radiator installations.
- RGB sync requires specific cable connections to the hub.
- Documentation is multilingual which might confuse single language readers.
Product Specification
External
N/A
Internal
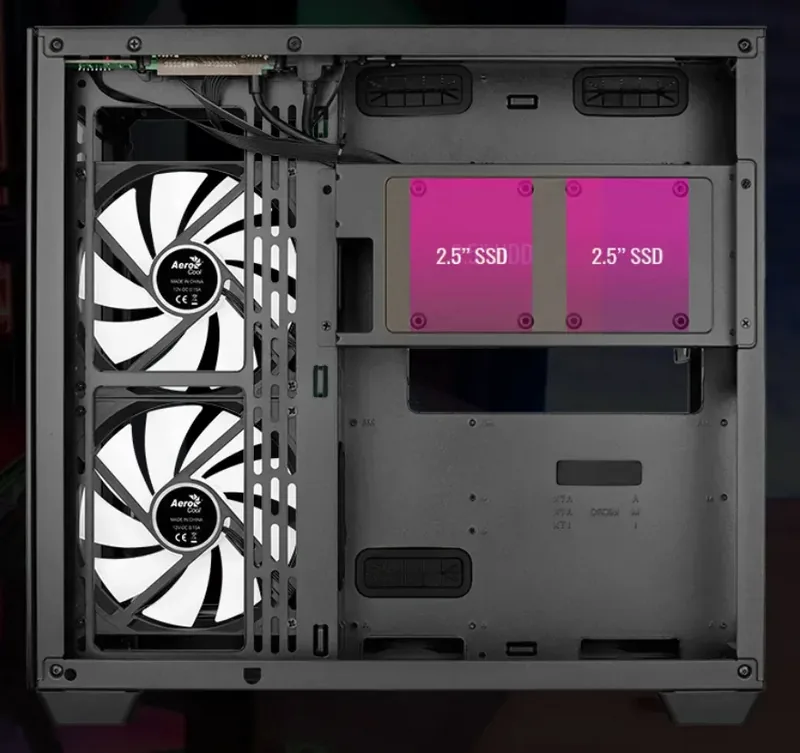
2x 2.5" or Option 2: 1x 3.5"
Connectivity
1x USB-C 2.0 (480Mb/s), 2x USB-A 3.0 (5Gb/s), 1x 3.5mm Jack (Line-Out), 1x 3.5mm Jack (Line-In)
PCI Slots
7
Fan (Front)
N/A
Fan (Left)
N/A
Fan (Top)
3x 4.72" (optional) or 2x 5.51" (optional)
Fan (Other)
N/A
Radiator Sizes
4.72/9.45/11.02/14.17" top, 4.72" rear, 4.72/9.45/11.02" right, 4.72/9.45/14.17" bottom
Motherboard
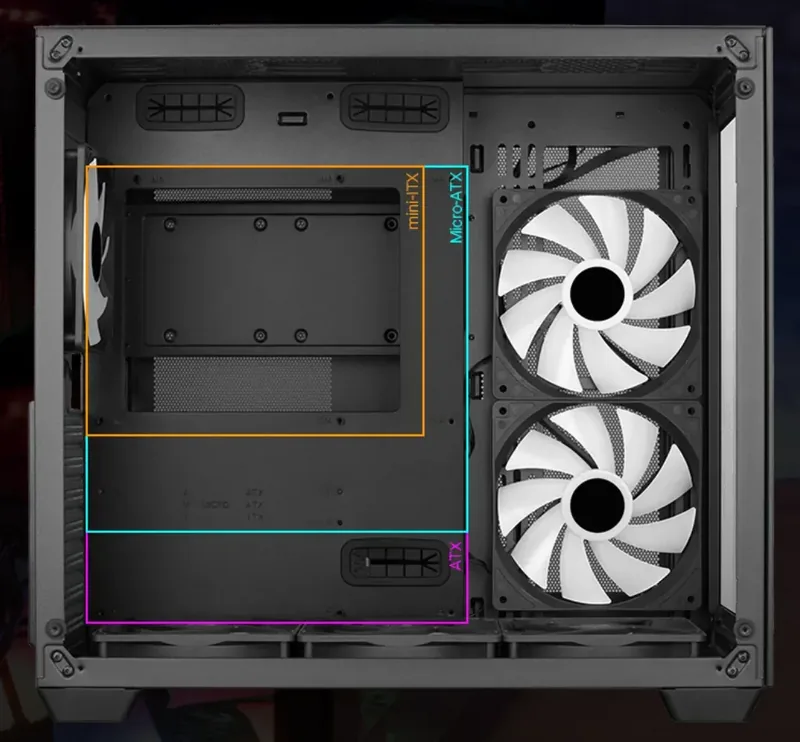
up to ATX
Supported Motherboards
Mini-ITX (6.7"x6.7")/Micro-ATX (9.6"x9.6")/ATX (12"x9.6")
Power Supply
ATX
PSU Position
bottom (vertical)
CPU Cooler
max. 6.38" height
Graphics Cards
max. 16.50"
Color
black, interior black
Dimensions (WxHxD)
11.46x15.73x17.28"
Volume
3114.55 cu in
Case Type
Mid-Tower
Front
solid, glass
Top
partially closed, mostly fan grill, dust filter outside
Bottom
partially closed, fan grill, dust filter outside
Left
solid, glass
Right
partially closed, partially mesh
Rear
partially closed, partially mesh, fan grill top right, PCI slots (7x horizontal)
Front I/O Position
Case Side: Top, Height: Front, Position: Right
Motherboard Orientation
Motherboard Orientation: Left
Features
Cable management, dust filters, glass window, multi-chamber design
USB Labeling
Left
Product Description
Comprehensive Guide to the AeroCool Dryft Case
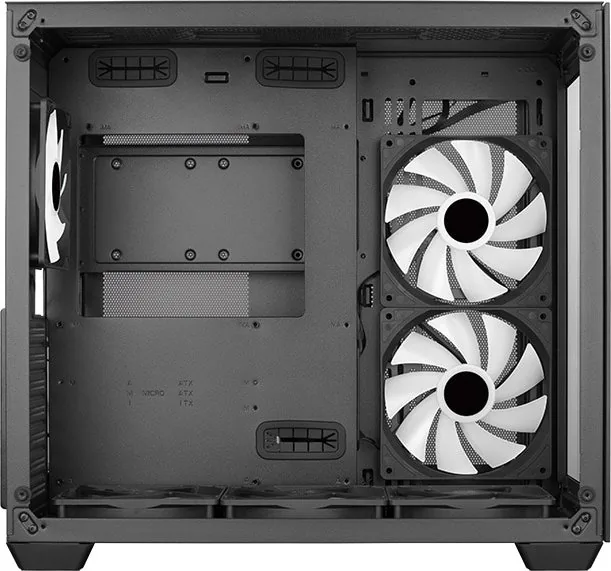
Building a high-performance computer requires careful attention to cooling and aesthetics. The AeroCool Dryft Mid Tower Case provides a robust foundation for custom PC builds. This chassis excels in airflow management and component compatibility. Fans can be installed across multiple areas including the top, bottom, rear, and sides. Support for large radiators ensures water cooling enthusiasts are covered. Users can fit radiators up to 360mm on the top panel for maximum heat dissipation.
Storage flexibility is another key strength. The design accommodates both 3.5-inch hard drives and 2.5-inch SSDs. Cable management is simplified with dedicated spaces and included tie straps. Accessory bags contain necessary screws for motherboards, power supplies, and drives. Front I/O connectivity is prioritized with USB 3.0 ports and high-definition audio. This setup ensures fast data transfer and clear sound output at your fingertips.
Lighting customization is a major highlight. The integrated RGB fan hub simplifies wiring for multiple fans. Synchronization with software like ASUS Aura Sync, MSI Mystic Light, and GIGABYTE RGB Fusion allows unified color schemes. Physical buttons on the hub offer direct control without software. Hold the button to switch modes or turn everything off completely. Refer to the AeroCool Dryft Manual for detailed connection diagrams.
Installation involves standard PC assembly steps. Mount the motherboard carefully using standoffs. Secure the PSU in the lower compartment. Connect add-on cards into PCIe slots. Install drives into their designated bays. Attach fans to the designated mounts. Ensure all power connections are routed to the PSU. Check the front panel connectors for correct pinouts. This process results in a clean and stable system ready for operation.
Detailed installation instructions guide users through every step. Start the process by installing the motherboard followed by the power supply unit. Add-on cards fit into available expansion slots easily. Install 3.5-inch HDDs as well as additional SSDs for speed. Top fans provide vertical airflow while side fans push air through components. Bottom fans assist in cooling the power supply area. Radiator mounts support both water and air cooling setups effectively.
Connectivity extends to various RGB standards. Connect the PWM socket for fan speed adjustments. Plug the addressable RGB socket for advanced lighting effects. Use SATA connectors for power to the hub. Non-addressable boards use the LED button interface instead. This versatility ensures the case works with most current gaming motherboards.
Maintenance is straightforward. Dust filters help keep the interior clean. Fans can be removed and cleaned without disassembling the whole build. The hub allows quick changes to lighting profiles during usage. If issues arise, troubleshooting steps are included. Contact support for specific regional variations in warranty. Specifications may vary depending on your region. Contact your local retailer for more details. Always verify socket types before purchasing adapters. Follow safety guidelines when installing electrical components.
The LED control features multiple modes for user convenience. Hold the control button to switch between motherboard and button control methods. This flexibility allows for customized lighting experiences without constant software usage. Powering down the LEDs is quick and easy for users who prefer a dark interior at night. The reset function ensures the hub returns to default settings if needed.
Variants of this case support different RGB configurations for specific build types. Some versions include advanced fan hubs while others focus on basic connectivity. Ensure you select the right version for your motherboard compatibility. The package contents are consistent across regions with minor variations in screws. Check the box for the specific accessory list provided with your unit.
Notes
- Specifications may vary depending on your region.
- Contact your local retailer for more information.
- Follow safety guidelines when installing electrical components.
Search for 67,706 Manuals online


Type-in Brand or Model