
AeroCool Dryft Mini Manual
PDF manual · 2 Pages
English



Quick check
Incorrect answer, please try again.
Chat with your AeroCool Dryft Mini manual using AI
Get instant AI answers from your AeroCool Dryft Mini manual
Ask anything about the AeroCool Dryft Mini. Answers come from this manual, with the pages they are based on.
Ask a Question
Do you recommend Dryft Mini?
Yes NoFrequently Asked Questions
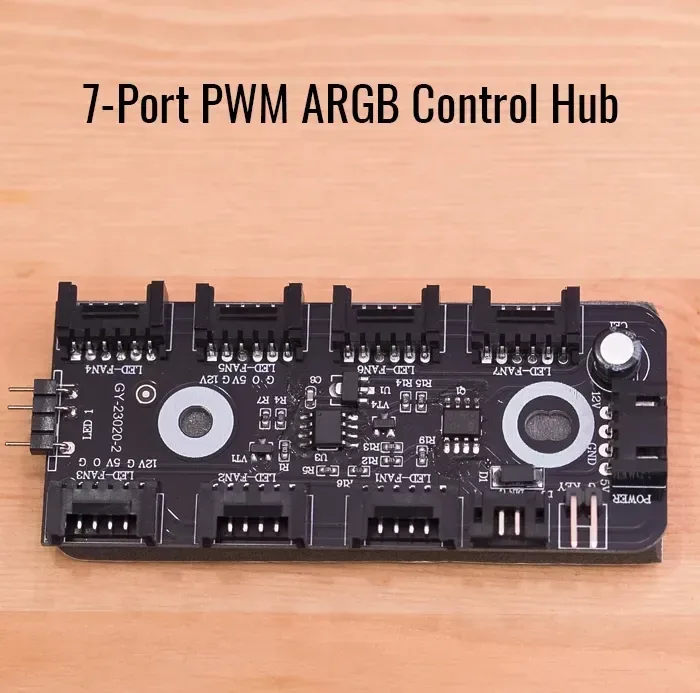
Connect the main hub connector to the motherboard PWM socket. If your board supports addressable RGB, connect to the specific RGB socket. Otherwise, use the non-addressable connector setup. Ensure power is provided from the PSU via the SATA connector for the hub to function correctly.
Is this answer helpful?
This case supports standard 120 mm and larger 140 mm fan sizes. You can install them on the top, bottom, rear, or side mounting locations to create optimal airflow. Radiator mounts also support up to 360 mm water cooling solutions effectively for thermal management.
Is this answer helpful?
Yes, the package includes motherboard standoffs to fit different form factors and expansion slots reliably. You will also find screw kits specifically designed for SSDs, HDDs, and the power supply unit installation to assist with assembly.
Is this answer helpful?
Use the LED control button located on the front panel to switch modes. Hold the button for three seconds to switch between motherboard and button control. Hold it for six seconds to turn off LEDs, or press once to turn them back on.
Is this answer helpful?
You should refer to the official AeroCool Dryft Mini Manual provided with your unit. Detailed instructions for cable management and component placement ensure proper setup. For visual diagrams on fan installation, consult the manufacturer's website or support portal.
Is this answer helpful?
Yes, radiator mounts accommodate up to 360 mm liquid cooling solutions on the top and side panels. Bottom and rear fan installations provide additional fresh air intake and hot air expulsion paths for thermal efficiency during operation.
Is this answer helpful?
The front I/O connectors provide easy access to high-speed USB 3.0, audio jacks for headphones and microphones, and reset buttons. Power and reset switches are also included for system control during the build process.
Is this answer helpful?
Advantages and Disadvantages
Advantages

- Included RGB hub allows easy RGB fan synchronization with motherboards for visual effects.
- Supports multiple fan sizes including 120mm and 140mm options for versatile airflow.
- Comprehensive accessory kit includes screws for all storage types and motherboard.
- Compact Mini Tower design fits smaller desk spaces efficiently without sacrificing cooling.
- Front I/O includes USB 3.0 and audio ports for convenient connectivity.
Disadvantages

- Regional specifications might vary requiring local retailer verification before purchase.
- Manual installation steps could be clearer for first-time desktop builders.
- LED control button functions might confuse some users attempting initial setup.
- Limited internal space restricts large professional GPU installations slightly.
- Multi-language included text may cause confusion regarding specific instructions.
Product Specification
External
N/A
Ports
1x USB-C 2.0 (480 Mbps), 2x USB-A 3.0 (5 Gbps), 1x 3.5mm Jack (Line-Out), 1x 3.5mm Jack (Line-In)
PCI Slots
5
Fans (Front)
N/A
Fans (Left)
N/A
Fans (Top)
3x 4.72 in (optional) or 2x 5.51 in (optional)
Fans (Other)
N/A
Radiator Sizes
120/240/280/360 mm top, 120 mm rear, 120/240/280 mm right, 120/240/360 mm bottom
Motherboard
up to mATX
Supported Motherboards
Mini-ITX (6.7 x 6.7 in) / mATX (9.6 x 9.6 in)
Power Supply
ATX
Power Supply Position
bottom (vertical)
CPU Cooler
max 6.38 in Height
Graphics Cards
max 16.50 in
Color
Black, Black Interior
Dimensions (WxHxD)
11.42 x 14.55 x 17.28 in
Volume
1.66 cu ft
Case Type
Mini-Tower
Front
Solid, Glass
Top
Partially Solid, Mostly Fan Mesh, Dust Filter Exterior
Bottom
Fan Mesh, Dust Filter Exterior
Left
Solid, Glass
Right
Partially Solid, Front Fan Mesh, Rear Fan Mesh
Rear
Partially Solid, Right Top Fan Mesh, Top Vent Slots Left, Top Vent Slots Right, PCI Slots (5x Horizontal)
Front I/O Position
Case Side: Top, Height: Front, Position: Right
Motherboard Orientation
Motherboard Orientation: Facing Left
Features
Cable Management, Dust Filters, Glass Window, Multi-chamber Design
USB Labeling
Left
Product Description
Discover the AeroCool Dryft Mini
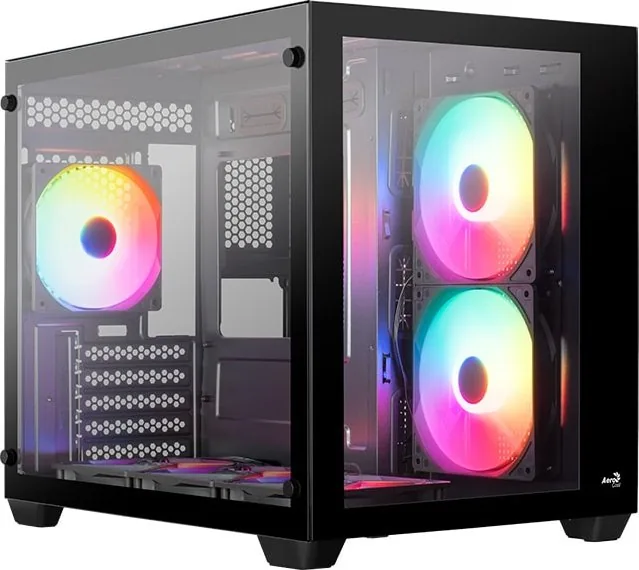
The AeroCool Dryft Mini is designed for compact builds without sacrificing performance or cooling capacity. This Mini Tower Case offers exceptional airflow solutions for custom water cooling loops or standard air cooling setups. Users can install multiple fans or large radiators to maintain optimal internal temperatures during intensive gaming or rendering tasks. The compact design maximizes space efficiency while ensuring compatibility with most ATX and micro ATX motherboards.
Installation and Setup Procedures
Setting up your system is straightforward with the included accessories and clear guidance. The package contains necessary screws and standoff hardware for connecting motherboards and storage drives safely. Following the official AeroCool Dryft Mini Manual ensures proper cable management and precise component placement inside the chassis. Front I/O connectors provide easy access to high-speed USB 3.0, audio jacks, and reset buttons. Proper connection of the front panel cables is crucial for full system functionality and ease of use.
RGB Lighting Integration Options
Lighting enthusiasts will appreciate the dedicated RGB fan hub included directly in the box. This feature allows for synchronized control with popular motherboard software suites like ASUS Aura Sync or MSI Mystic Light. You can connect addressable RGB fans directly to the integrated hub for vibrant visual effects tailored to your preference. Non-addressable boards have specific connection steps to manage illumination without potential electrical issues. The LED control button on the front panel lets you switch modes or power off lights instantly for energy saving.
Advanced Cooling Capabilities
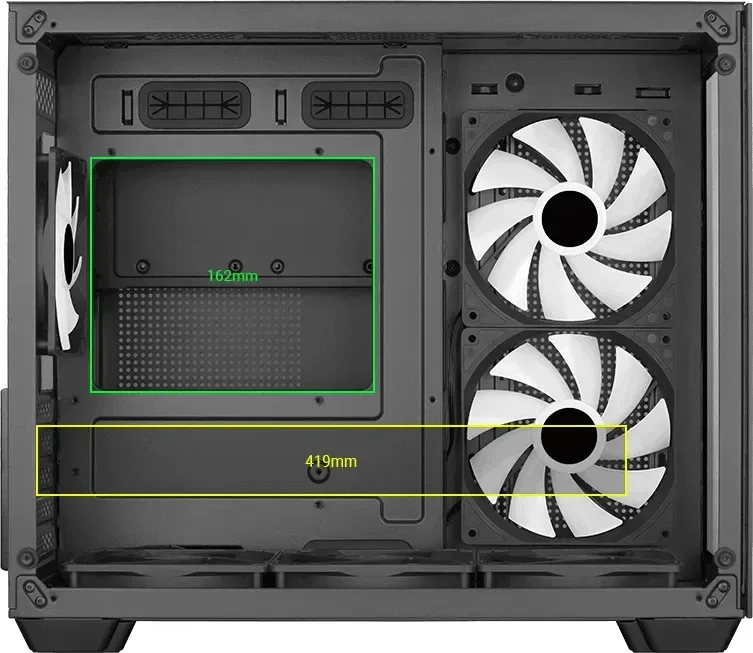
This case supports various fan sizes including standard 120 mm and larger 140 mm options for versatile airflow. Radiator mounts accommodate up to 360 mm liquid cooling solutions on the top and side panels effectively. Bottom and rear fan installations provide additional fresh air intake and hot air expulsion paths for thermal efficiency. The design encourages maximum airflow through strategic mounting locations and ample ventilation zones. Ensure all fans are secured tightly to prevent unwanted vibration noise during operation.
Comprehensive Accessories Included
A dedicated accessory bag houses essential mounting hardware required for successful assembly. You will find screw kits specifically designed for SSDs, HDDs, and the power supply unit installation. Motherboard standoffs are provided to fit different form factors and expansion slots reliably. Cable ties help organize wiring inside the chassis for a clean look that simplifies maintenance later. This attention to detail simplifies the build process significantly for both new and experienced users.
Important Note
Always verify regional specifications with your local retailer as items may vary by location.
Conclusion
Overall, the AeroCool Dryft Mini balances size and functionality perfectly for modern builds. It serves well for gamers and enthusiasts seeking a compact yet powerful platform for daily use. Enjoy building your dream system with confidence using this reliable case.
Search for 67,706 Manuals online


Type-in Brand or Model