
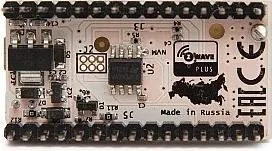
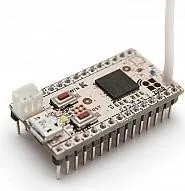
Z-Wave.Me Z-Uno Manual
PDF manual · 2 Pages
English



Quick check
Incorrect answer, please try again.
Chat with your Z-Wave.Me Z-Uno manual using AI
Get instant AI answers from your Z-Wave.Me Z-Uno manual
Ask anything about the Z-Wave.Me Z-Uno. Answers come from this manual, with the pages they are based on.
Ask a Question
Do you recommend Z-Uno?
Yes NoFrequently Asked Questions
Z-Wave.Me ZUNO is used to create custom Z-Wave smart home devices. It helps developers and hobbyists build controllers, sensors, and automation projects that can connect to a Z-Wave network and interact with other compatible products.
Is this answer helpful?
Connect the board to your computer by USB, confirm the LED is blinking, open your Z-Wave controller, and put it into inclusion mode. Then trigger Learn Mode on Z-Uno with a triple click on the service button.
Is this answer helpful?
The board comes with a Blink demo already loaded. The blinking LED shows that the device is powered, running correctly, and ready to be included in a Z-Wave network. It also serves as a simple functional test.
Is this answer helpful?
Yes, the text recommends using the Arduino IDE. After installing the Z-Uno package and drivers, you can open prepared examples, update the board, and start writing your own sketches using a familiar development environment.
Is this answer helpful?
Install the latest Arduino IDE, add the Z-Uno package and drivers, update the board using Burn Bootloader, and review the example sketches. These steps prepare the environment for reliable development and testing.
Is this answer helpful?
Yes, it is designed to work with a wide Z-Wave ecosystem. The text highlights compatibility with more than 1300 existing Z-Wave products, which makes it easier to build devices that fit into existing smart home setups.
Is this answer helpful?
Advantages and Disadvantages
Advantages

- Easy first-time setup with a preloaded Blink demo for instant feedback.
- Works with Arduino IDE, making custom development familiar and accessible.
- Supports Z-Wave inclusion, so devices can join a real smart home network.
- Compatible with a large Z-Wave ecosystem, expanding project possibilities.
Disadvantages

- Requires a Z-Wave controller and pairing steps before it becomes useful.
- New users may need time to learn channels, getters, setters, and sketches.
- Software setup includes driver installation and board updates, which adds complexity.
- The starter example is simple, so advanced projects still require coding effort.
Product Specification
Format
Enhanced Features, Internet of Things, Robot
Platform
Z-Uno
Manufacturer
Z-Wave.Me
Type
Mainboard
MCU
Sigma ZM5101, not specified, 2.3-3.6V
Memory
128kB Flash, 64kB EEPROM, 16kB SRAM
Host Interface
USB 2.0 Micro-B, 5.0V
Operating Voltage
5.0V (3.0-18.0V max.), USB 2.0 Micro-B/Pin Header
I/O Pin Current
32mA, 50mA Power Pin (3.3V)
Digital I/O Pins
26 total, 5 of which are PWM
Analog I/O Pins
4 (input)
UART/USART
2x UART
Additional SoC
N/A
Dimensions
1.54x0.63x0.79in (WxHxD)
Weight
0.25 oz
Special Features
Reset Button, Service Button, Z-Wave Plus compatible, Z-Wave OTA, 128bit AES Encryption, 10 Channel Multichannel
Scope of Delivery
1x Mainboard, 1x 3.39in Cable Antenna
Product Description
Z-Wave.Me ZUNO Manual: A Friendly Start to Smart Home Development
Z-Wave.Me ZUNO is a compact gateway to building custom Z-Wave devices without having to start from a blank slate. The Z-Wave.Me ZUNO Manual introduces a practical, hands-on path for getting the board up and running: connect it by USB, confirm the built-in LED is blinking, and use the controller’s inclusion mode to bring the device into your Z-Wave network. That simple first experience is a strong hint at what makes Z-Uno appealing: it lowers the barrier between an idea and a working smart home device.
One of the most useful details in the setup flow is the preloaded Blink sample. It gives immediate feedback that the board is alive and configured correctly, while also demonstrating how Z-Wave commands can affect behavior. In this example, the dimming value changes the blink rate of the onboard LED, turning a basic light into a clear demonstration of communication between the controller and the board. For newcomers, that makes the learning process feel tangible instead of abstract.
The manual also points users toward Arduino IDE integration, which is a major advantage for hobbyists and developers. After installing the Z-Uno package and drivers, updating the board, and exploring the examples menu, users can begin writing their own sketches. The sample code shows how channels, getter/setter callbacks, and a simple loop work together to create a controllable Z-Wave device. This approach is especially valuable for anyone who wants to understand both the hardware behavior and the software logic behind it.
Beyond the setup steps, Z-Uno stands out because it is designed to work with a broad Z-Wave ecosystem. The text highlights compatibility with more than 1300 existing Z-Wave products, which means custom devices can fit naturally into real homes and existing automation setups. That makes the board attractive not just for experimentation, but also for building practical solutions such as lighting controls, sensors, and other interactive smart devices.
Why it matters
Z-Wave.Me ZUNO is not just about learning electronics; it is about building something useful quickly. The blend of a ready-made demo, Arduino support, and Z-Wave compatibility creates a smooth entry point into smart home development. Whether you are testing your first sketch or planning a more advanced project, the Z-Uno ecosystem gives you a clear starting structure and room to grow.
Notes
- Start with the Blink demo to verify the board and inclusion process.
- Use the Arduino IDE examples before creating custom sketches.
- Keep the Z-Wave controller nearby during pairing and testing.
- Update the board firmware before deeper development.
Search for 67,706 Manuals online


Type-in Brand or Model