

Yamaha DTX482K Manual
PDF manual · 2 Pages
English



Quick check
Incorrect answer, please try again.
Chat with your Yamaha DTX482K manual using AI
Get instant AI answers from your Yamaha DTX482K manual
Ask anything about the Yamaha DTX482K. Answers come from this manual, with the pages they are based on.
Ask a Question
Do you recommend DTX482K?
Yes NoFrequently Asked Questions
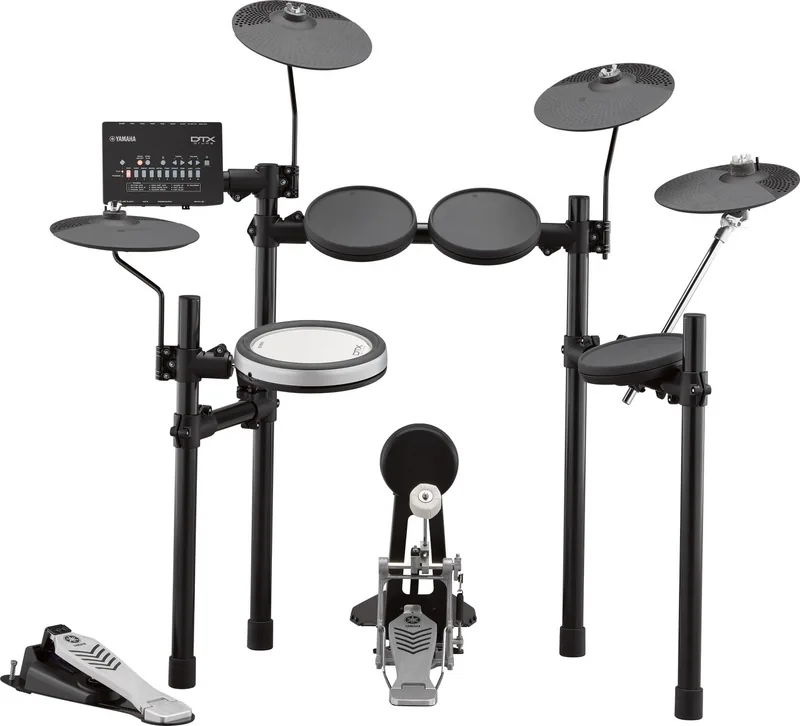
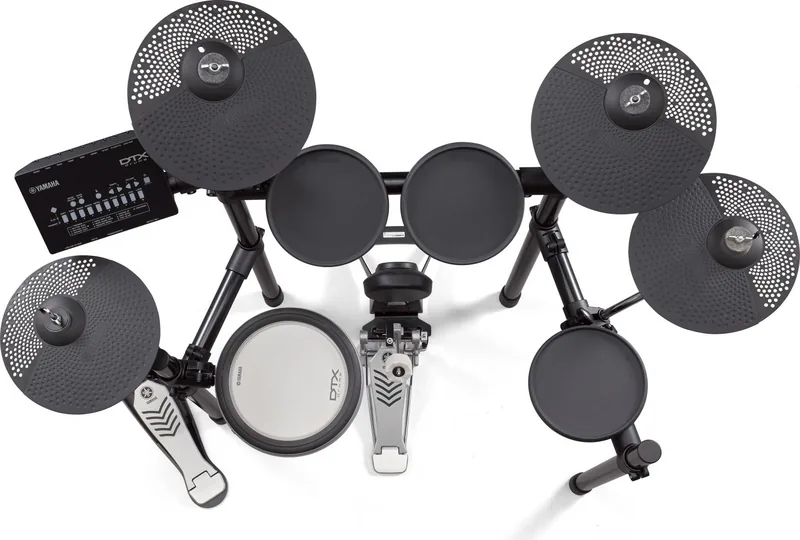
The DTX482K is the top configuration in the DTX402 series. It includes three cymbal pads, with two crash pads and one ride pad, plus an XP80 snare pad. This provides a more expanded playing layout than a basic electronic drum configuration.
Is this answer helpful?
The kit includes a drum rack, drum module, KP65 kick pad, HH65 hi-hat controller, FP6110A foot pedal, cymbal and hi-hat pads, XP80 snare pad, extra cymbal pad, mounts, a multi-channel cable loom, stereo cable, cable ties, tuning key, and related mounting hardware.
Is this answer helpful?
Insert the L-shaped connector of the supplied stereo audio cable into the OUTPUT jack on the additional cymbal pad. Connect the other end to the PAD IN jack on the KP65 kick pad. Secure the cable along the rack after connection.
Is this answer helpful?
The stopper keeps the additional cymbal pad from turning while it is played. It must be aligned so its pin enters the small hole in the pad. Proper positioning also helps prevent unnecessary strain or damage to the connected cable.
Is this answer helpful?
Hold down the number 8 button while pressing the standby/on button. The number 8 button flashes while the module updates its settings. This procedure is needed after initial setup or after the drum module has been initialized.
Is this answer helpful?
Yes. Loosen the relevant clamp bolts on the snare mounting rod, adjust the pad to a comfortable angle, and tighten the bolts again. Leave about 1.3 cm of space between the rod base and the snare pad for correct installation.
Is this answer helpful?
Advantages and Disadvantages
Advantages

- Expanded layout includes two crash cymbal pads and a dedicated ride pad.
- XP80 snare pad offers adjustable positioning on a separate snare rod.
- KP65 kick pad supports connection of the additional cymbal pad.
- Compact rack can be organized neatly with the included cable ties.
- Module setup has a dedicated startup procedure optimized for the DTX482K.
Disadvantages

- Assembly involves multiple clamps, rack sections, and hardware adjustments.
- Yamaha recommends at least two people for safe kit assembly.
- The extra cymbal requires careful stopper alignment to prevent pad rotation.
- Module initialization removes DTX482K settings and requires setup again.
- Rubber objects left on the snare head may cause discoloration.
Product Specification
Sounds
10 Drum Kits, 287 Sounds
Snare
8 in, 3 Zones (XP80)
Bass
Rubber Pad (KP65)
Rack Tom
2 x 7.5 in, Rubber Pad
Floor Tom
7.5 in, Rubber Pad
Hi-Hat
10 in
Crash
2 x 10 in
Ride
10 in
Hardware
Bass Drum Control Pedal (FP6110A), Hi-Hat Control Pedal (HH65), Rack
Connections
AUX In (0.14 in Jack), Headphones (0.14 in Jack), 9 x Trigger In, USB-B
Features
MIDI Recorder, Practice Function
Product Description
Yamaha DTX482K Manual: Electronic Drum Kit Overview
The Yamaha DTX482K is an electronic drum kit designed for players who want a fuller pad layout and a practical setup for home practice, learning, and performance. As the top configuration in the DTX402 series, it expands the core kit with three cymbal pads: two crash pads and a dedicated ride pad. The setup also includes Yamaha's XP80 snare pad, giving the kit a more substantial snare-playing surface and flexible positioning on its own mounting arm.
This Yamaha DTX482K Manual guide is especially useful for understanding how the components work together before playing. The kit includes a compact rack, a KP65 kick pad, HH65 hi-hat controller, FP6110A foot pedal, drum module, multi-channel cable loom, cymbal mounts, clamps, cable ties, tuning key, and power adapter where supplied. Its expanded cymbal arrangement is a key attraction for drummers who need separate crash and ride voices in a compact electronic setup.
Expanded Cymbal and Snare Configuration
A major feature of the DTX482K is the additional cymbal pad. It is mounted on a dedicated holder attached to the TOM3 rack tube. Correct installation of the stopper is important because it keeps the cymbal pad from rotating during use and helps protect the cable connection. The additional cymbal connects by stereo cable to the PAD IN input on the KP65 kick pad, integrating it into the complete kit configuration.
The XP80 snare pad mounts to a dedicated snare rod on the smaller rack. Its angle can be adjusted by loosening the relevant clamp bolts, positioning the pad, and tightening them again. Yamaha also recommends leaving approximately 1.3 cm of space between the rod base and the snare pad. This attention to positioning helps create a comfortable playing angle while keeping the hardware secure.
Setup and Care Notes
The rack should be assembled on a flat, hard surface, preferably with help from another person. Tighten each clamp after fitting a part, and follow the prescribed assembly order to avoid incorrect installation. Once the pads and cables are in place, cable ties can be used to secure wiring neatly along the rack.
Before using the module, hold number button 8 while turning it on. This applies settings optimized for the DTX482K. If the module is later initialized, repeat this procedure to restore the correct kit setup. Avoid storing pads stacked together or leaving rubber items against the snare head for long periods, as this may cause discoloration.
Notes
- Check all supplied parts before assembly.
- Keep the cymbal stopper firmly aligned with the pad hole.
- Retighten clamps after changing pad angles.
- Store the kit in a clean, accessible location for routine checks.
Search for 67,706 Manuals online


Type-in Brand or Model