Manual.ly Logo

Wahl Vogue Manual

0.0 · 0 Ratings

PDF manual · 5 Pages

English

M: qwen/qwen3.5-flash-20260224
page

/ 5

Loading...
75efaa387800543366662571fbb98e0766ff page 4
Battery Installation - Trimmer
1. Remove battery cover from trimmer by pushing in and back on the plastic door in the direction of the arrow.
2. Important: Be sure to insert the negative (-) end of each battery rst, so that it depresses the spring at the bottom of the battery compartment. Then slide the positive (+) end into position. Do not allow
the negative terminal clips to bend and cut the casing of the batteries.
3. Replace battery cover to its original position.
4. Move switch to ON position to use.
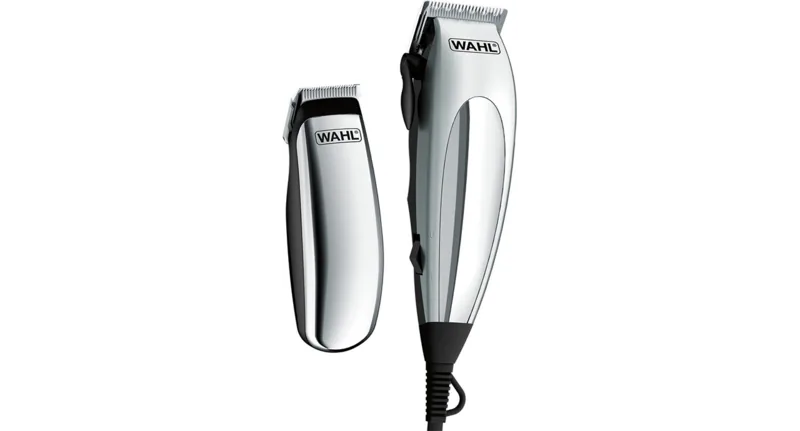
Using Your Nasal Trimmer (Not Included in all Wahl kits)
1. Before trimming remove the protective cap and turn on the trimmer by pushing the switch up.
2. To trim hair from nose – make sure the nasal passages are clean. Slowly move the rotary head in and out of each nostril, no more than ¼ inch deep. Keep the side of the cutting head rmly against
the skin to prevent a tickling sensation.
3. To trim hair from ears – make sure the outer areas of the ears do not contain any wax. Hold the ear at with one hand and carefully insert rotary head no more than ¼ inch into the outer ear. Caution:
Do not insert the rotary head or any other foreign object into the inner ear. For hair growing on the outside of the ear, simply move the rotary head slowly along the edges of the ear.
CLEANING YOUR NASAL TRIMMER
Periodically after use, turn the trimmer off and rinse the cutting head under warm, running water. For more thorough cleaning, remove the attached cutting head by turning it slightly counter clockwise. Then
rinse the entire head under running water. After cleaning, replace desired head by turning it slightly clockwise and wipe the entire trimmer dry with a soft cloth. Always replace the protective cap after use.
CLEANING AND MAINTENANCE
Your Wahl Clipper and Trimmer Blades were oiled and aligned before leaving our factory; however it is possible for the blades to get bumped out of alignment. Blades must be re-aligned if they have been
removed for cleaning or replacement. To determine if realignment is necessary, compare your clipper blades with this sketch.
1. End of top blade teeth should be .025” to .050” (064mm to 1.27mm) back from bottom blade. This is important so that the clipper does not cut too close or allow the moving cutter to touch the skin.
2. Extreme left hand tooth of top blade must be covering or to the left of the rst small tooth of the bottom blade.
3. Extreme right hand tooth of top blade must be touching the big tooth on the bottom blade.
If blade alignment is incorrect, add a few drops of oil to the blades, turn clipper on for a few moments, turn off and unplug. Loosen screws slightly and adjust. Tighten screws after blade is aligned.
OIL
The blades of your new clipper should be oiled after every haircut. Simply place a few drops of Wahl Clipper Oil on the blades at points A and B. Use only the Wahl Clipper Oil included in the pack. Due to the
high speed of your Wahl Clipper, the correct type of oil must be used. Do not use hair oil, grease or any oil mixed with kerosene or any solvent, as the solvent will evaporate and leave the thick oil, slowing
down the blades. Wahl Clipper Oil is a very thin, natural oil which will not evaporate and will not slow down the blades.
POWER SCREW
(Not found on all models of Wahl Clippers)
Your clipper has a power screw; it has been adjusted for peak efciency before leaving the factory. However, if voltage in your home is low, you may need to readjust it.
To adjust power, use the plastic brush, screwdriver or a thin coin to turn the power screw in a clockwise direction until he arm strikes the coil making a noise. Then slowly turn the power screw out (counter
clockwise), just until noise stops. Then about a quarter turn more, This is the maximum power setting.
IMPORTANT WIRING INSTRUCTION
WARNING: If the supply cord is damaged it must be replaced by the manufacturers service agent or a similarly qualied person in order to avoid a hazard.
The wires in the mains lead are coloured in accordance to the following code:
Blue Neutral (N) Brown live (L)
This lead is tted with a 3 pin plug which has a 3 amp fuse tted.
If the plug supplied is not suitable for your socket or becomes damaged, it should be cut off and disposed of, and a suitable plug tted as detailed below.
The wire which is coloured BLUE must be connected to the terminal in the plug which is marked with the letter ‘N’ or coloured BLACK or BLUE.
The wire which is coloured BROWN must be connected to the terminal in the plug which is marked with the letter ‘L’ or coloured RED or BROWN.
DO NOT connect either wire to the terminal in the plug which is marked with the letter ‘E’ or has the Earth symbol, or coloured GREEN or GREEN/YELLOW.

Chat with your Wahl Vogue manual using AI

Get instant AI answers from your Wahl Vogue manual

Ask anything about the Wahl Vogue. Answers come from this manual, with the pages they are based on.

Vogue Maintenance Schedule

After every haircut
Oil the blades

Place a few drops of Wahl Clipper Oil on the blades at points A and B after each use.

Periodically
Clean nasal trimmer head

Turn off and rinse cutting head under warm running water. Remove head for thorough cleaning if needed.

M: QW-35-FL

Ask a Question

0/1000

Do you recommend Vogue?

Yes No

Frequently Asked Questions

A

Three years from the date of original purchase or receipt as a gift.

Is this answer helpful?

A

Yes, if supervised and understood safety rules regarding age eight and above.

Is this answer helpful?

A

After every haircut is recommended to maintain peak efficiency and speed.

Is this answer helpful?

A

No, use alkaline batteries only and do not attempt to recharge them.

Is this answer helpful?

A

No, designed for domestic use only and professional use voids the guarantee.

Is this answer helpful?

A

Rinse under warm water, detach head, then dry thoroughly with a soft cloth.

Is this answer helpful?

A

Replace it through the manufacturers service agent or a similarly qualified person.

Is this answer helpful?

M: qwen/qwen3.5-flash-20260224

Advantages and Disadvantages

Advantages

  • Comprehensive safety safeguards protect users including children over eight years old with supervision
  • Taper lever option adds versatility allowing adjustable hair length without changing combs
  • Three year guarantee against defects in material and workmanship covers major issues
  • Detailed blade alignment instructions ensure professional results at home during maintenance
  • Specific oiling guide prevents blade slowing using correct Wahl Clipper Oil types
VS

Disadvantages

  • Taper lever is not included in all Wahl clipper kits available for purchase
  • Trimmer and nasal trimmer attachments are sometimes not included in base kits
  • Domestic use only applies and professional environments invalidate the guarantee immediately
  • Manual wiring instruction required for plug replacement if cord becomes damaged later
  • Do not use with wet hands or immerse unit in water for safety
M: qwen/qwen3.5-flash-20260224

Product Specification

Type

Hair Clipper

Power Source

Corded

M: qwen/qwen3.5-flash-20260224

Product Description

Mastering Your Grooming Routine with Wahl Vogue Manual

The Wahl Vogue Manual represents a comprehensive guide designed for home users seeking professional grooming results from the comfort of their own home. This publication ensures you handle your new clipper with absolute care and confidence. Understanding your device is crucial for safety and longevity. The detailed instructions cover everything from initial setup to complex maintenance routines. The handbook details operating procedures and safety guidelines for all components. Wahl products are trusted for quality.

Safety is paramount in this product design. The manual stipulates that children aged eight and above may use the appliance under direct supervision. It emphasizes keeping the device dry and unplugging it immediately when not in use. This reduces the risk of electrical shock and ensures a safe grooming environment. Do not wrap the cord around the appliance. Check voltage supply before plugging in. Replace damaged cords through authorized agents. Ensure you read all instructions carefully before starting any procedure. Save these instructions for further reference regarding warranty claims. Call Customer Services on the provided number if issues arise.

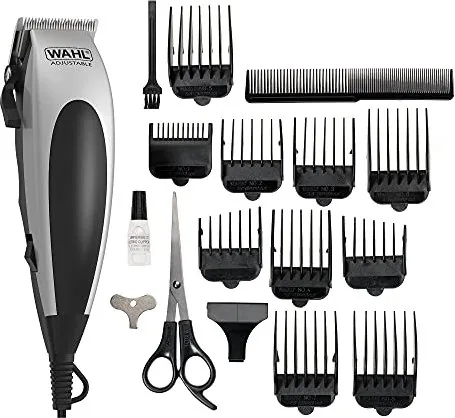
Operating the clipper involves specific techniques for uniform cutting. You should comb your hair into its natural direction before starting. Using guide combs allows for consistent lengths depending on preference. The taper lever adds versatility by altering cut closeness dynamically. For longer hair, lift and cut over a comb for precision results. The trimmer features distinct heads for beard and nose usage with specific guide settings. Trimming the beard or moustache requires specific guide settings. Comb beard in direction it grows. Use smooth overlapping strokes. Define upper part similarly for sharp lines.

Maintenance is simple yet effective. Oiling the blades after every haircut is mandatory to maintain peak efficiency. Do not use generic oils as they may damage the motor. The warranty covers defects for three years. However, professional use voids the guarantee. Clean trimmer heads under warm water and dry thoroughly. Compare blade ends against the manual sketch to ensure correct positioning.

Notes

Always read safety first. Check alignment. Keep cords dry. Register online. Use specified oils. Do not immerse unit. Dispose of batteries legally. Avoid attachments not supplied by the manufacturer. Replace batteries with like batteries only. Ensure positive terminal slides in last. Follow WEEE directive for waste disposal.

M: qwen/qwen3.5-flash-20260224

© Copyright 2026 Manual.ly