Manual.ly Logo

Vitavia Triton 2500 Manual

0.0 · 0 Ratings

PDF manual · 32 Pages

English

M: OA-GPT-54-NAN
page

/ 32

Loading...
40abd7008634768ea9bb84bd6cafa08563af page 6
6
Assembly Instructions
Safety Warning
EN
1. PLEASE READ THESE INSTRUCTIONS CAREFULLY AND COMPLETELY BEFORE ASSEMBLING YOUR GREENHOUSE.
2. Sharp edges and corners can cause injury. Always wear protective glasses, gloves, shoes and headgear when handling the aluminium proles, glass and
polycarbonate sheets. Broken glass is a safety hazard – always clear up immediately and dispose of with care.
3. The product you have purchased is intended only for growing plants and should only be used for this purpose. When used for other purposes we will take
no responsibility.
4. It is recommended that this greenhouse is assembled by two people.
5. Should you encounter difculties constructing this house, or in tting the glass or polycarbonate sheets, please contact your retailer
– do not use force!
6. The greenhouse must always be anchored.
020.01.2007
SITE SELECTION
Always try to select a sunny location, sheltered
from the wind as much as possible.
IMPORTANT
Before assembling your new greenhouse,
please check that all parts in the provided list
are included. Please take each bundle out of
the packaging in order to identify the parts
better.
It is important that the opened bundles do not
get mixed with one another.
If something is missing please contact your
retailer.
Nuts (1002) - Max. tightening torque 3Nm.
Important! The UV-resistant side of the
polycarbonate panes is indicated by a plastic
folio or printing at the edge. This side must
face outside. Remove the plastic folio.
NECESSARY TOOLS
Screw drivers (Normal and Crosshead PH2),
10 mm socket spanner or wrench, 10 mm
combination spanner, knife, measuring stick,
spirit level, Accu-drill with adjustable torque.
MAINTENANCE
The greenhouse should be thoroughly washed
with a gentle detergent occasionally. Please
check that the detergent used does not react
aggressively with aluminium or the glass xing
clips.
Ensure that the upper and lower door tracks
are cleaned regularly to avoid a build-up of
debris.
0. BASE
Important! The base must be exactly square
and level. A zinc-coated steel base is available
as an accessory for all greenhouse models.
(Attention! Only when the greenhouse has to
be located in a very windy and unprotected
location: Drill through both the prole at the
base of the greenhouse and the steel base,
and connect them with nuts and bolts.)
If you would rather construct your own stone
or concrete foundation, please follow the
dimensions specied in diagram 0. Treated
wooden beams at least 18 mm high and not
more than 32 mm wide should be positioned
between the stone/concrete foundation and
the aluminium frame, and connected to the
foundation with 50 mm long bolts (not pro-
vided).
Foundations must extend down below the frost
level.
Diagrams in a single frame show the view
from inside the greenhouse. Those
enclosed in a double frame show the view
from outside the greenhouse.
1. SIDE ELEMENTS
Lay all of the parts on the oor and connect
them loosely. (1.1) to (1.6)
Note: All bolt heads must slide into the bolt
channels in each vertical bar.
Note: The position of the corner bars (2230)
used should correspond to the front of the
house. The two sides will be a mirror image of
one another.
2. PLAIN GABLE END
Lay the parts (2208), (2230), (2235), (2236),
(2291) and (2292) on the oor and connect
them loosely (2.2) (2.3) (2.8).
Slide panes A, B and C into the appropriate
guides in the vertical bars (2.4).
Please cut (K) to a length of 584mm so that
they t between the aluminium proles.
Position (2280) / (2281) on the relevant corner
bar (2230) .
Connect (2244) / (2246) to the outside of roof
corner bar (2240) and (2245) / (2247) to the
outside of (2241) (2.6) .
Loosely connect corner plate (1043) to (2240)
and (2241) (2.5).
Connect the assembled roof corner bars over
the assembled panes (2.7) (2.9), taking care to
position (2280) and (2281) as shown .
3. CONNECTING THE SIDE ELEMENTS
Insert 2 extra bolts into each roof corner bar
(2240) and (2241) (3.3) (3.4).
[VM0017-T 2500: Insert an extra bolt in (2240)
or (2241) to later connect roof vent sill bar
(2260) on the desired side.]
Bolt the side elements to the plain gable end
(3.1) (3.2).
Allow one of the extra bolts in (2240) and
(2241) to slide into the open hole in corner
angle (2215 / 2216) (3.4) (3.5).
Note: Position (2240) and (2241) using the
locating edge on (2215 / 2216).
Connect the front sill bar (2209) to corner bars
(2230) (3.6).
Connect back side brace (2293) (3.5) (3.7).
4. DOOR GABLE END
Assemble the front middle bars (2235) (2236)
and braces (2290) (2292) (4.3) (4.4) (4.5).
Slide panes A and C into the appropriate
guides in the vertical bars (4.2).
Please cut (K) to a length of 584mm so that
they t between the aluminium proles.
Position (2280) / (2281) on the relevant corner
bar (2230) .
Connect (2244) / (2248) to the outside of roof
corner bar (2240) and (2245) / (2249) to the
outside of (2241) (4.6) .
Insert 2 extra bolts into each roof corner bar
(2240) and (2241) (4.7) (4.8).
Connect the assembled roof corner bars over
the assembled panes, taking care to position
(2280) and (2281) as shown .
Loosely connect corner plate (1043) to (2240)
and (2241) (4.7) and allow one of the extra
bolts in (2240) and (2241) to slide into the
open hole in corner angle (2215 / 2216) (4.7).

Chat with your Vitavia Triton 2500 manual using AI

Get instant AI answers from your Vitavia Triton 2500 manual

Ask anything about the Vitavia Triton 2500. Answers come from this manual, with the pages they are based on.

Triton 2500 Maintenance Schedule

Remind me when maintenance is due
Monthly
Clean door tracks

Clean the upper and lower door tracks regularly to avoid a build-up of debris.

Quarterly
Wash greenhouse

Thoroughly wash the greenhouse occasionally with a gentle detergent that does not react aggressively with aluminium or glass fixing clips.

Free maintenance reminders

Timed to your purchase date. Always free, unsubscribe anytime.

By submitting you agree to the privacy policy. Unsubscribe with one click in any email.
M: QW-35-FL

Ask a Question

0/1000

Do you recommend Triton 2500?

Yes No

Frequently Asked Questions

A

It is designed for growing plants in a protected environment. The aluminum frame and 4mm glazing help create a practical space for seedlings, herbs, flowers, and other crops that benefit from shelter and stable light.

Is this answer helpful?

A

Yes. The manual stresses that the base must be square and level, and the greenhouse should always be anchored. A steel base, stone foundation, or concrete base can be used depending on the site and local conditions.

Is this answer helpful?

A

The UV-resistant side of the polycarbonate panels must face outward. This helps the panels perform properly outdoors and ensures the greenhouse is assembled in the intended orientation.

Is this answer helpful?

A

Yes. The instructions describe both swing door and sliding door configurations. You can choose the opening direction during assembly so the greenhouse fits your garden layout more comfortably.

Is this answer helpful?

A

Clean it occasionally with a gentle detergent, avoid harsh chemicals, and keep the door tracks free of debris. Regular care helps protect the aluminum frame, glazing, and moving parts.

Is this answer helpful?

A

In strong wind, close all doors and vents. In heavy snowfall, remove snow from the roof or support the structure properly. The manual also recommends heating the greenhouse in winter if needed.

Is this answer helpful?

M: OA-GPT-54-NAN

Advantages and Disadvantages

Advantages

  • Light aluminum frame keeps the structure manageable while still supporting a stable greenhouse setup.
  • 4mm polycarbonate glazing helps protect plants and retain growing conditions inside the house.
  • Roof vent improves airflow and helps manage heat on sunny days.
  • Door setup can be adapted to suit different layouts, with swing or sliding options.
  • Designed to be anchored firmly, which supports safer long-term use.
VS

Disadvantages

  • Assembly is detailed and time-consuming, so it is not a quick one-person project.
  • The base must be perfectly square and level, which adds preparation work.
  • Panels and profiles require careful handling because sharp edges and breakable parts can cause injury.
  • Fasteners must not be overtightened, so the build needs patience and attention.
  • Performance depends on regular maintenance, including cleaning tracks and glazing surfaces.
M: OA-GPT-54-NAN

Product Specification

Glazing

Polycarbonate 4mm (twin-wall panels)

Frame

Aluminum

Color

silver

Area

26.91 sq ft

Special features

Roof window

Door

Sliding door

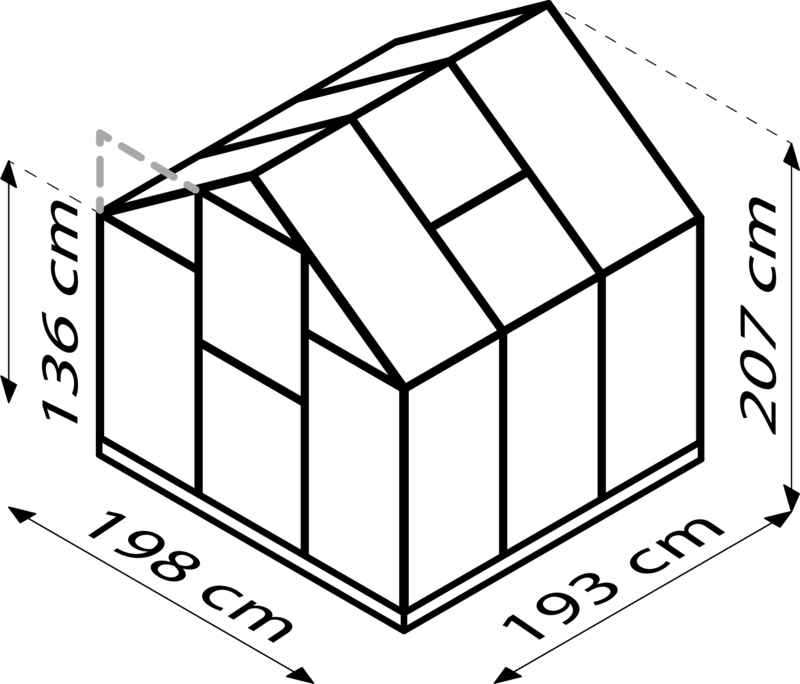
Dimensions (LxWxH)

77.95x51.58x81.50in

M: OA-GPT-54-NAN

Product Description

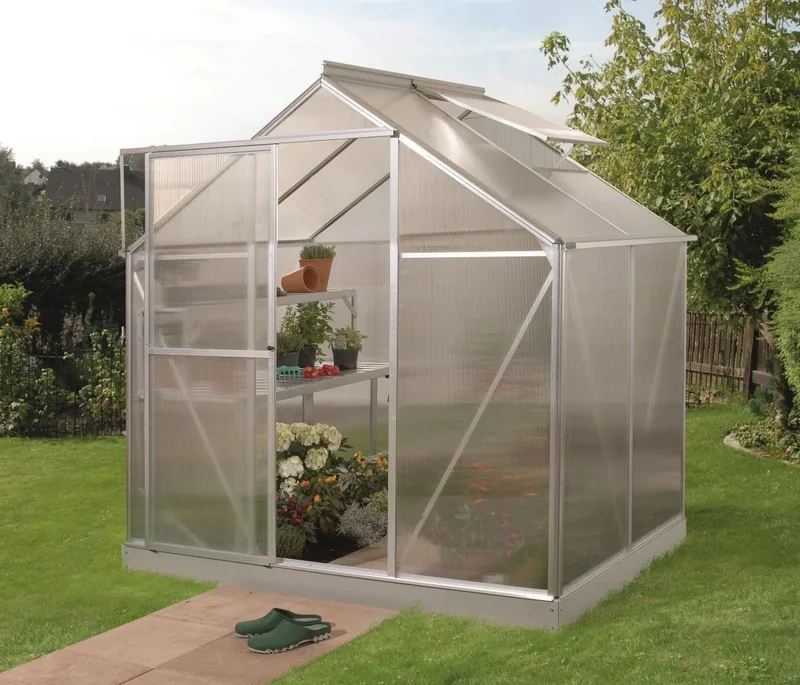
Vitavia Triton 2500 HKP 4mm Greenhouse Aluminum

The Vitavia Triton 2500 HKP 4mm greenhouse aluminum is built for gardeners who want a practical, durable space for raising plants through changing seasons. Its aluminum frame gives the structure a clean, lightweight feel while still offering the strength needed for long-term use. The 4mm glazing helps create a protected growing environment, making it a smart choice for seedlings, herbs, and compact vegetable crops.

What stands out most in the Vitavia Triton 2500 HKP 4mm greenhouse aluminum Manual is the focus on stability and careful assembly. The greenhouse is designed to be anchored to a solid, level foundation, which helps it stay secure in exposed conditions. That attention to the base matters, because a greenhouse performs best when the frame is square, the panels are fitted correctly, and every connection is tightened with care rather than force.

The glazing system is another strong point. The polycarbonate panels are UV-resistant on the correct side, so they need to be installed with the outer face positioned properly. This makes the greenhouse more reliable for everyday growing while also supporting light transmission inside the structure. The manual also shows that the design includes a roof vent, which is useful for controlling heat and airflow during warmer days.

Functionality is thoughtful throughout. Depending on the setup, the door can be arranged as a swing or sliding version, giving you flexibility based on your space and workflow. That makes the greenhouse easier to adapt to different garden layouts. Maintenance is equally straightforward: regular cleaning, clear door tracks, and occasional washing with gentle detergent help preserve both the aluminum frame and the glazing.

For gardeners looking for a compact greenhouse with a practical build and clear assembly logic, this model offers a balanced mix of convenience and reliability. It is best suited to users who appreciate structured installation and want a growing space that can support consistent cultivation rather than a decorative feature alone.

Notes

  • Best installed by two people.
  • Use a perfectly square, level foundation.
  • Keep vents and doors closed during strong wind.
  • Clear snow from the roof in winter.
  • Do not overtighten fasteners; follow the torque limit.
M: OA-GPT-54-NAN

© Copyright 2026 Manual.ly
