

Vitavia Ida 900 Manual
PDF manual · 48 Pages
English



Quick check
Incorrect answer, please try again.
Chat with your Vitavia Ida 900 manual using AI
Get instant AI answers from your Vitavia Ida 900 manual
Ask anything about the Vitavia Ida 900. Answers come from this manual, with the pages they are based on.
Ida 900 Maintenance Schedule
Thoroughly wash the greenhouse occasionally using a gentle detergent. Ensure the detergent does not react aggressively with aluminium or glass clips.
Clean the upper and lower door tracks regularly to prevent debris buildup.
Ask a Question
Do you recommend Ida 900?
Yes NoFrequently Asked Questions
The lean-to layout saves space and uses an existing wall for support. It also helps the greenhouse feel more sheltered, which can be useful in windy gardens or tighter outdoor areas.
Is this answer helpful?
Yes, but only if it is properly anchored and installed on a stable foundation. The instructions stress secure fixing, especially in exposed or windy sites, to keep the structure safe.
Is this answer helpful?
Yes. It includes a roof vent, which helps release heat and improve airflow. That makes it easier to manage temperature and humidity during warmer periods.
Is this answer helpful?
Yes, the door can be positioned in any front section. This gives some flexibility during assembly and lets you adapt the layout to your garden setup.
Is this answer helpful?
The text refers to clear glass and also notes that polycarbonate sheets may be used instead. The exact glazing method depends on the material and thickness chosen.
Is this answer helpful?
Check that all parts are included, prepare the right tools, and make sure the foundation is level and square. Protective gear is also recommended when handling glass or metal parts.
Is this answer helpful?
Clean it occasionally with a mild detergent, avoid harsh chemicals on aluminum or clips, and regularly clear the door tracks. In winter, watch for snow load and keep vents closed in strong wind.
Is this answer helpful?
Advantages and Disadvantages
Advantages

- Space-saving lean-to design uses a wall for support and fits smaller gardens well.
- Aluminum frame is durable and low-maintenance for outdoor use.
- 4 mm glazing helps create a bright growing space for plants.
- Roof vent and sliding door improve airflow and everyday access.
Disadvantages

- Assembly is detailed and works best with two people.
- A level, square foundation and secure anchoring are required.
- Glass handling adds safety risks and requires protective gear.
- Some tools and fixing materials are not included in the package.
Product Specification
Glazing
Polycarbonate 0.16in (Twin-wall sheets)
Frame
Aluminum
Color
silver
Area
1,395.00 ft2
Special features
Roof window
Door
Sliding door
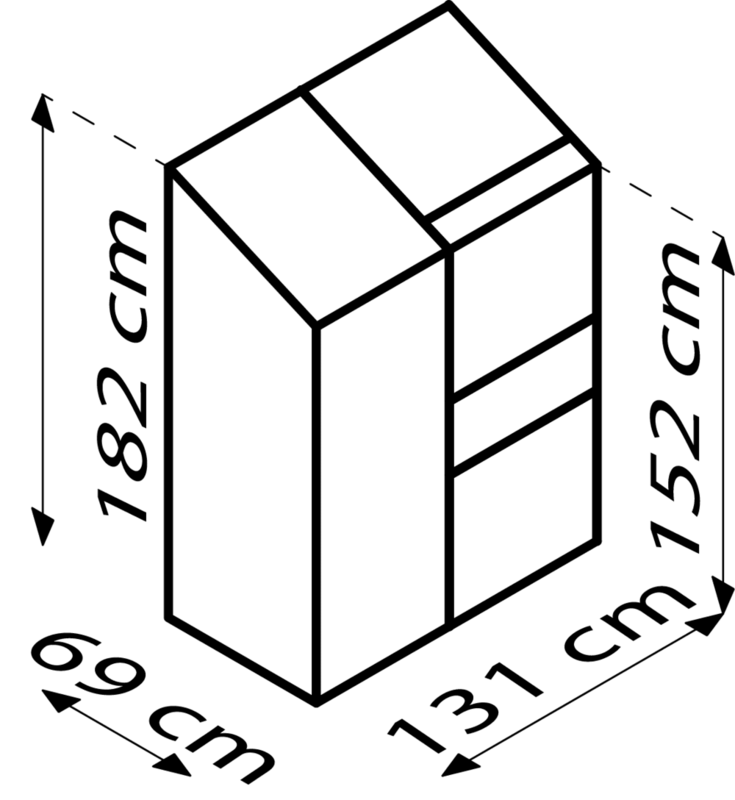
Dimensions (LxWxH)
51.57x27.17x71.65in
Product Description
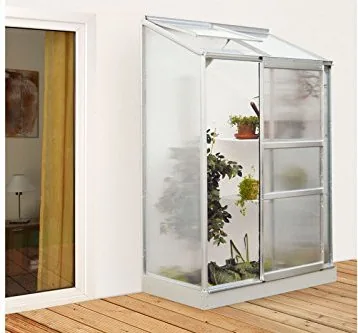
Vitavia Ida 900 HKP 4mm Lean-to Greenhouse Aluminum
The Vitavia Ida 900 HKP 4mm lean-to greenhouse aluminum Manual points to a compact, wall-mounted greenhouse designed for gardeners who want a practical growing space without taking over the whole yard. Its lean-to format makes smart use of an exterior wall, helping the structure stay sheltered while still capturing plenty of sunlight for seedlings, herbs, and seasonal plants.
A space-saving greenhouse for everyday growing
What makes this model appealing is its balance of simplicity and function. The aluminum frame offers a clean, durable build that is meant to stand up well to outdoor conditions, while the 4 mm glazing supports a bright interior for plant growth. The design also includes a sliding door and a roof vent, both of which are important for comfort, airflow, and day-to-day access. For gardeners who value an orderly setup, the structure feels efficient rather than oversized.
This greenhouse is clearly made with stability in mind. The instructions emphasize a square, level foundation and secure anchoring, which is a strong sign that the product is intended for serious use, not just decorative placement. Once installed properly, it can become a dependable spot for raising plants through changing seasons. The wall-mounted concept also helps create a more protected microclimate, especially in exposed gardens where wind can be an issue.
Built with practical gardening in mind
The assembly guidance suggests a careful, step-by-step process, which reflects the product’s sturdy construction. It also shows that the greenhouse is meant to be assembled with attention to detail: checking all parts, using the right tools, and handling glass or polycarbonate safely. That may sound demanding, but it also means the finished result is designed to be solid and long-lasting.
For gardeners who enjoy organized growing, this greenhouse offers a good mix of ventilation, access, and weather protection. The roof vent helps manage heat on sunny days, while the sliding door keeps entry convenient. In short, it is a compact solution for anyone who wants to extend the season and give plants a more controlled environment.
Notes
- Install on a level, square base for the best stability.
- Two people are recommended for assembly.
- Anchor the greenhouse securely, especially in windy areas.
- Keep door tracks and ventilation parts clean for smoother use.
Summary
The Vitavia Ida 900 HKP 4mm lean-to greenhouse aluminum is a space-efficient growing structure with a durable frame, practical ventilation, and a design focused on steady plant care. It suits gardeners who want a compact, wall-adapted greenhouse that feels robust, useful, and ready for regular cultivation.
Search for 67,706 Manuals online


Type-in Brand or Model