Manual.ly Logo

Vitavia Helena 7000 Manual

0.0 · 0 Ratings

PDF manual · 54 Pages

English

M: OA-GPT-54-NAN
page

/ 54

Loading...
f6a4c10c006b291a993acc8faf5cb34cf64c page 6
6
1. PLEASE READ THESE INSTRUCTIONS CAREFULLY AND COMPLETELY BEFORE ASSEMBLING YOUR GREENHOUSE.
2. Sharp edges and corners can cause injury. Always wear protective glasses, gloves, shoes and headgear when handling the aluminium proles, glass
and polycarbonate sheets. Broken glass is a safety hazard – always clear up immediately and dispose of with care.
3. The product you have purchased is intended only for the growing of plants and should only be used for this purpose. When used for other purposes we
will take no responsibility.
4. It is recommended that this greenhouse is assembled by two people.
5. When using a step ladder one person should steady it at all times whilst the other works.
6. Should you encounter difculties constructing this house or in positioning the polycarbonate sheets, please contact your retailer
– do not use force!
7. The green house must always be anchored.
Assembly Instructions
Safety Warning
EN
036.01.1512
SITE SELECTION
Always try to select a sunny location, sheltered
from the wind as much as possible.
IMPORTANT
Before assembling your new greenhouse,
please check that all parts in the provided list
are included. Please take each bundle out of
the packaging in order to identify the parts
better.
It is important that the opened bundles do not
get mixed with one another.
If something is missing please contact your
retailer.
Note - The UV-resistant side of the polycar-
bonate sheets is indicated by a plastic lm
or printing at the edge. This side must face
outside.
In order to seal the greenhouse effectively it is
suggested that you apply neutral silicone as
shown in diagrams (4b.4), (4b.5), (7a.7) and
(7a.9). Silicone is provided for this purpose.
NECESSARY TOOLS
Screw drivers (Normal and Crosshead PH2)
Rubber Hammer
2 x 1.8m ladder
10 mm socket spanner or wrench
10 mm combination spanner
Craft knife
Measuring stick
Spirit level
Accu-drill with adjustable torque
MAINTENANCE
The greenhouse should be thoroughly washed
with a gentle detergent occasionally. Please
check that the detergent used does not react
aggressively with aluminium or plastic.
Ensure that the door tracks are cleaned regu-
larly to avoid a build up of debris.
0. FOUNDATION
Important! The foundation must be exactly
right angular and level. To achieve this you will
require a spirit level and a right angle.
Note - If the distance between the two opposi-
te corners is the same then the foundation is
right angular.
For the erection of this greenhouse we
suggest a solid foundation constructed from
concrete, brickwork or stonework.
If you have no experience with the construc-
tion of such a foundation please consult a
company specialising in this work.
Materials and tools for the preparation of the
suggested foundation are not provided.
The suggested foundation allows the door to
be assembled on any side of the greenhouse.
Foundations must extend down below the frost
level.
Diagrams in a single frame show the view
from inside the greenhouse. Those enclo-
sed in a double frame show the view from
outside the greenhouse.
1. FRONT ELEMENTS
Note - If the door is to be assembled in the
front of the house remove one of the middle
bars (7311).
Push silicon seal (7396) into the sill bar (7304
- 7307) and cut to t both ends (1.1) (1.2).
Lay all of the parts, according to the model, on
the oor and loosely connect by inserting bolts
(7052) into the bolt channels.
Take care that the eave angles (7314 - 7317)
are pushed into the corner of both corner bars
(7310) (1.3) (1.4) and that corner bars (7310)
and middle bars (7311) sit correctly on the
assembly edge on the eave angle (1.9) (1.12).
Assemble diagonal bars (7312) on both sides
(1.3) (1.4) (1.10) (1.11). At the sill loosely
attach temporary bolt (7050). (7050) will be
removed during glazing (section 7b).
2. PLAIN GABLE END
Note - If the door is to be assembled on this
side of the house remove middle bar (7311).
Push silicon seal (7396) into sill bar (7301)
and wall bar (7344) and cut to t the ends
(2.1) - (2.4).
Lay all of the parts on the oor and loosely
connect by inserting bolts (7052) into the bolt
channels.
Assemble end bar (7321) into the recess in
wall bar (7344) (2.5) (2.6) and then (7344)
onto sill bar (7301) (2.7) (2.8).
Assemble middle bars (7311) (2.9) (2.10),
noting the assembly edge on the eave angle
(1.9).
Assemble diagonal bar (7313) (2.5) (2.11)
(2.12). At the sill loosely attach temporary bolt
(7050). (7050) will be removed during glazing
(section 7b).
3. DOOR GABLE END
Note - If the door is to be assembled on ano-
ther side then assemble the (7311), which
was previously removed, in position b.
Assemble all parts as in Section 2.
4a. CONNECTING THE SIDE ELEMENTS
(4a.1) shows the 4a assembly if the door is to
be in the front of the house.
Push silicon seal (7396) into the ridge bar
(7334 - 7337) and cut to t the ends. Check
that ridge seal (7414 - 7417) is correctly
inserted into the guide in the ridge bar. (4a.2)
(4a.3).

Chat with your Vitavia Helena 7000 manual using AI

Get instant AI answers from your Vitavia Helena 7000 manual

Ask anything about the Vitavia Helena 7000. Answers come from this manual, with the pages they are based on.

Helena 7000 Maintenance Schedule

Remind me when maintenance is due
Quarterly
Clean door tracks

Clean door tracks regularly to avoid a build up of debris.

Yearly
Wash greenhouse

Thoroughly wash the greenhouse occasionally with a gentle detergent that does not react aggressively with aluminium or plastic.

Free maintenance reminders

Timed to your purchase date. Always free, unsubscribe anytime.

By submitting you agree to the privacy policy. Unsubscribe with one click in any email.
M: QW-35-FL

Ask a Question

0/1000

Do you recommend Helena 7000?

Yes No

Frequently Asked Questions

A

It is designed for growing plants in a protected greenhouse environment. The structure supports light, airflow, and temperature management for everyday gardening use.

Is this answer helpful?

A

Yes. The layout is flexible, and the door can be positioned on different sides depending on how the foundation and frame are planned.

Is this answer helpful?

A

The greenhouse supports several glazing setups, including 4mm glass/ESG options and polycarbonate variants, depending on the chosen model version.

Is this answer helpful?

A

Yes. A level, square, frost-safe foundation is strongly recommended to keep the greenhouse stable, aligned, and securely anchored.

Is this answer helpful?

A

Because condensation is normal in greenhouse conditions, especially with polycarbonate. Good ventilation and sealing choices can help reduce it.

Is this answer helpful?

A

Clean it occasionally with a mild detergent, avoid harsh chemicals on aluminum or plastic parts, and regularly clear the door tracks of debris.

Is this answer helpful?

M: OA-GPT-54-NAN

Advantages and Disadvantages

Advantages

  • Strong aluminum frame with a clean, low-maintenance finish.
  • Flexible layout with configurable door placement and ventilation.
  • Supports multiple glazing types, including 4mm ESG glass options.
  • Detailed assembly guidance helps ensure a secure, precise build.
VS

Disadvantages

  • Assembly is complex and time-consuming for first-time builders.
  • A proper square foundation is required before installation.
  • Two people are recommended, so solo assembly is not ideal.
  • Condensation can still occur and needs ongoing ventilation management.
M: OA-GPT-54-NAN

Product Specification

Glazing

Safety glass 4mm (single layer)

Frame

Aluminum

Color

silver

Area

75.35 sq ft

Special features

1 roof window

Door

Double sliding door

Dimensions (LxWxH)

106.85x104.65x73.78in

Weight

594.15 lb

M: OA-GPT-54-NAN

Product Description

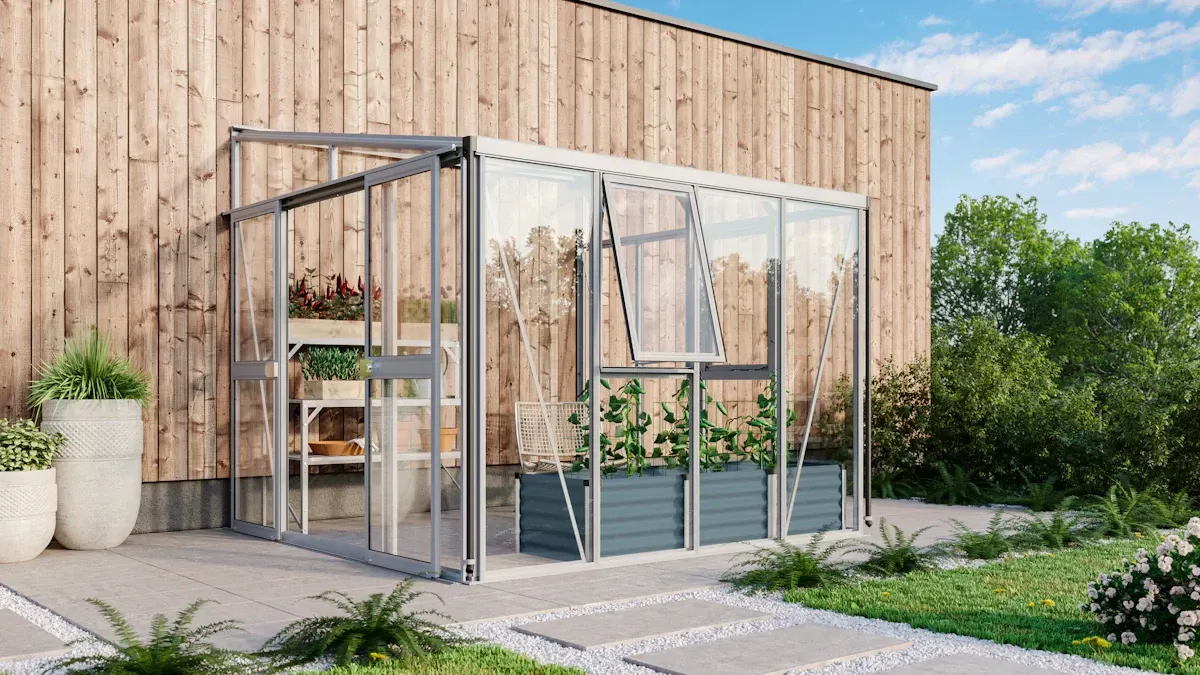
Vitavia Helena 7000 ESG 4mm Greenhouse Aluminum Manual

The Vitavia Helena 7000 is a practical greenhouse design for gardeners who want a strong, adaptable growing space with a clean aluminum finish. Built around a lightweight yet sturdy frame, it is made to support reliable cultivation while keeping the structure simple enough to maintain over time. The Vitavia Helena 7000 ESG 4mm greenhouse aluminum Manual focuses on careful assembly, secure anchoring, and proper glazing, which shows that this model is designed for long-term outdoor use rather than temporary setup.

One of the most appealing qualities of this greenhouse is its flexibility. The frame can be arranged with the door on different sides, and the side windows add valuable ventilation control. That matters for everyday growing, especially when temperatures rise or humidity builds up inside. With roof glazing, side glazing, and seal placement all clearly addressed, the Helena 7000 aims to balance plant protection with airflow and light.

The manual also reflects a product that expects solid preparation. A level, square foundation is not optional here; it is part of the greenhouse’s stability and weather resistance. That foundation requirement may take extra effort, but it also helps the structure stay aligned and anchored. For gardeners, that means better performance in wind, less movement over time, and a more dependable base for doors and panels.

Another highlight is the glazing versatility. The greenhouse can be fitted with different pane thicknesses depending on the chosen version, and the instructions pay special attention to the UV-resistant side of polycarbonate sheets. The included sealing advice, brush seals, and optional silicone finishing all point to a product that values insulation and a tidy fit. At the same time, the notes about condensation are honest and useful: even a well-built greenhouse needs ventilation and regular attention to moisture.

From a practical standpoint, this is a greenhouse for gardeners who like precision. It is not a quick weekend project without planning, but it rewards careful assembly with a neat, functional, and attractive growing environment. The aluminum construction keeps maintenance manageable, while the doors, windows, and roof sections are designed to make daily use more comfortable.

Notes

  • Best installed by two people.
  • A level, frost-safe foundation is strongly recommended.
  • Regularly check nuts, bolts, tracks, and seals after assembly.
  • Close doors and vents during strong wind or snow.
  • Neutral silicone can improve sealing, but it is not fully included for all edge work.
M: OA-GPT-54-NAN

© Copyright 2026 Manual.ly
