
Vitavia Diana 11500 Manual
PDF manual · 32 Pages
English



Quick check
Incorrect answer, please try again.
Chat with your Vitavia Diana 11500 manual using AI
Get instant AI answers from your Vitavia Diana 11500 manual
Ask anything about the Vitavia Diana 11500. Answers come from this manual, with the pages they are based on.
Diana 11500 Maintenance Schedule
Ensure that the upper and lower door tracks are cleaned regularly to avoid a build up of debris.
Wash the greenhouse thoroughly occasionally with a gentle detergent and ensure it does not react aggressively with aluminium or clips.
Approximately 2 weeks after completion, check that all nuts are tightened correctly.
Free maintenance reminders
Timed to your purchase date. Always free, unsubscribe anytime.
Ask a Question
Do you recommend Diana 11500?
Yes NoFrequently Asked Questions
It needs a square, level, and well-anchored base. A galvanized steel base is recommended as an option, and stone or concrete foundations can also be used if they match the specified dimensions and frost depth requirements.
Is this answer helpful?
Yes. The setup is intended for two people. The frame, glazing, and door components are easier and safer to handle with help, especially when aligning the structure and installing the glass.
Is this answer helpful?
Common tools include screwdrivers, a 10 mm wrench or socket spanner, a measuring stick, a spirit level, a knife, and an adjustable torque drill. These tools help with accurate frame assembly and secure fitting.
Is this answer helpful?
Wash it occasionally with a gentle detergent and clean the door tracks regularly so debris does not build up. Use cleaning products that will not damage aluminum parts or the glazing clips.
Is this answer helpful?
Close all doors and vents during strong wind. In heavy snowfall, clear the roof or support it properly to reduce stress on the structure. Winter heating can also help protect the greenhouse.
Is this answer helpful?
It is designed specifically for growing plants. Using it for other purposes is not recommended, and responsibility for non-gardening use is not accepted by the manufacturer.
Is this answer helpful?
Advantages and Disadvantages
Advantages

- Spacious layout suits serious home growing and easy movement inside.
- Aluminum frame offers a lightweight, durable, low-rust structure.
- 3 mm ESG glazing supports bright light and a safer glass option.
- Roof vent and sliding door design improve airflow and daily access.
Disadvantages

- Assembly is detailed and requires careful step-by-step alignment.
- A level foundation is essential, so site preparation takes extra effort.
- Glazing and sharp edges mean safety gear is necessary during setup.
- Regular cleaning and weather checks are needed to keep it performing well.
Product Specification
Glazing
Safety glass 0.12 in (single layer)
Frame
Aluminum
Color
silver
Area
123.78 sq ft
Special features
Roof window, Gutter, lockable
Door
Double sliding door
Dimensions (LxWxH)
175.20x103.94x100.39in
Weight
666.90 lb
Product Description
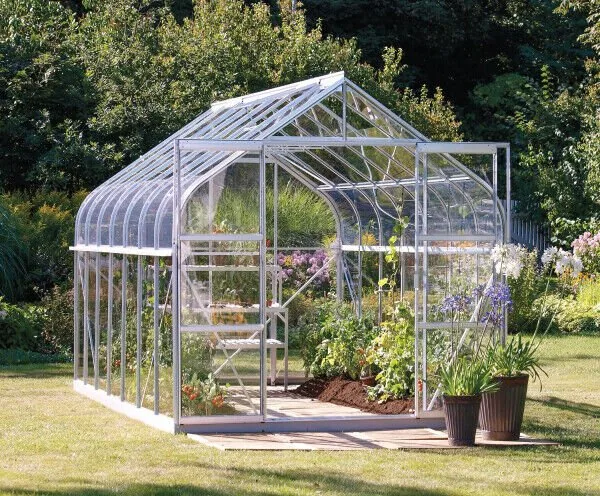
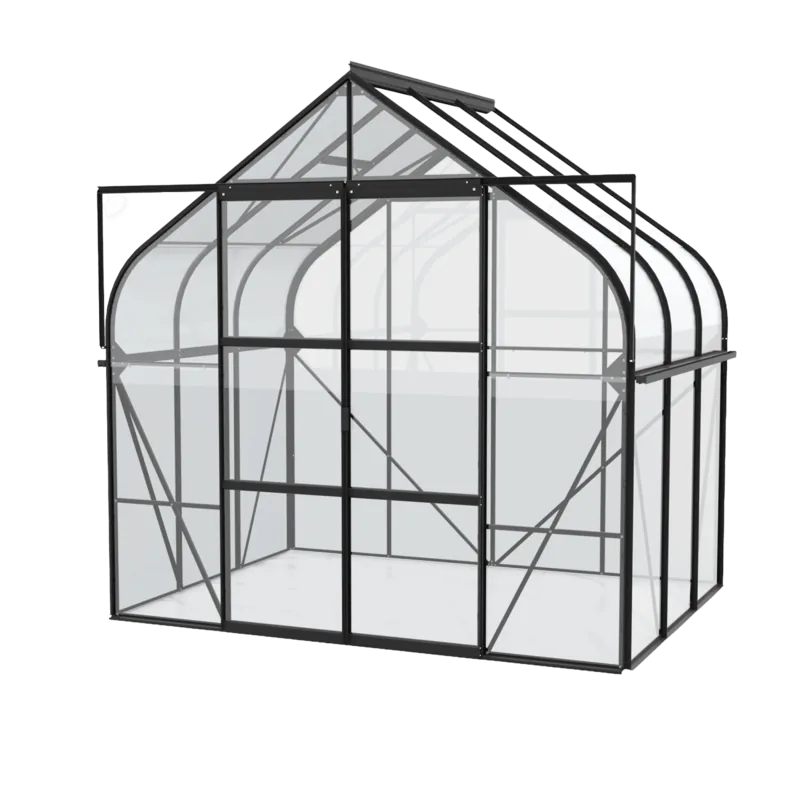
Vitavia Diana 11500 ESG 3mm Aluminum Greenhouse
The Vitavia Diana 11500 ESG 3mm aluminum greenhouse Manual points to a greenhouse built for gardeners who want generous growing space, dependable structure, and a clean modern look. With its aluminum frame and 3 mm ESG safety glazing, this model balances light transmission with a solid feel that suits both everyday planting and more ambitious seasonal projects.
What makes the Diana 11500 stand out is its scale. It offers enough room for trays, raised staging, taller plants, and comfortable movement inside, so working in the greenhouse feels practical rather than cramped. The aluminum construction helps keep the frame lightweight and resistant to corrosion, while the glazing system is designed to bring in plenty of daylight for healthy plant growth.
The design also reflects real gardening needs. Sliding doors make access smooth, roof vents support airflow, and the structure is intended to be anchored to a firm, level base for long-term stability. That matters in changing weather, especially when wind or snow can put extra stress on a greenhouse. The instructions emphasize careful alignment, proper tightening, and a square foundation, which all contribute to a safer and longer-lasting setup.
From a usability perspective, this greenhouse is made for people who value order and maintenance-friendly details. Regular cleaning, clear door tracks, and occasional checks on fittings help keep the structure performing well. The glazing and frame combination is aimed at gardeners who want a bright growing environment without giving up durability or ease of care.
In practice, the Vitavia Diana 11500 ESG 3mm aluminum greenhouse works best as a dedicated plant space for seedlings, herbs, vegetables, and ornamentals. It is the kind of greenhouse that rewards careful assembly and ongoing attention, then gives back with a stable, light-filled environment through many growing seasons.
Notes
- Best installed on a square, level, and anchored foundation.
- Two-person assembly is strongly recommended.
- Keep doors, vents, and roof areas clear during strong wind or heavy snow.
- Clean tracks and glazing regularly to preserve smooth operation and clarity.
Search for 67,706 Manuals online


Type-in Brand or Model