
Manual.ly Logo

Vitavia Comet 6200 Manual

0.0 · 0 Ratings

PDF manual · 44 Pages

English

M: QW-35-FL
page

/ 44

Loading...
0d08e68ad3827f59b39fb63c4ba01d87535f page 6
6
SICHERHEITSVORKEHRUNGEN
SITE SELECTION
Always try to select a sunny location, sheltered
from the wind as much as possible.
IMPORTANT
Before assembling your new greenhouse,
please check that all parts in the provided list
are included. Please take each bundle out of
the packaging in order to identify the parts
better.
It is important that the opened bundles do not
get mixed with one another.
If something is missing please contact your
retailer.
Nuts (1002) - Max. tightening torque 3Nm.
NECESSARY TOOLS
Screw drivers (Normal, Crosshead PH2, T25),
10 mm socket spanner or wrench, 10 mm
combination spanner, knife, measuring stick,
spirit level, Accu-drill with adjustable torque.
MAINTENANCE
The greenhouse should be thoroughly washed
with a gentle detergent occasionally. Please
check that the detergent used does not react
aggressively with aluminium or the glass xing
clips.
Ensure that the upper and lower door tracks
are cleaned regularly to avoid a build-up of
debris.
0. BASE
Important! The base must be exactly square
and level. A zinc-coated steel base is available
as an accessory for all greenhouse models.
(Attention! Only when the greenhouse has to
be located in a very windy and unprotected
location: Drill through both the prole at the
base of the greenhouse and the steel base,
and connect them with nuts and bolts.)
If you would rather construct your own stone
or concrete foundation, please follow the
dimensions specied in diagram 0. Treated
wooden beams at least 18 mm high and not
more than 32 mm wide should be positioned
between the stone/concrete foundation and
the aluminium frame, and connected to the
foundation with 50 mm long bolts (not pro-
vided).
Foundations must extend down below the frost
level.
Diagrams in a single frame show the view
from inside the greenhouse. Those enclo-
sed in a double frame show the view from
outside the greenhouse.
1. SIDE ELEMENTS
Slide eave connector (1160) into the joining
ends of eave bars (1134), (1135), (1156) or
(1157) and connect using nuts (3326) and
bolts (3324) (1.5).
Lay all of the parts on the oor and connect
them loosely.
For Model 7500 only: The corner braces
(2056) must also be connected to each bar
(1390) at this point (1.7).
2. PLAIN GABLE END
Lay all of the parts on the oor and connect
them loosely.
Please include an extra connect ing bolt in
each vertical bar (1391) and (1392) to connect
brace (1335) (2.2).
3. DOOR GABLE END
Lay all of the parts on the oor and connect
them loosely.
The door runner bar (1347) will be connected
to the horizontal bar (1348). Connect these
loosely from the outside with two nuts and
bolts.
Depending on which direction the door should
open, align the door runner bar (1347) to the
left or to the right.
4. CONNECTING THE SEPARATE
ELEMENTS
Bolt the side elements to the end elements
(4.1) & (4.2).
Connect the side braces (1333) between the
eave and sill bars (4.1) & (4.3).
Assemble ridge sections (1126), (1127) or
(1137) together using connecter (1149) and 4
nuts and bolts (4.4).
Slide the parts (2227) (4.5) or (2228) (4.6)
over the join between the ridge bars.
Assemble the ridge bar to both gable ends.
(4.7).
Connect middle bar (1138) between eave and
ridge taking care that the long hole in (1138) is
at the ridge (4.8). 2 extra bolts should be in-
serted into each glazing bar (1138) at this time
to connect braces (1056) (4.10) and (2056)
(4.9).
Now connect the roof glazing bars (1395)
between the eaves (4.11) and the ridge bar
(4.12). An extra bolt should be inserted into
each glazing bar (1395) at this time to connect
roof braces (1356). Additionally, insert in 2 of
the roof glazing bars (1395) an extra bolt,
where the roof vent(s) will be positioned later.
The roof braces (1356) can now be connected
(4.12).
For Model 7500 only: Please add an extra
bolt to all roof bars (1395), at the eave end for
the already connected corner braces (2056)
(4.11).
Now position your greenhouse on the pre-
pared base/foundation and connect loosely.
Assembly Instructions
Safety Warning
EN
1. PLEASE READ THESE INSTRUCTIONS CAREFULLY AND COMPLETELY BEFORE ASSEMBLING YOUR GREENHOUSE.
2. Sharp edges and corners can cause injury. Always wear protective glasses, gloves, shoes and headgear when handling the aluminium proles, glass and
polycarbonate sheets. Broken glass is a safety hazard – always clear up immediately and dispose of with care.
3. The product you have purchased is intended only for the growing of plants and should only be used for this purpose. When used for other purposes we
will take no responsibility.
4. It is recommended that this greenhouse is assembled by two people.
5. Should you encounter difculties constructing this house, or in tting the glass or polycarbonate sheets, please contact your retailer
– do not use force!
6. The greenhouse must always be anchored.
995.01.1807

Chat with your Vitavia Comet 6200 manual using AI

Get instant AI answers from your Vitavia Comet 6200 manual

Ask anything about the Vitavia Comet 6200. Answers come from this manual, with the pages they are based on.

Comet 6200 Maintenance Schedule

Occasionally
Wash the greenhouse with gentle detergent

Thoroughly wash the greenhouse occasionally using a neutral detergent that does not react aggressively with aluminium or glass fixing clips.

Regularly
Clean door tracks and rails

Ensure that the upper and lower door tracks are cleaned regularly to avoid a build-up of debris.

M: qwen/qwen3.8-flash

Ask a Question

0/1000

Do you recommend Comet 6200?

Yes No

Frequently Asked Questions

A

You will need screwdrivers (flathead, PH2, T25), a 10mm socket wrench, a combination spanner, a knife, a measuring stick, a spirit level, and an adjustable torque drill.

Is this answer helpful?

A

No, it must be placed on a solid foundation like concrete, stone, or a galvanized steel base. Sand or loose soil cannot support the anchoring requirements safely.

Is this answer helpful?

A

Use a gentle detergent and water. Avoid abrasive cleaners or solvents that might scratch the surface or damage the UV protection layer.

Is this answer helpful?

A

Yes, the roof vent opens automatically based on temperature changes, helping to regulate the internal climate without manual intervention.

Is this answer helpful?

A

The Vitavia Comet 6200 HKP is designed to withstand wind speeds up to 75 km/h, provided it is correctly anchored to a stable foundation.

Is this answer helpful?

A

Yes, specific attachment points require drilling 2mm holes through the panel and profile to secure them properly with screws.

Is this answer helpful?

M: QW-35-FL

Advantages and Disadvantages

Advantages

  • High-quality aluminum frame resists rust and lasts for decades
  • Polycarbonate glazing offers better insulation than glass
  • Automatic roof vent regulates temperature effectively
  • Spacious interior ideal for various plant types
  • Wind resistance rated up to 75 km/h
VS

Disadvantages

  • Requires a perfectly level and square foundation
  • Drilling holes needed for some panel attachments
  • Silicone sealant not included in the package
  • Heavy parts may require two people to lift
  • Initial assembly takes several hours to complete
M: QW-35-FL

Product Specification

Glazing

Polycarbonate 4mm (hollow chamber sheets)

Frame

Aluminum

Color

silver

Area

67 sq ft

Features

Roof window, gutter, lockable

Door

Sliding door

Dimensions (WxDxH)

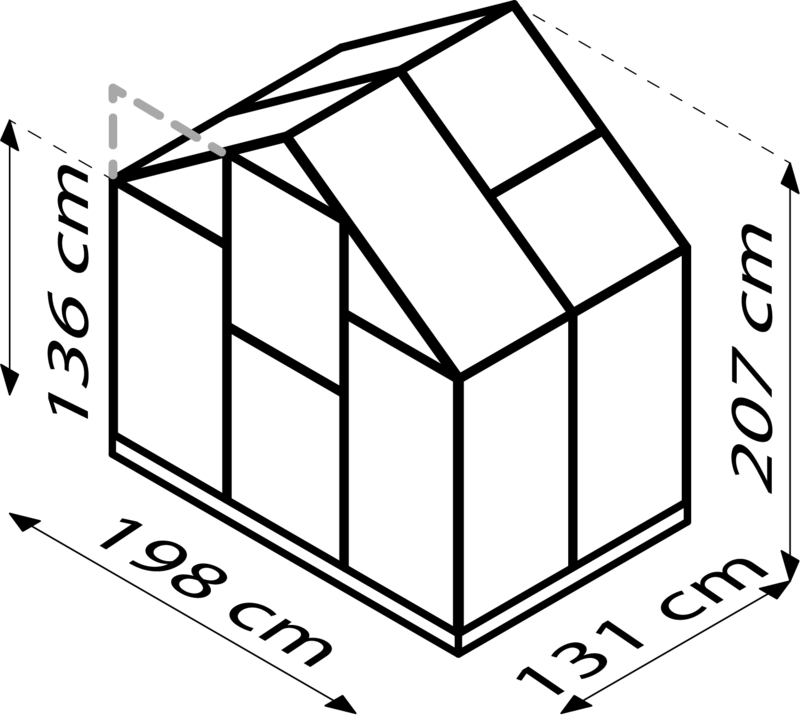
10.53x6.40x6.46ft

M: QW-35-FL

Product Description

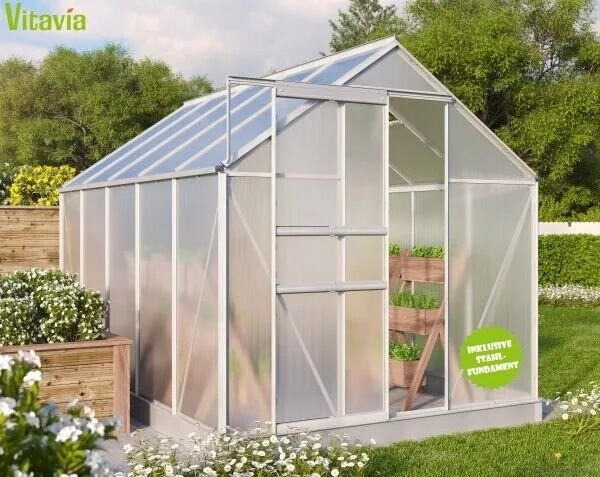
Vitavia Comet 6200 HKP Greenhouse: A Gardener's Dream

The Vitavia Comet 6200 HKP is a robust and spacious greenhouse designed for serious gardeners who demand quality and durability. Constructed with a high-grade aluminum frame, this structure offers exceptional strength while remaining lightweight and resistant to corrosion. The defining feature of this model is its polycarbonate glazing, which provides superior insulation compared to traditional glass. This material ensures that your plants stay warm during cold nights and protected from harsh UV rays, creating an optimal microclimate for year-round growing.

Assembly of the Vitavia Comet 6200 HKP is a straightforward process when following the detailed manual provided. The kit includes all necessary components, from the sturdy base profiles to the sliding door mechanism and roof vents. The design prioritizes ease of use, allowing two people to construct the frame efficiently on a prepared foundation. Whether you choose a concrete base or a galvanized steel accessory, the greenhouse sits securely, ensuring stability against wind loads up to 75 km/h.

One of the standout aspects of this greenhouse is its ventilation system. The integrated roof vent allows for automatic temperature regulation, preventing overheating during sunny days. Combined with the large sliding door, air circulation is optimized, reducing the risk of fungal diseases and promoting healthy plant growth. The polycarbonate sheets are pre-cut to allow for thermal expansion, ensuring a long-lasting fit without cracking under pressure.

Maintenance is minimal yet crucial for longevity. Regular cleaning with mild soap and water keeps the panels transparent and the aluminum frames looking pristine. It is important to avoid harsh chemicals that could damage the UV-resistant coating on the polycarbonate. With proper care, the Vitavia Comet 6200 HKP serves as a reliable sanctuary for your garden, protecting your crops from adverse weather while maximizing sunlight exposure.

Key Notes for Owners

  • Always anchor the greenhouse to the ground for safety.
  • Remove protective films only after installing the panels.
  • Clean door tracks regularly to ensure smooth operation.
  • Clear snow from the roof promptly during winter months.
M: QW-35-FL

© Copyright 2026 Manual.ly
